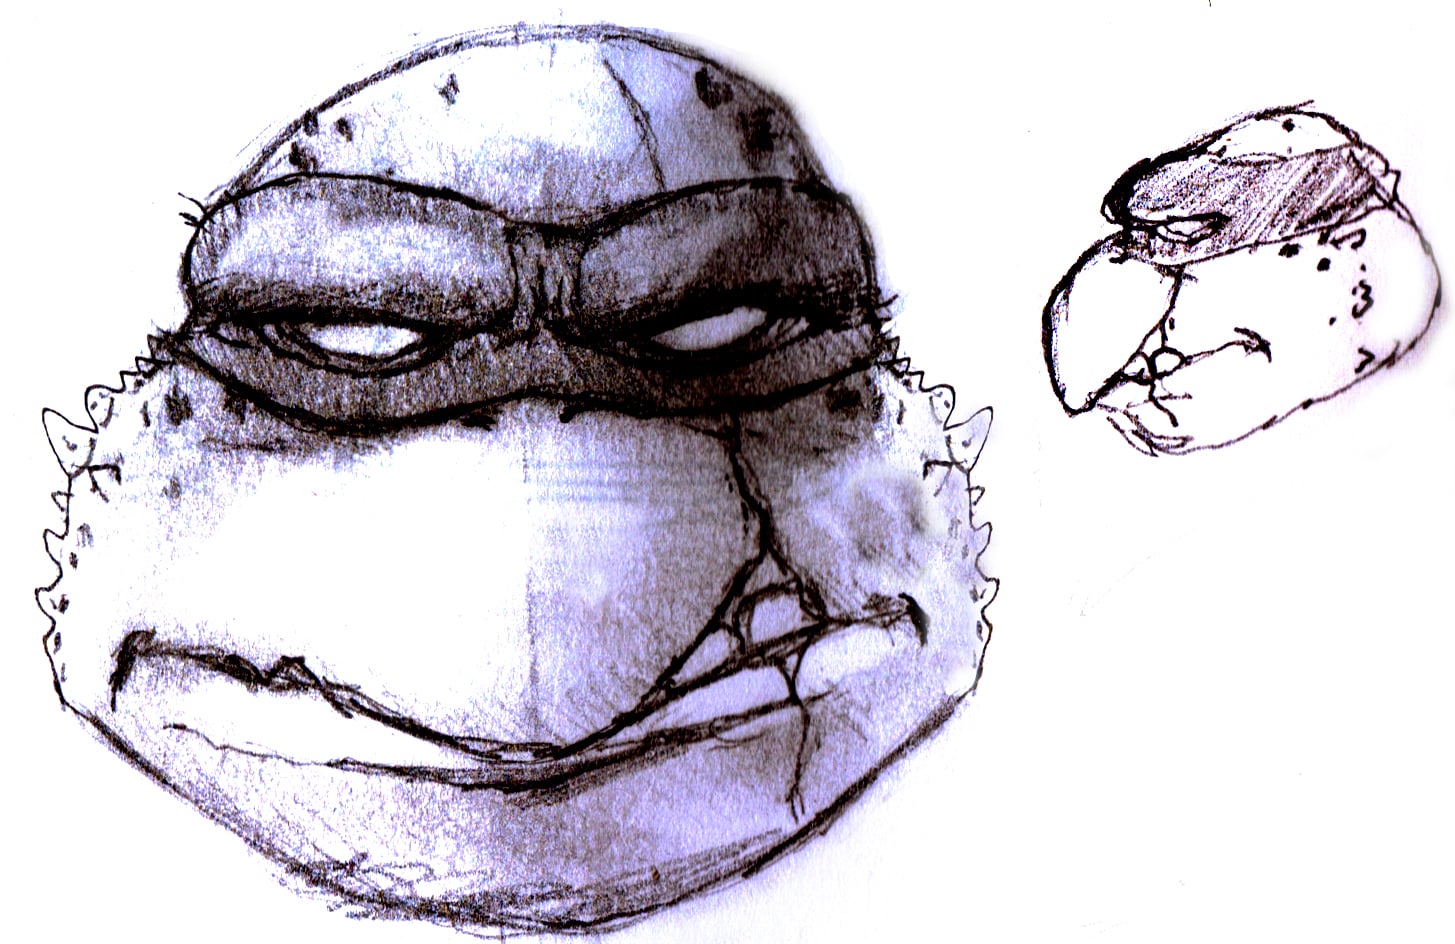
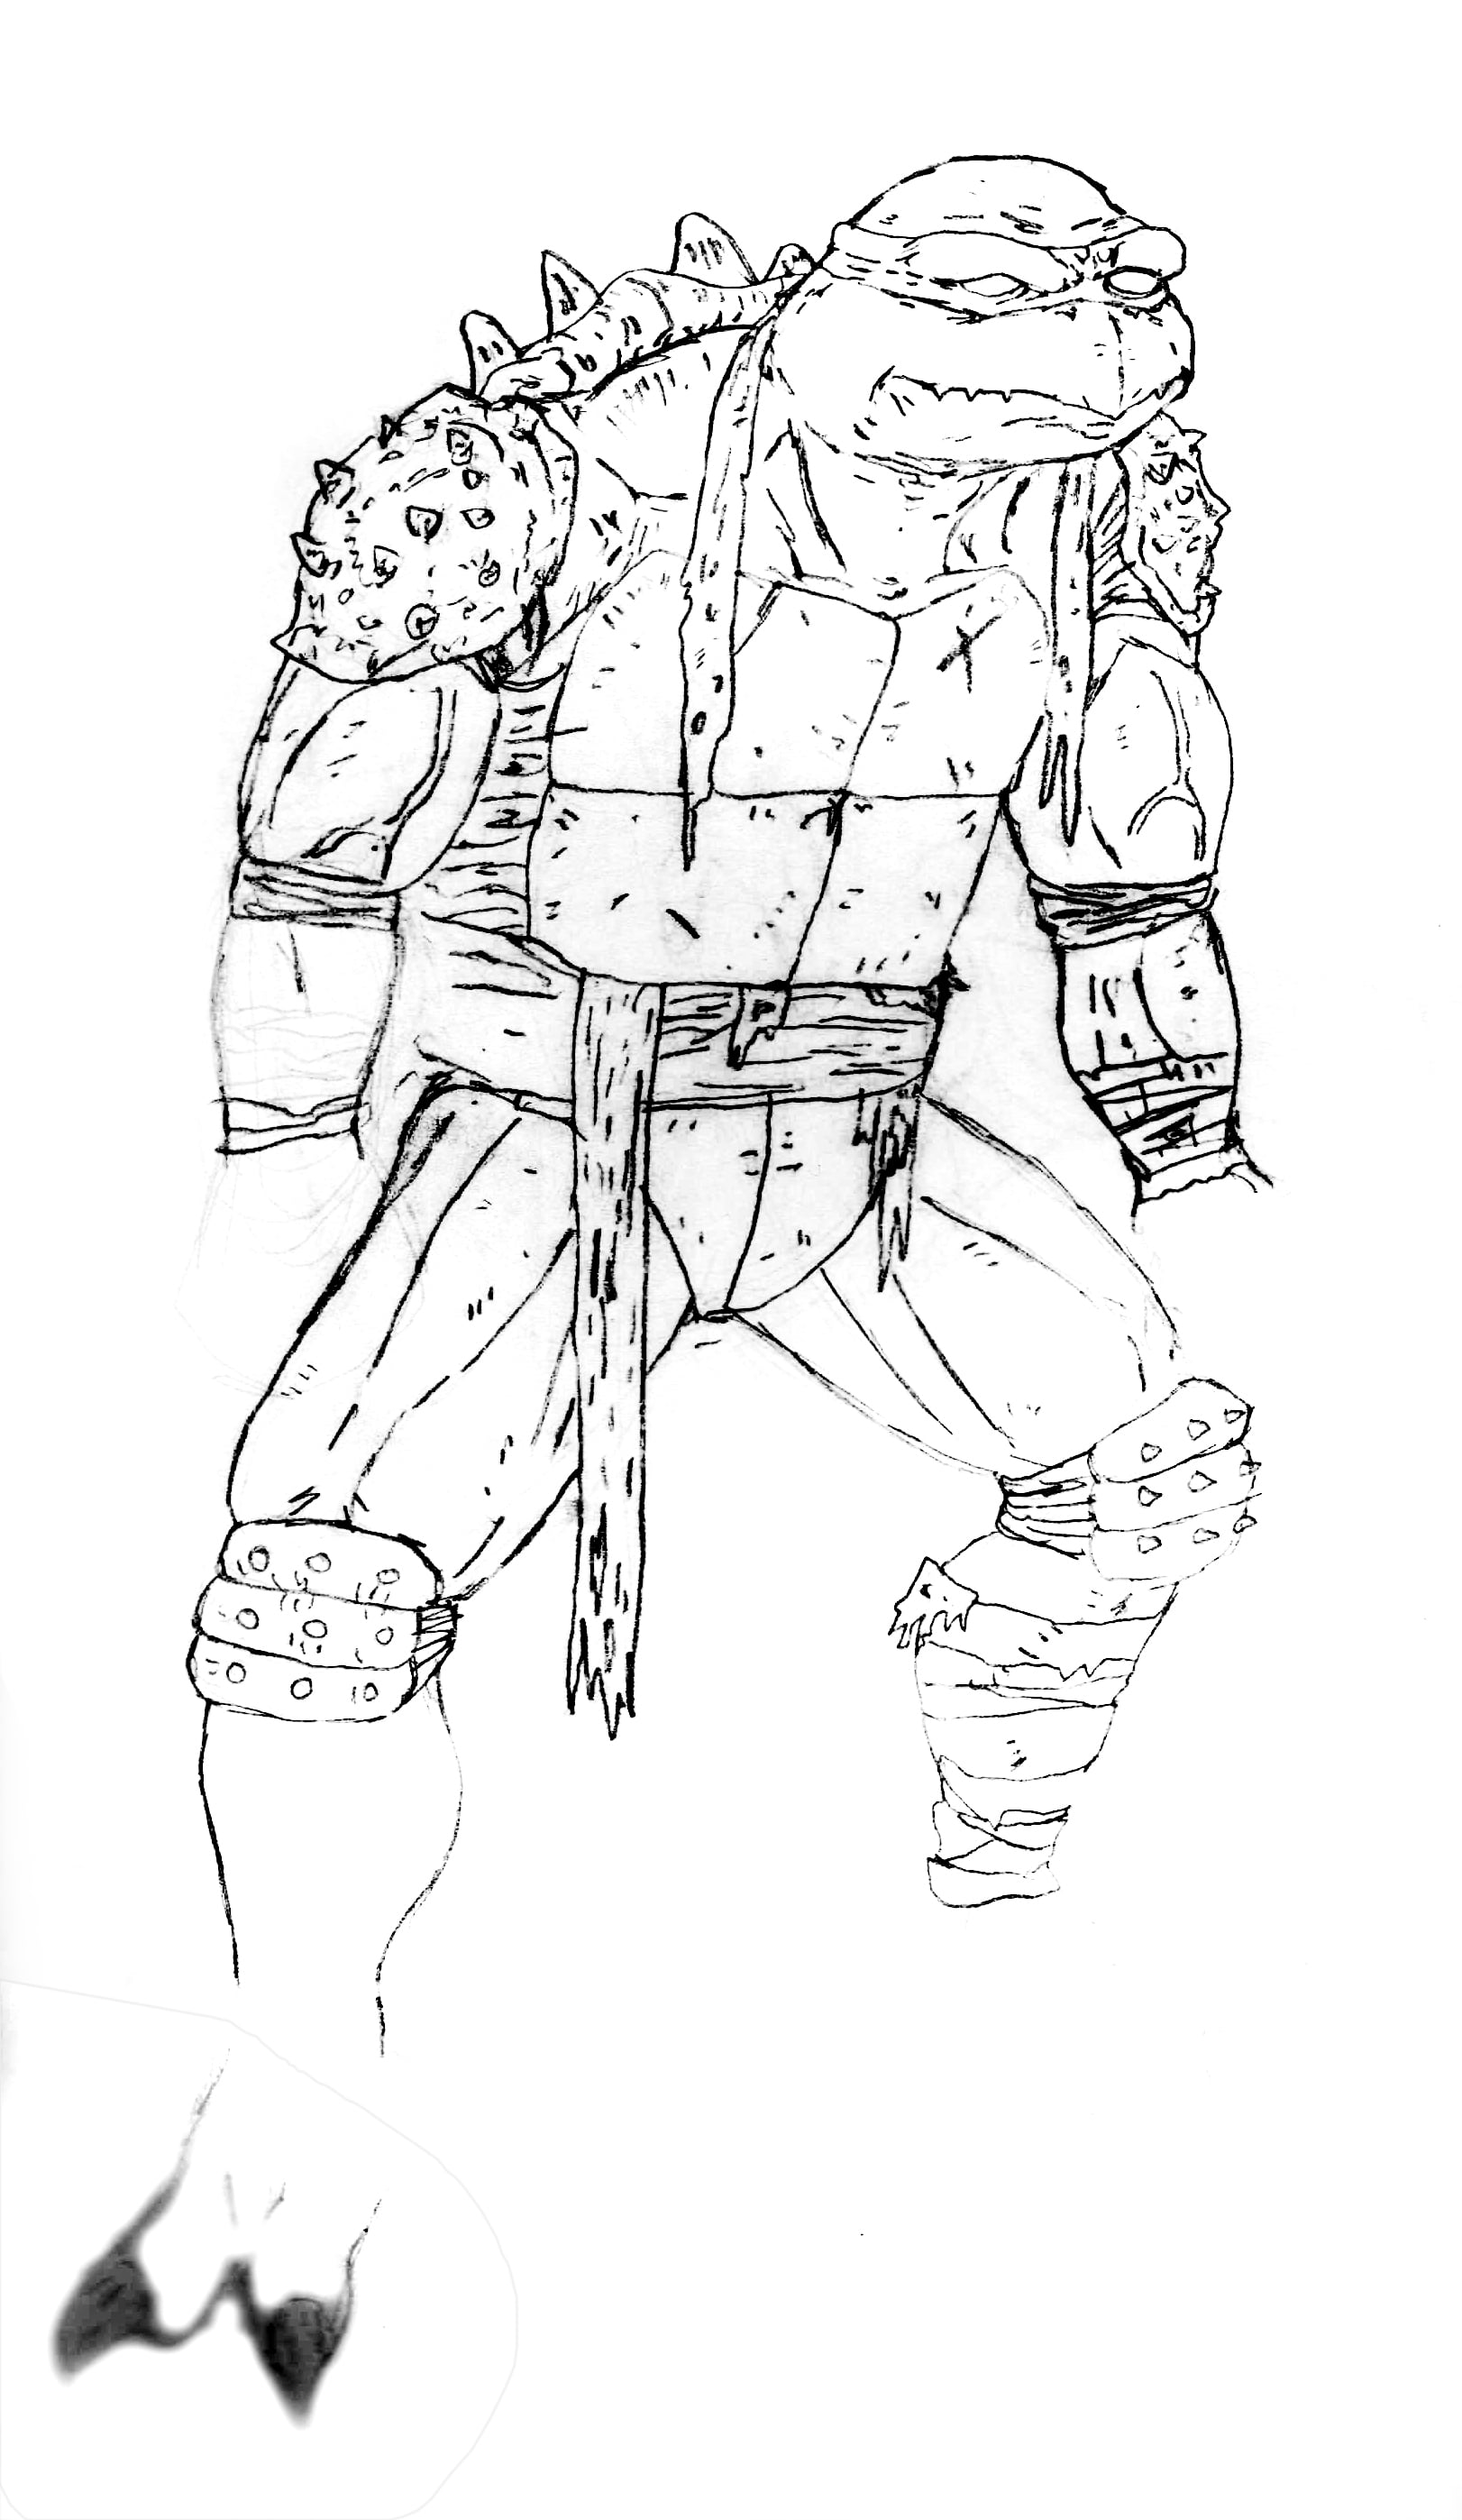
Teenage Mutant Ninja Turtles SLASH
Jared Lee
✭✭✭

Hello, everyone. It has been a while. As I have gotten older I have narrowed my convention attendance down to one show. Retropalooza.
I read a message that Retropalooza is having it's last show. That the Houston Retropalooza will be the only one remaining.
After getting the news I decided that I need to make a costume worth a final appearance.
I'm going to try and make a Teenage Mutant Ninja Turtles Slash costume.
A Teenage Mutant Ninja Turtle Costume is my dream costume. Since I saw the Jim Henson suits in the 1990 movie I have dreamed of owning one.
I'm too big to be a normal teenage mutant ninja turtle. At 6 foot 2 inches tall that would be a huge turtle.
So I am going to be the corrupted 5th turtle Slash.
This has been my plan for over a decade. When I made my first creature suit Lizardman it was a test run to make a Slash costume. Visually it was a success. The paint job was fantastic, the moving eyes worked. I won 3 prizes and had a lot of fun in it.
The biggest issue with it was the heat. Even with a cooling vest it was murder to wear. The latex did not allow the costume to breath. I had sweat running out of the legs of the costume. I was clammy and cold after my 4 hours in the costume. I did not add latex to the paint so it peeled off the costume. The costume was not stored well. The latex rotted and varmints got into the container so I had to throw it away.
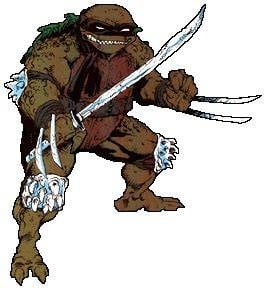
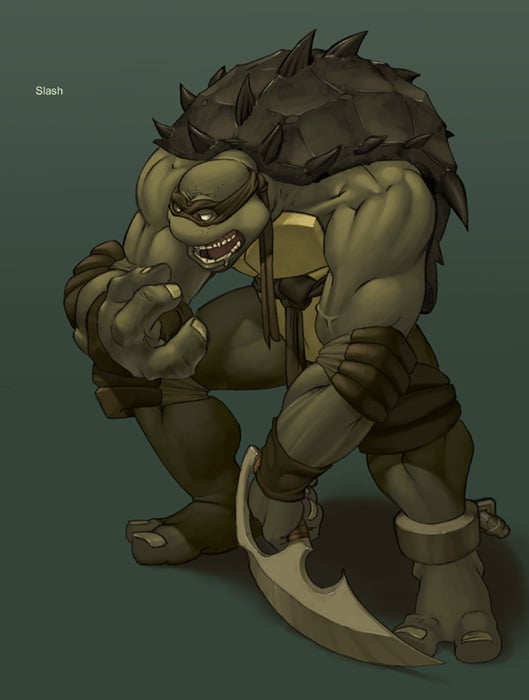
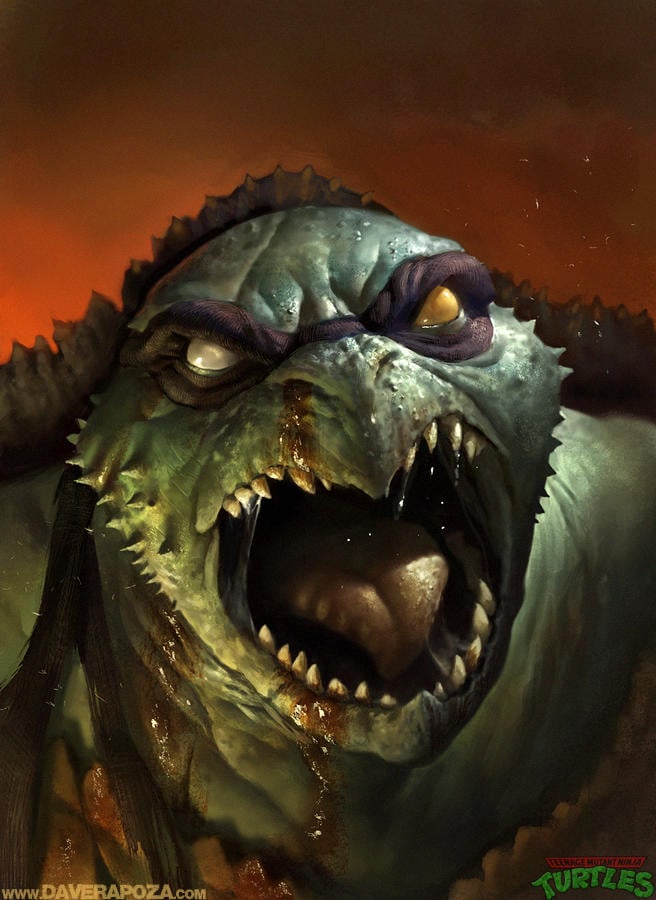
I've wanted make the design ferocious like Dave Rapoza's art. I liked the idea of Slash having a big slash on his face similar to a clef lip.
A feature I have been wanting to add to my costumes since finding out about it is a jaw operated lip curl. Like the one Star Wars Chewbacca has. So the design will need lips.
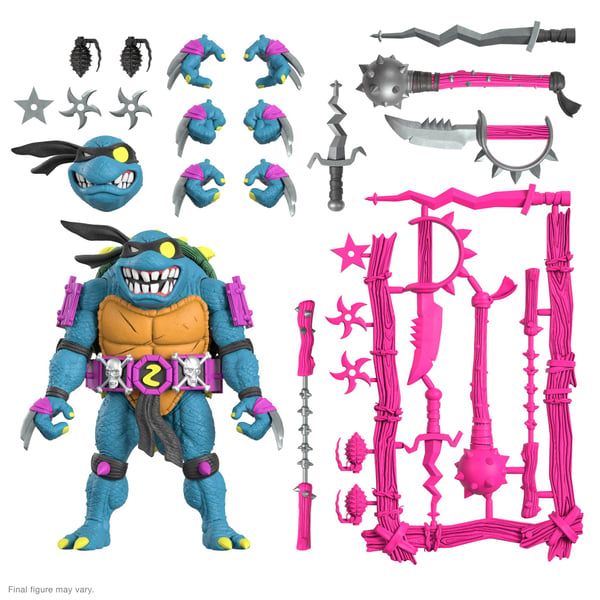
I'm thinking about leaning more into the Playmates toy design. The convention is Retropalooza and it is very retro. Also it is a bit silly, and when I get into cosplay I can't commit to the mean characters. I tend to be really light hearted goofy. The Playmates toy design is a good mix of those features.
The convention's cosplay contest on May 23. That gives me under 20 days to make this. Two things will happen. I will get it done in time, or I will have to save it for Halloween. Or plan on taking the costume to Houston (I don't want to ). Wish me luck!
2
Comments
-
Here is what I have on Day 01.


I am making the under mask for the silicon mask to cover. The base is a Halloween skull mask with a mouth operated jaw. When you open your mouth the skull opens it's mouth. I want the lip curl when the mouth is opened. So I drilled some holes into the mask for the string to come out of. I plan to attach the string to a wire. It will be sewn, or glued to the inner lip.
The eyes are novelty blinking glasses I got from Amazon. When you pull the string the eyes blink. I ran the string through a tube to reduce friction.
I found out there were green eyes options so I got some of those. Everything is screwed in, so I can take it apart and replace the eyelids with the green eye lids.
One of the first things I have to do is take care of these eyes. The eyes have a hole to see through, but I am going to look out of the mask from under the eyes.
I am going to add a clear iris and pupil with UV resin. This is using the resin T-Rex eye lesson. I will use some clay as a push mold. I will push the eye into clay. Then I will round out the hole. Next I will put the eye back into the clay indentation. Pour clear resin into the eye, and cure it with a UV light. Then I will paint pupil and iris onto the back of the resin.
Next I will add veins to the sclera /whites of the eye. Slash has distinctive eyes. The left is white, and the right is yellow. I'm going for a more cinematic look. So the left I will be a dark brown, and the right will be a clouded blind yellow eye.
I will use some Magic sculpt to sculpt bigger teeth into the mouth. If I can't get the mechanisms to work, I may just give up. I like my costumes to have a gimmick.2 -
After looking at some Jim Henson design notes. I think I am going to have to extend the teeth section of the skull out to make the mouth bigger. I can do this by attaching EVA foam but I won't do it unless I have to. I would prefer to keep the head smaller to make the body look bigger.


No avoiding it. If I want a costume comparable to Jim Henson's designs. I have to follow what his studio did.
2 -
I did some more research. If I don't raise the point where the mouth opens it will look similar to the Michelangelo costume from the Casey Jones movie.


I'll use some EVA foam on the skull and shape it out into the shape I need.
2 -
Awesome project, excited to see your progress! Thanks for sharing it with us!
/Chris2 -
Totally stoked to see you have another build in the works. Liking the research. I feel this head portion is likely the only new ground you need the research for as your previous creature work for bodies was spot on. Any chance you do the body at the same time as the head to meet the deadline? My recent builds got jammed up on shipping time because our local option was Joanns and they closed. Do you have any materials that are going to require shipping?0
-
Those are good questions. I have to have this complete by the 23rd. I have to be there in time for prejudging. It's probably going to take 30 minutes to put this costume on. So I can't do a lot of last minute fixes.Darrell Green said:Totally stoked to see you have another build in the works. Liking the research. I feel this head portion is likely the only new ground you need the research for as your previous creature work for bodies was spot on. Any chance you do the body at the same time as the head to meet the deadline? My recent builds got jammed up on shipping time because our local option was Joanns and they closed. Do you have any materials that are going to require shipping?
I could start the legs now. I tend to leave the body for last so I can get the proportions correct. Looking at how far the eyes stick out, the head is going to be bigger than I expected. I have to make the shoulders are wide enough to off set size of the head. I have the lycra bodysuit and foam. I could start on the legs while I sculpt the head. I've never made a turtle shell before. There should be some templates online, but my foam crafting has always been something I do by eye.
The transport shouldn't be too difficult. The reason I attend this convention is that it's only an hour drive from my home. Everything should be fine in the back of the SUV. I just have to get the sets down.
Getting dressed in the costume is another story. For the Leather costume, I wore light shorts and got dressed in the trunk of the SUV. This is skin tight, so I will need privacy. With my lizardman, I got dressed in my hotel room. I may have to put this on in the back of the SUV, or the bathroom stall. Since it will be covered in rubber, my skin will not be able to breathe. I plan to keep the back of the costume bare so I can get some kind of ventilation, but the shell may prohibit that. So I can't wear the costume too long. If I start shaking and stop sweating, then I have to worry.0 -
I used some thermal plastic to cover the open areas, and support the eyes.
I scratched wrinkles into the eyelids and scuffed up the surface of the plastic with steel wool so paint will stick. I carved some lines into the iris, and filled in the pupil hole with thermal plastic. There is a divot in the pupil for holding resin. I plan on painting the pupil black on the left eye, and grey on the right. After I paint them I will fill the up with UV resin.
I was going to work on extending the Jaw with some teeth, but decided to sculpt it first. I can't change the position of the eyes, but I can put the teeth where ever I want after I sculpt it. This will give me some freedom with how I the head sculpt looks.
I don't want clay getting into the mechanics so I covered everything in aluminum foil. Next I wrapped in wire. This keeps the foil on and gives the Klean Klay something to hold onto.


If I can get this head sculpted and cast by Monday, that will give me enough time to work on the body and shell.
My brother is my wrangler. He has final say if I wear the costume. If he thinks the costume looks horrible I will take the L and not wear it.1 -
Once I am done with the foam fabrication I am going to have to seal it. In the T-Rex head video he uses 3M Super 74 Orange spray glue. I looked that up on Amazon and that is super expensive, and banned in California. Are there any alternatives I can use to seal the foam so it doesn't soak up a bunch of rubber?0
-
@Chris Ellerby, above1
-
Called 3m, they are closed until Monday morning. Still looking.1
-
I've got a mannequin, but I'm a big guy. So I am padding it out with shipping bubbles.

I put the body suit on and used a white acrylic marker to mark out where the muscle shapes are.
It's not on the mannequin at the moment, because dressing it is a hassle.
Most people have the entire shell separate from the body, but I often see the shell not fitting properly when that is done. I think I am going to have the carapace/ torso shell be part of the body suit.
I started blocking out the clay on the head. Mostly trying to get it fully covered.


The clay is making the head very front heavy so I am propping it up with some pink foam. I'm trying to work both sides at the same time, but it tough keeping things balanced symetrically.2 -
Excellent! Shaping up quick!1
-
my Internet search says 3m made a cali compliant 74 called 74 CA, so check in the same stores where 74 was previously:
"For California-compliant alternatives to the banned 3M Foam Fast 74, use 3M Foam Fast 74 CA Spray Adhesive (specifically the Low VOC <25% version), 3M Super 77 (Low VOC version), or TensorGrip P307. These offer fast tack for foams and fabrics while meeting strict California CARB/SCAQMD regulations."1 -
Thank you Darrell. I made some more progress. Nothing is set in stone so I am trying a few things. I added a beak, and nostrils to see how they look. I may take them away.
It started to warm up in the garage. It is currently 90 degrees fahrenheit. That caused the face to start breaking off the head so I had to sculpt it face up.

2 -
It's cooler today so I was able to keep the sculpt upright. Here is what I currently have.
I added a big scar to his face, and sculpted the mask. After seeing other people's turtle costumes it turns out that having the mask sculpted on helps add more dimension to the mask. So I can just glue some black fabric onto the cast.
The nostrils , beak, and fangs are gone. It was going to make it look unique, but it just didn't look like a ninja turtle.
At times the sculpt looked like Raphael, or Leonardo, but once the snaggle teeth are added I don't think people will get this fellow confused with one of the brothers.
Keep things symmetrical is difficult. It's supposed to be an organic creature so that should give me some wiggle room.
I am satisfied with this look. Next I have to add the skin texture with the opening of a retractable click pen. After some finishing touches that should be the final step before molding.


2 -
Excellent!1
-
I've spent yesterday and today adding scales to the sculpt with a click pen.

Each mark on this white masking tape represents 100 scales.
I counted 170. So that is 17,000. The scar was made bigger, and I also added some wrinkles.


I need to add some scales on the area proped up by the foam. Adding those scales and molding this will be tough.
2 -
Awesome progress!
/Chris1 -
I have good news and bad news : The good news is I don't have to rush to finish the costume. So I can take my time and make sure it's the best costume possible. The bad news my brother wasn't able to get the days off for the convention. So I don't have a wrangler to help me get into the costume, and make sure I don't run into people.
I will continue to work on the costume in case the situation changes. I just wish I was able to compete in the final Retropalooza cosplay contest.1 -
I was able to look through my upholstery foam supplies and I have a good amount onhand.


I learned about the dragon skin from the garage monsters course. Dragon skin is now defunct. A good alternative is the Stanley Surform for rounding/sanding upholstery foam. 1 -
I showed a few of my supplies in the previous post, but these I are what I am using the most.
The hobby knives with a sharpening stone, and the tiny scissors.
Nothing is glued yet. I've started pinning the foam to the body. I'm starting with the neck. The shoulders are next.
I'm not sure if I should add pectoral muscles or keep that area flat so the carapace shell can keep it's form.
2 -
I was a bit apprehensive about it but I cut and attached the pectorals, neck, clavicle bone, and Adam's apple using the super 77 spray adhesive. I didn't make a template. I just helped the foam up to the dummy and Drew out the shapes.
After that I cut out the general shape with an inward cut. I kind of goofed because I did some carving on the top. What I wanted to do was just angle the cut so that the edges would lay flat on the body. I put triangle of foam under each pec to add more form. Then I placed the pectorals over them.
I like the way the carving of the day clavicle turned out so I left that carved side up. The super 77 worked better than I expected. 

After studying the movie Teenage Mutant Ninja Turtle costumes I don't think they had a very detailed chest. It looked flat besides the neck muscles. Since Slash is bigger I'm going to bulk up the chest, shoulders, arms, and upper back.
I am planning on making the carapace of the shell part of the body. This is different than they did in the movie.
My concern is how the bottom of the carapace attaches to the back shell under the crotch. I've seen a few Ninja turtle movie cosplays that couldn't attach the bottom of the carapace to the back shell, That lead to the crotch sometimes getting exposed. That is something I do not want to show.
So I am going to use upholstery foam for the carapace. I plan to add flaps to the side of the body that attack to the sides of the shell, but the bottom will be free butt out. That should help me sit down.
The back shell will be held on by a backpack harness I will wear under the body. Hopefully the back will allow the costume to breathe under the shell.2 -
Looking good!
/Chris1
Categories
- All Categories
- 97 CURRENT CONTEST
- 97 2025 Halloween Costume Contest
- 1.3K COMMUNITY
- 1K General
- 62 Tutorial Reviews
- 98 Suggestions and FAQ
- 82 Job Listings
- 40 Artists for Hire
- 1.8K CHARACTER CREATION
- 165 Costumes & Cosplay
- 148 Lab work
- 95 Props
- 152 Puppets
- 36 Stop Motion
- 18 VFX
- 39 Student Projects
- 478 Sculpture
- 159 Fabrication
- 160 Animatronics
- 177 Makeup Effects
- 130 Painting
- 29 Traditional/Digital Design
- 8.1K PAST CONTESTS
- 244 Creature Making Contest 2025
- 100 2024 Halloween Costume Contest
- 198 Character Making Contest 2024
- 343 Creature Making Contest 2024
- 131 2023 Halloween Costume Contest
- 168 Monster Making Contest 2023
- 239 Creature Making Contest 2023
- 117 2022 Halloween Costume Contest
- 309 Character Sculpting Contest 2022
- 133 Character Makeup Contest 2022
- 170 2021 Halloween Costume Contest
- 261 Creature Sculpting Contest 2021
- 209 Character Makeup Contest 2021
- 354 Creature Making Contest
- 200 2020 Halloween Costume Contest
- 203 Monster Makeup Contest
- 372 Creature Painting Contest
- 244 Horror Character Contest
- 182 2019 Halloween Costume Contest
- 260 Character Makeup Contest 2019
- 351 Character Sculpting Contest
- 279 2018 Halloween Costume Contest
- 292 Alien Art Contest 2018
- 251 Character Makeup Contest
- 389 Monster Making Contest
- 167 2017 Halloween Costume Contest
- 153 Heroes & Villains Contest
- 221 Cosplay Contest
- 215 Creature Sculpting Contest
- 107 Puppet Contest
- 161 Alien Art Contest
- 98 Halloween Costume Contest
- 149 Robot Art Contest
- 269 Dino Art Contest
- 592 Creature Contest
- 5 ALUMNI
- 275 ON DEMAND WEBCOURSES
- 1 Hand Puppet Detail and Finishing Techniques
- 24 Animation for Animatronics
- 9 How To Make a Mask - Wearable Dynamic Art
- 11 3-Axis Robotic Mechanisms
- 5 Neck Mechanisms
- 24 How To Make a Monster Suit with Bill Bryan & Ted Haines
- 19 Character Animatronics
- 5 How to Sculpt a Dinosaur
- 5 How To Build An Animatronic Head
- 5 Creature Costume Basics
- 4 Puppet Mechanism Basics
- 1 Tattoo Makeup - Cover, Create, & Apply
- 2 How To Make Horror Props
- 1 The Fine Art of Horror Painting
- 1 Fantasy Maquette Sculpting In CX5(S)
- 14 The Business of Making Monsters
- Production Design - The Process Of Creating A World For Film
- 4 Character Makeup - Multi-Piece Prosthetic Application
- 3 Prosthetic Makeup Basics - Gelatin Facial Appliances
- 5 Stop Motion Animation with the Chiodo Bros.
- 11 Blood, Gore and Makeup Effects
- 7 How to Punch Hair - Hairwork for Silicone Characters
- 3 Bodycasting on a Budget with Ted Haines
- 2 Portrait Illustration with Terry Wolfinger
- 5 Mastering Marionettes - Design, Construction & Performance with Scott Land
- 1 Creature Makeup - Multi-piece silicone prosthetic application
- 12 Muscle Suit Fabrication
- 11 Wig & Hair Basics
- 4 Silicone Prosthetic Transfer Appliances
- 3 Building Miniatures: Small-Scale Model Making - Part 5
- 9 Toy Design & Sculpture for Action Figures & Collectibles
- 1 Building Miniatures: Small-Scale Model Making - Part 4
- 2 Human Head Anatomy & Sculpture
- 1 How to Make a Foam Puppet - Part 3
- 1 Building Miniatures: Small-Scale Model Making - Part 3
- 5 How to Make a Foam Puppet - Part 2
- 3 How To Make a Foam Puppet - Part 1
- 1 Building Miniatures: Small-Scale Model Making - Part 2
- 14 Animatronic Control Systems - Arduino Programming Basics with David Covarrubias
- 3 Building Miniatures: Small-Scale Model Making - Part 1
- 3 Advanced Creature Teeth: Prosthetic Dental Appliances - Part 2
- 1 3D Pumpkin Carving - How to Carve a Pumpkin from the Outside In
- 5 How To Make A Latex Rubber Mask Part 3
- 3 Advanced Creature Teeth - Part 1
- 11 How To Make A Latex Rubber Mask Part 2
- 6 How To Make A Latex Rubber Mask Part 1
- 294 PAST LIVE WEBCOURSES
- 11 Monster Sculpting
- 8 Platinum Silicone Mask Painting
- 5 Feather Work: Puppets, Costumes, Hair & Makeup
- 9 How To Make Eyes For Puppets, Masks, & Makeups
- Working with Wigs - Wig & Hair Basics with Connie Grayson Criswell
- 14 Muscle Suit Fabrication with Ted Haines
- 7 Homework - Muscle Suit Fabrication with Ted Haines
- 13 Toy Design & Sculpture for Action Figures & Collectibles with Sandy Collora
- 10 Homework - Toy Design & Sculpture for Action Figures & Collectibles with Sandy Collora
- 13 Human Head Anatomy & Sculpture with Jordu Schell
- 11 Homework - Human Head Anatomy & Sculpture with Jordu Schell
- 18 Mastering Marionettes - Design, Construction & Performance with Scott Land
- 13 Homework - Mastering Marionettes - Design, Construction & Performance with Scott Land
- 16 Puppet Mechanism Basics - Eyes, Brows & Ears with BJ Guyer - Watch & Chat
- 11 Homework - Puppet Mechanism Basics - Eyes, Brows & Ears with BJ Guyer
- 12 Advanced Creature Teeth -- with John Cherevka
- 3 On Camera Hand Puppet Performance
- 9 Silicone Prosthetic Transfer Appliances - Age Makeup with Neill Gorton
- 3 Practical Magic: The Art of In-Camera Visual Effects with Joey Shanks
- 9 Buisness of Making Monsters with Shannon Shea
- 11 Stop Motion Animation with the Chiodo Bros
- 5 Foam Carving Puppets with BJ Guyer
- 3 3D Pumpkin Carving with Andy Bergholtz
- 4 Prosthetic Makeup Basics with Rob Burman
- 13 How to Make a Latex Mask with Tim Martin
- 2 Character Illustration with Terry Wolfinger
- 3 Halloween Costumes - Fabric Effects with Dawn Dininger and Amy Whetsel
- 9 Blood, Makeup & Gore FX with Gary J. Tunnicliffe
- 13 Hand Puppet Design and Fabrication with BJ Guyer
- 3 How to Sculpt a Dinosaur with Christopher Darga
- 2 Airbrush FX: Beginning to Advanced with Craig Fraser
- 1 Female Figure Sculpting in Cx5 wtih Adam Beane
- 3 Creature Design: Maquette Sculpting with Casey Love
- 3 How to Make a Sci Fi Helmet with Fon Davis
- 2 Hyper Realistic Silicone Painting with Tim Gore
- 2 Josh Herman Zbrush Creature Sculpting
- 13 Textures and Forms with Don Lanning Oct 26, 2013
- 9 Character Rendering in Photoshop with Dan LuVisi
- 2 Creature Maquette Painting with Jordu Schell
- 24 Textures and Forms with Don Lanning May 04, 2013
- 3 Tattoo Makeup A-to-Z: Cover, Create, and Apply with Christien Tinsley
- 11 Creature Design w/ Casey Love - Sculpting
- 7 Creature Design With Casey Love - Translucent Creature Painting
- 3 Creature Maquette Sculpting with Jordu Schell