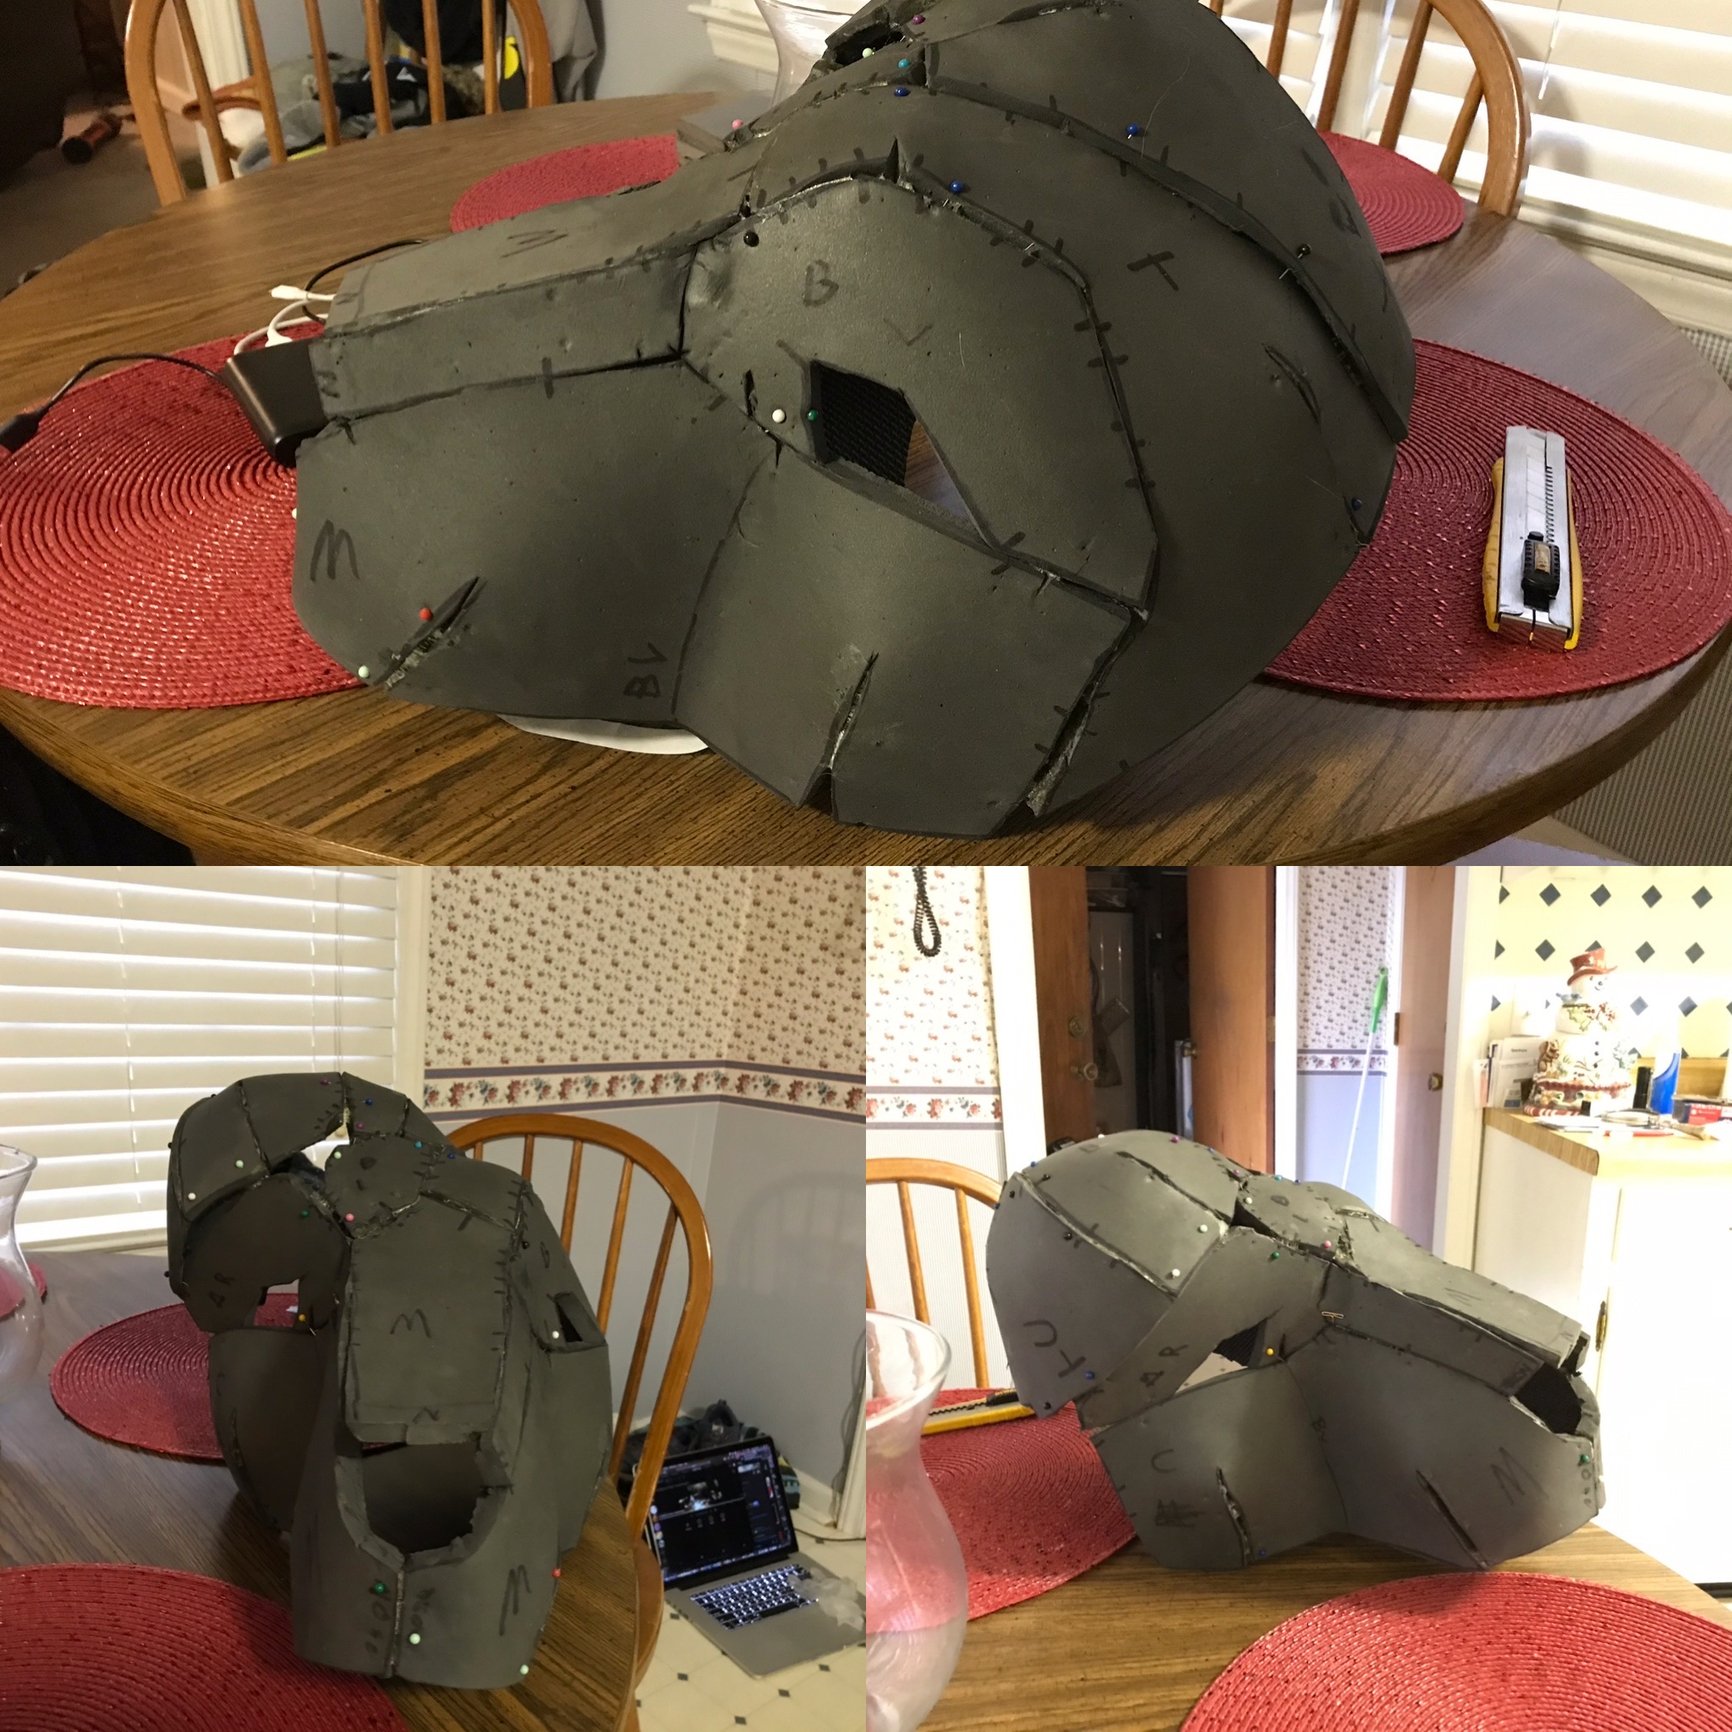
First time building a organic character with EVA foam. What went wrong?
I've got this werewolf I've been trying to build for a while but, kept hitting pitfalls. Since I'd planned to install mechs and I thought eva'd be the studier material for installing mech plates(Using a mix of what I learned in marionette and puppet mechs courses) Anyways something went wrong between my mock up and the final. Any ideas? 
My only guess is that having to work infront of a heater because of the temps lately has played in a ton along with not having as simple of shapes for my skill level.

My only guess is that having to work infront of a heater because of the temps lately has played in a ton along with not having as simple of shapes for my skill level.
Also does anyone have any suggestions on how I could do a simple snarl mechanism?
I drew up a plan last year that I thought was pretty clear but, I lost it and with the convention I'm trying to build this for way too close for comfort I am starting to question myself. Plus it'd be awesome to hear from someone with more experience in this kind of thing than me.
Thanks in advance.
0

Comments
Can you talk a bit about what you had trouble with? It's hard to see from the images what issues you ran into as things still appear to be pinned together and in progress.
A good way to do a snarl mechanism is to have a flexible cable act as the lip, and pull it upward with cables attached at points that shape the snarl as desired. Your skin can then attach to the lip cable with tabs of fabric.
/Chris
/Chris
If you are having issues with it not holding it may be how it's applied. To get a strong instant bond brush the adhesive on both surfaces and allow it to fully dry. Once dry you can firmly press the two sides together and you should get a bond that is so strong you can't pull it apart without damaging the foam.
If the problem is the pieces not fitting together and aligning properly, that is a bit more tricky. Some curves may need to be darted to allow them to bend smoothly. This is a common challenge with rounded shapes.
One challenge is working off 2D templates or patterns, as they don't account for the thickness of foam and how it will behave. Things may need to be adjusted to account for that, but how the adjustments are done are very situation specific and usually determined by past experience. Things like beveling edges at a specific angle so they create a specific effect on the outside surface when they meet up.
Don't be afraid to consider this head a prototype, and start over if you feel like it is not going to turn out the way you want. One of the awesome things about working with foam is that it is not expensive, so when trying new forms you can always make a few prototype rounds, make notes, and improve each new one. It's not uncommon to make 2 or 3 of something before getting it all dialed in, even for the professionals.
And remember you can always cut things apart to make adjustments, remove sections, or add new foam. If you are going to be covering it with another material it does not have to be pretty as long as it's the right shape. Carving and grinding down the surface can also help refine compound curves or details.
To me it looks like you are off to a great start, as that's a pretty complex form you have going. You are headed in the right direction!
/Chris