Animatronics as Fine Art.

Hey all!
I wanted to share my current project with everyone and show some ways I go about saving money on sculpting and building.
This animatronic sculpture will be stationary and is more of an installation/fine arts piece. It'll all be preprogrammed so I can walk away and let it do its thing. It focuses on the movement of breathing. The belly and chest will fill, moving the top leg, ribs, and shoulder blades. There will be sensors that will detected proximate movements of people and the eyes will quickly look up to the position then back down. The piece will interacts with us more so than us interacting with it (Still working out the Logistics).
I started with the basic concept and drew an Ariel sketch on butcher paper for the correct sizing I wanted the sculpture to be.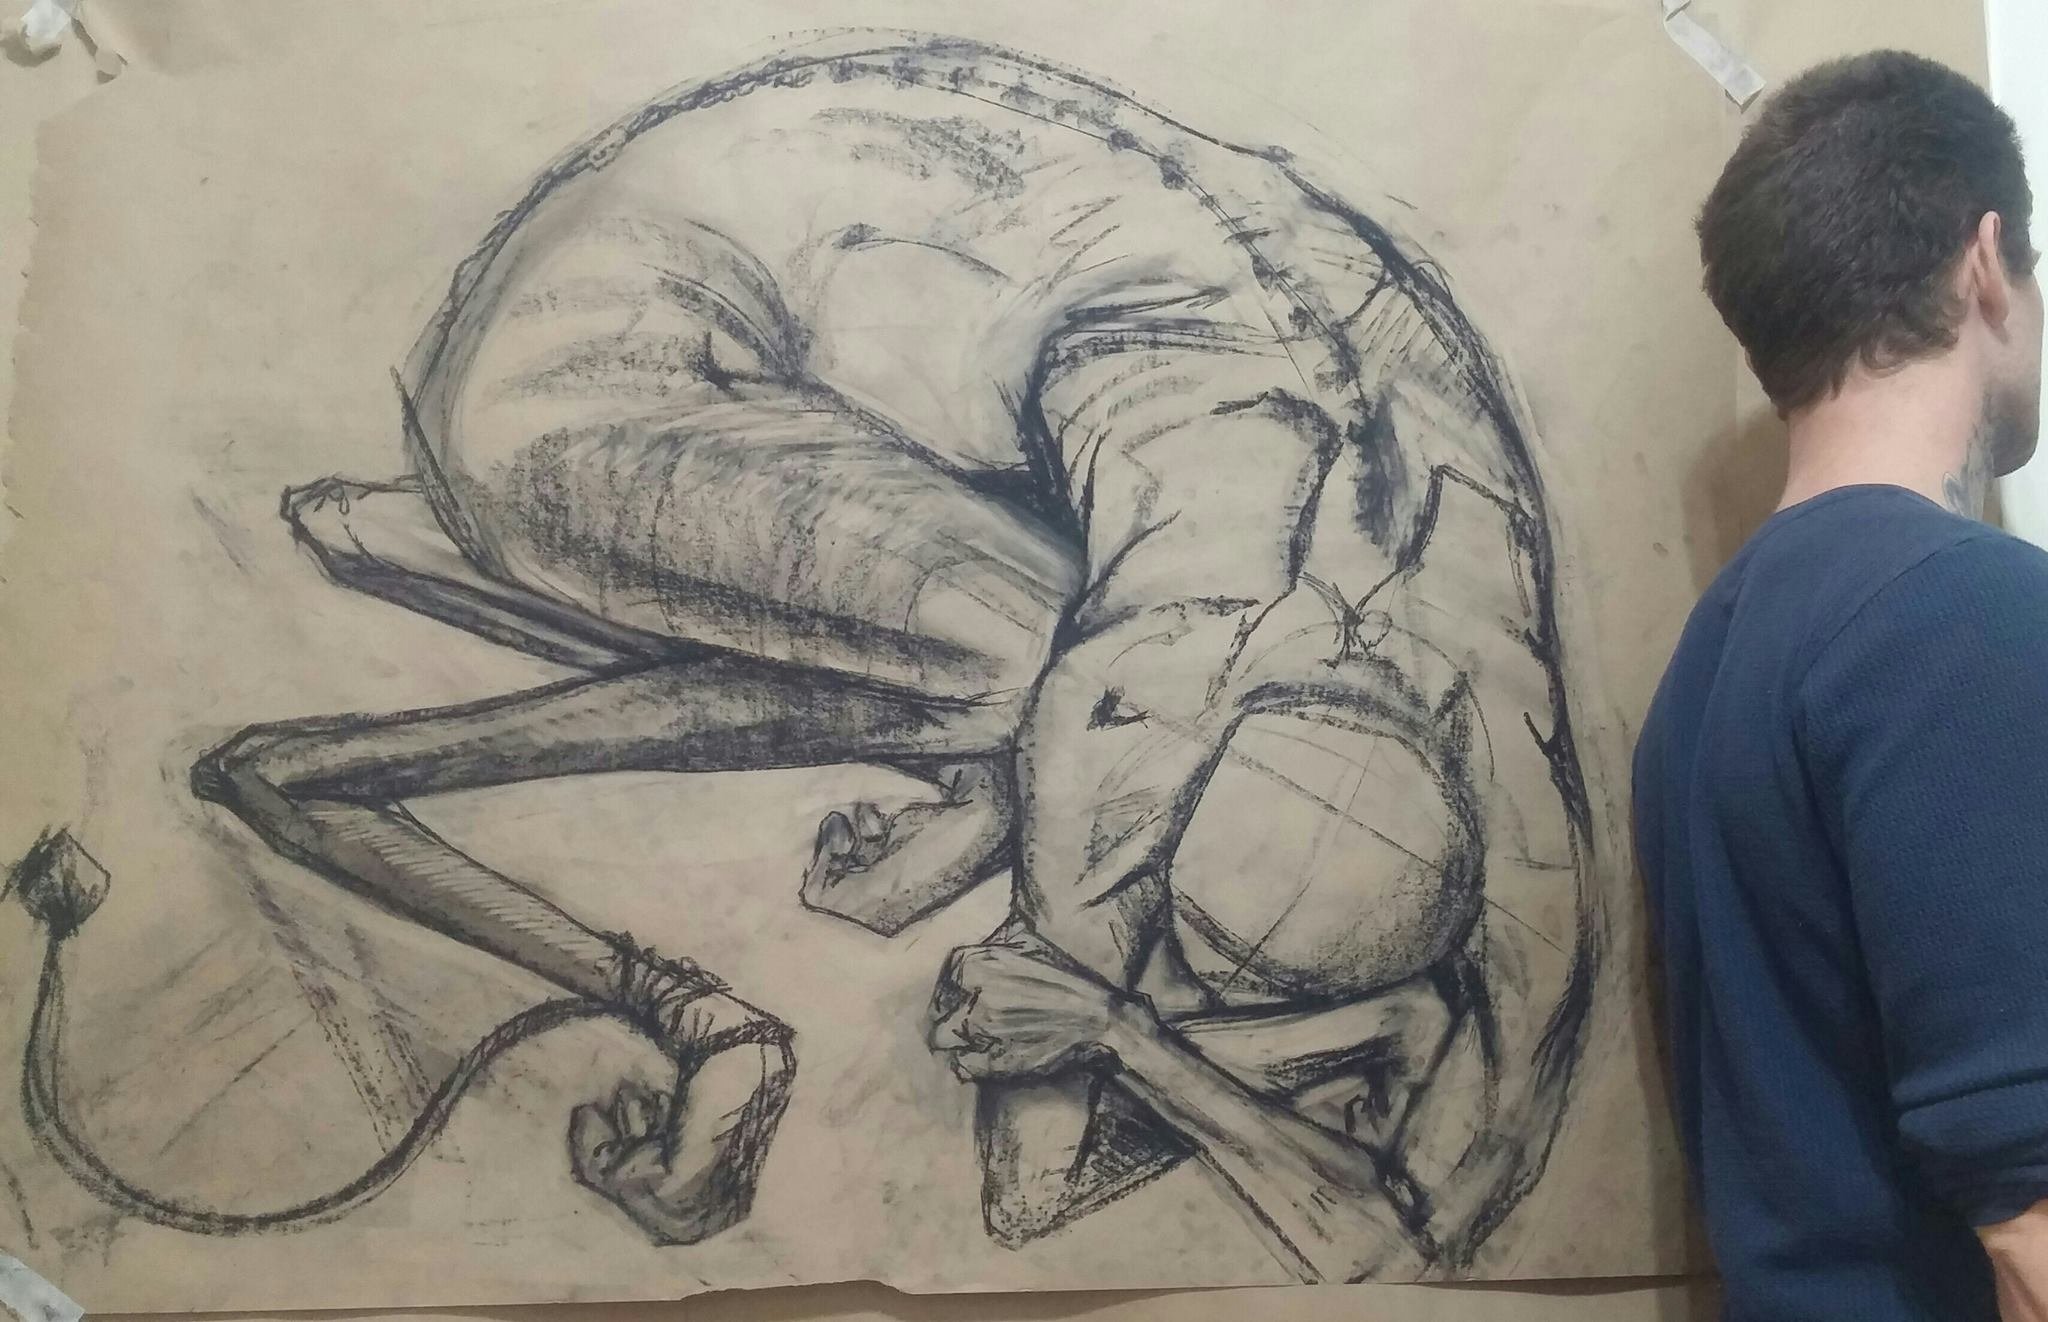
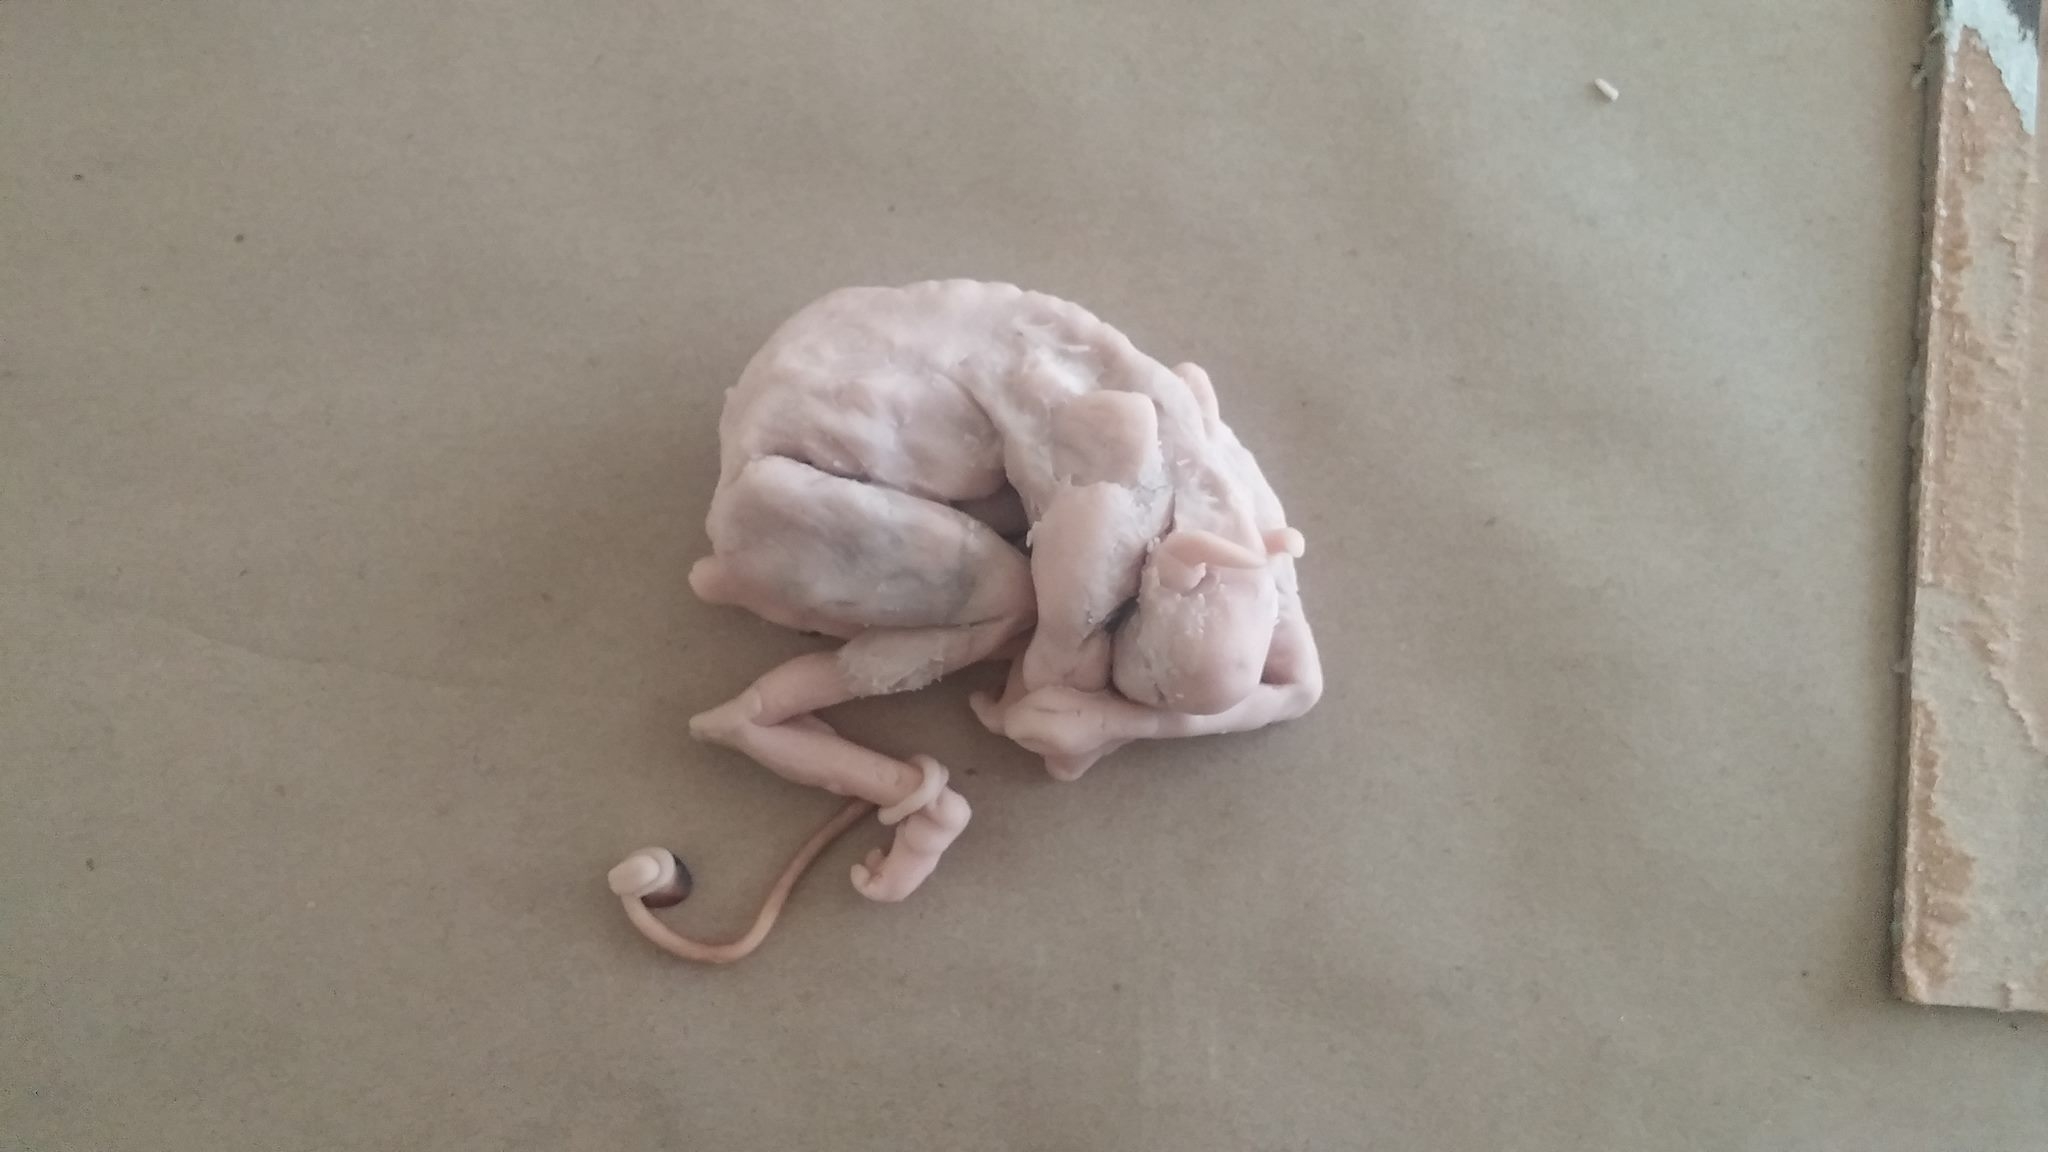
Next, a maquette in sculpy to refer back to when sculpting the finished piece.
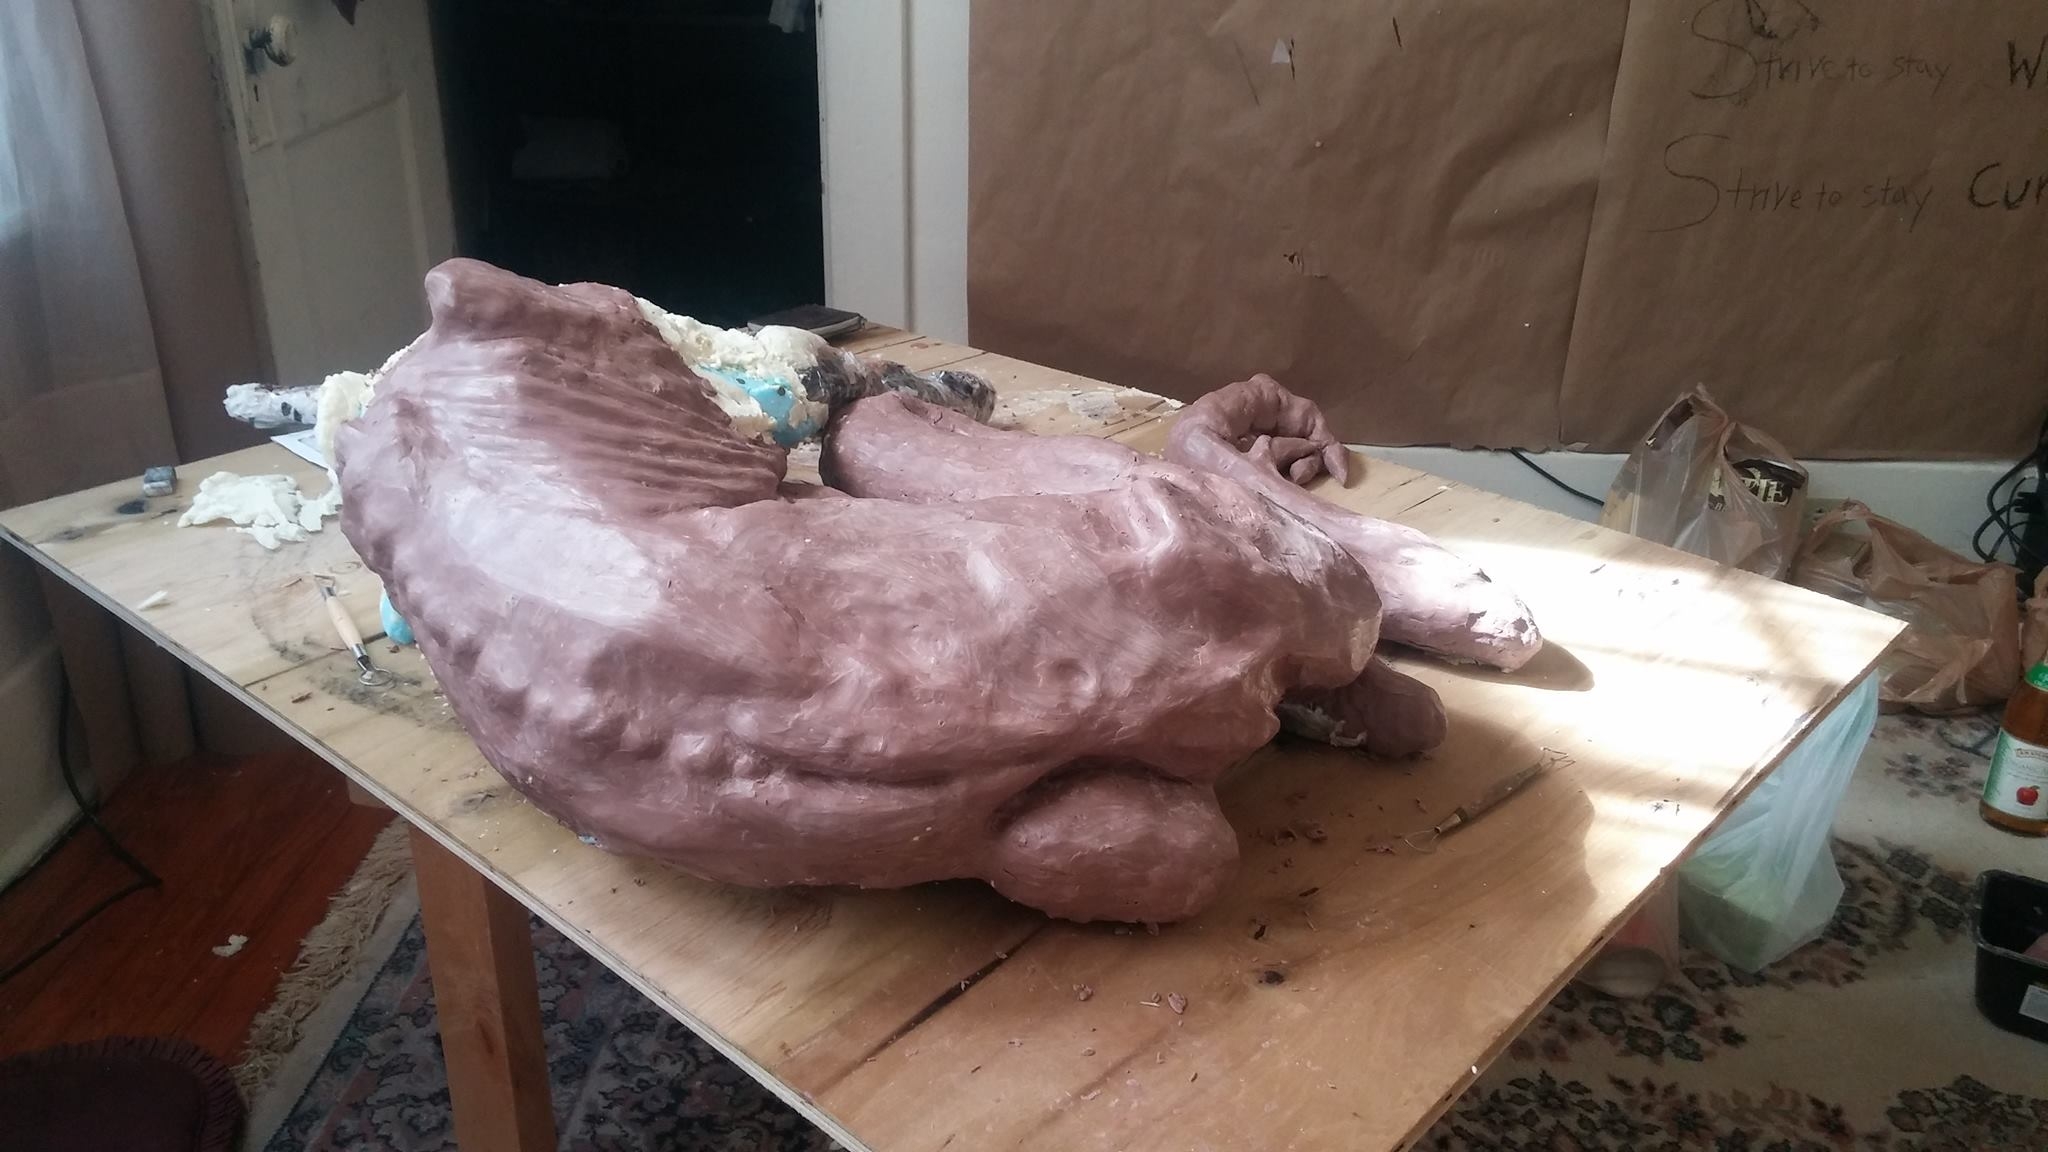
Laying down the original drawing on butcher paper (or a copy of the original) for length and size reference when sculpting. Taking old magazines, newspaper, plastic bags, foam piece or any other materials I can find I begin to build up the form. This helps build up thickness and saves TONS of money on clay. The downside is if you want to shorten or lengthen anything it involves cutting with a snap knife or a saw and takes a bit longer. That's why I stick to paper or foam as material and nothing hard, like glass. For smaller detailed shapes like hands, I'll use Tinfoil.

I try to think ahead when using material inside the sculpture. ex: The ribs, I knew I wanted to be able to shape each rib so I choice to use a piece of foam that I could carve into. I also love to use great stuff spray foam as "glue" to stick piece together. Such as arms torsos, hands to arms, etc. When mapping out placements of muscles and shapes I use nails as a temporary holder so I can step back and look.
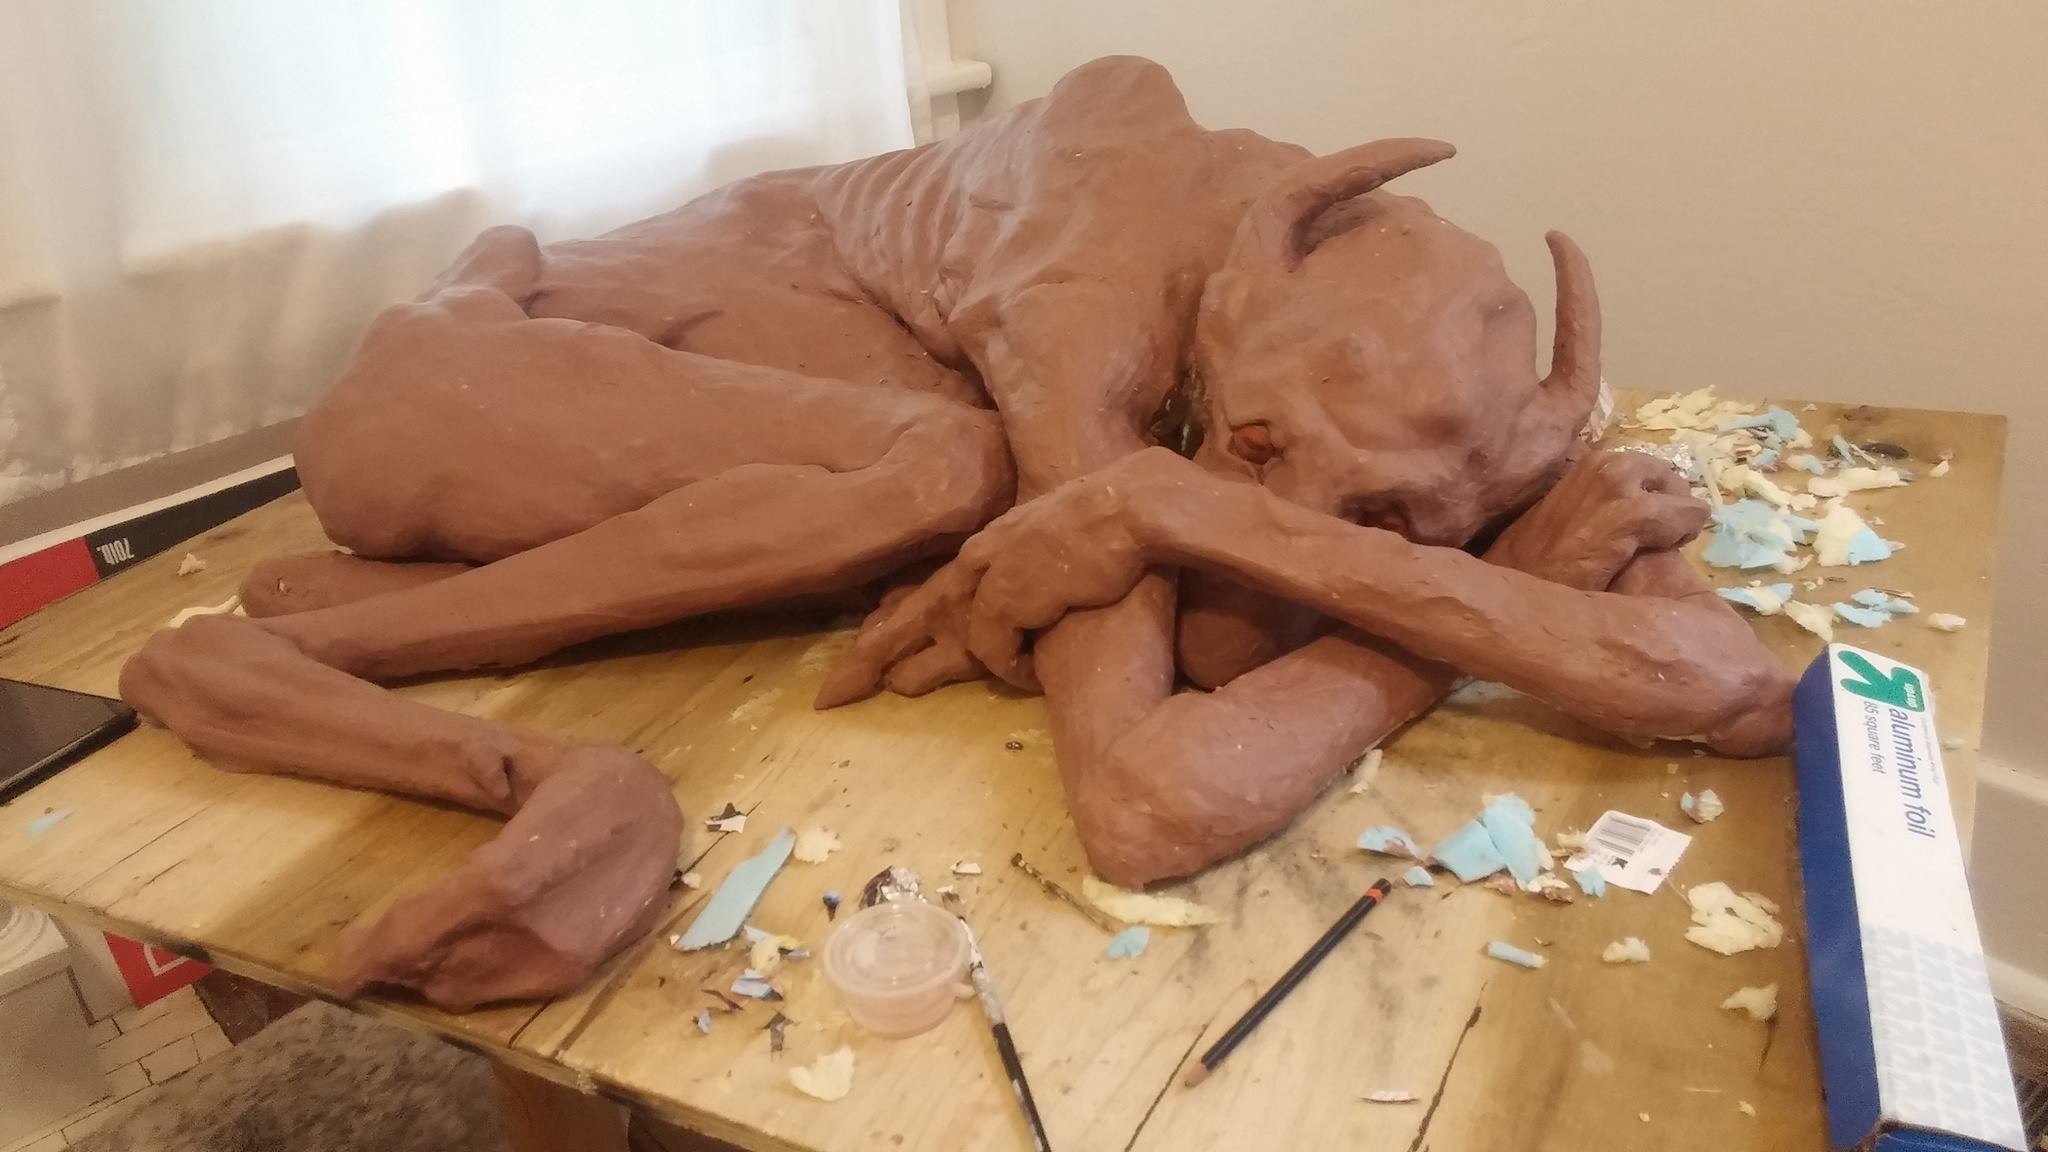
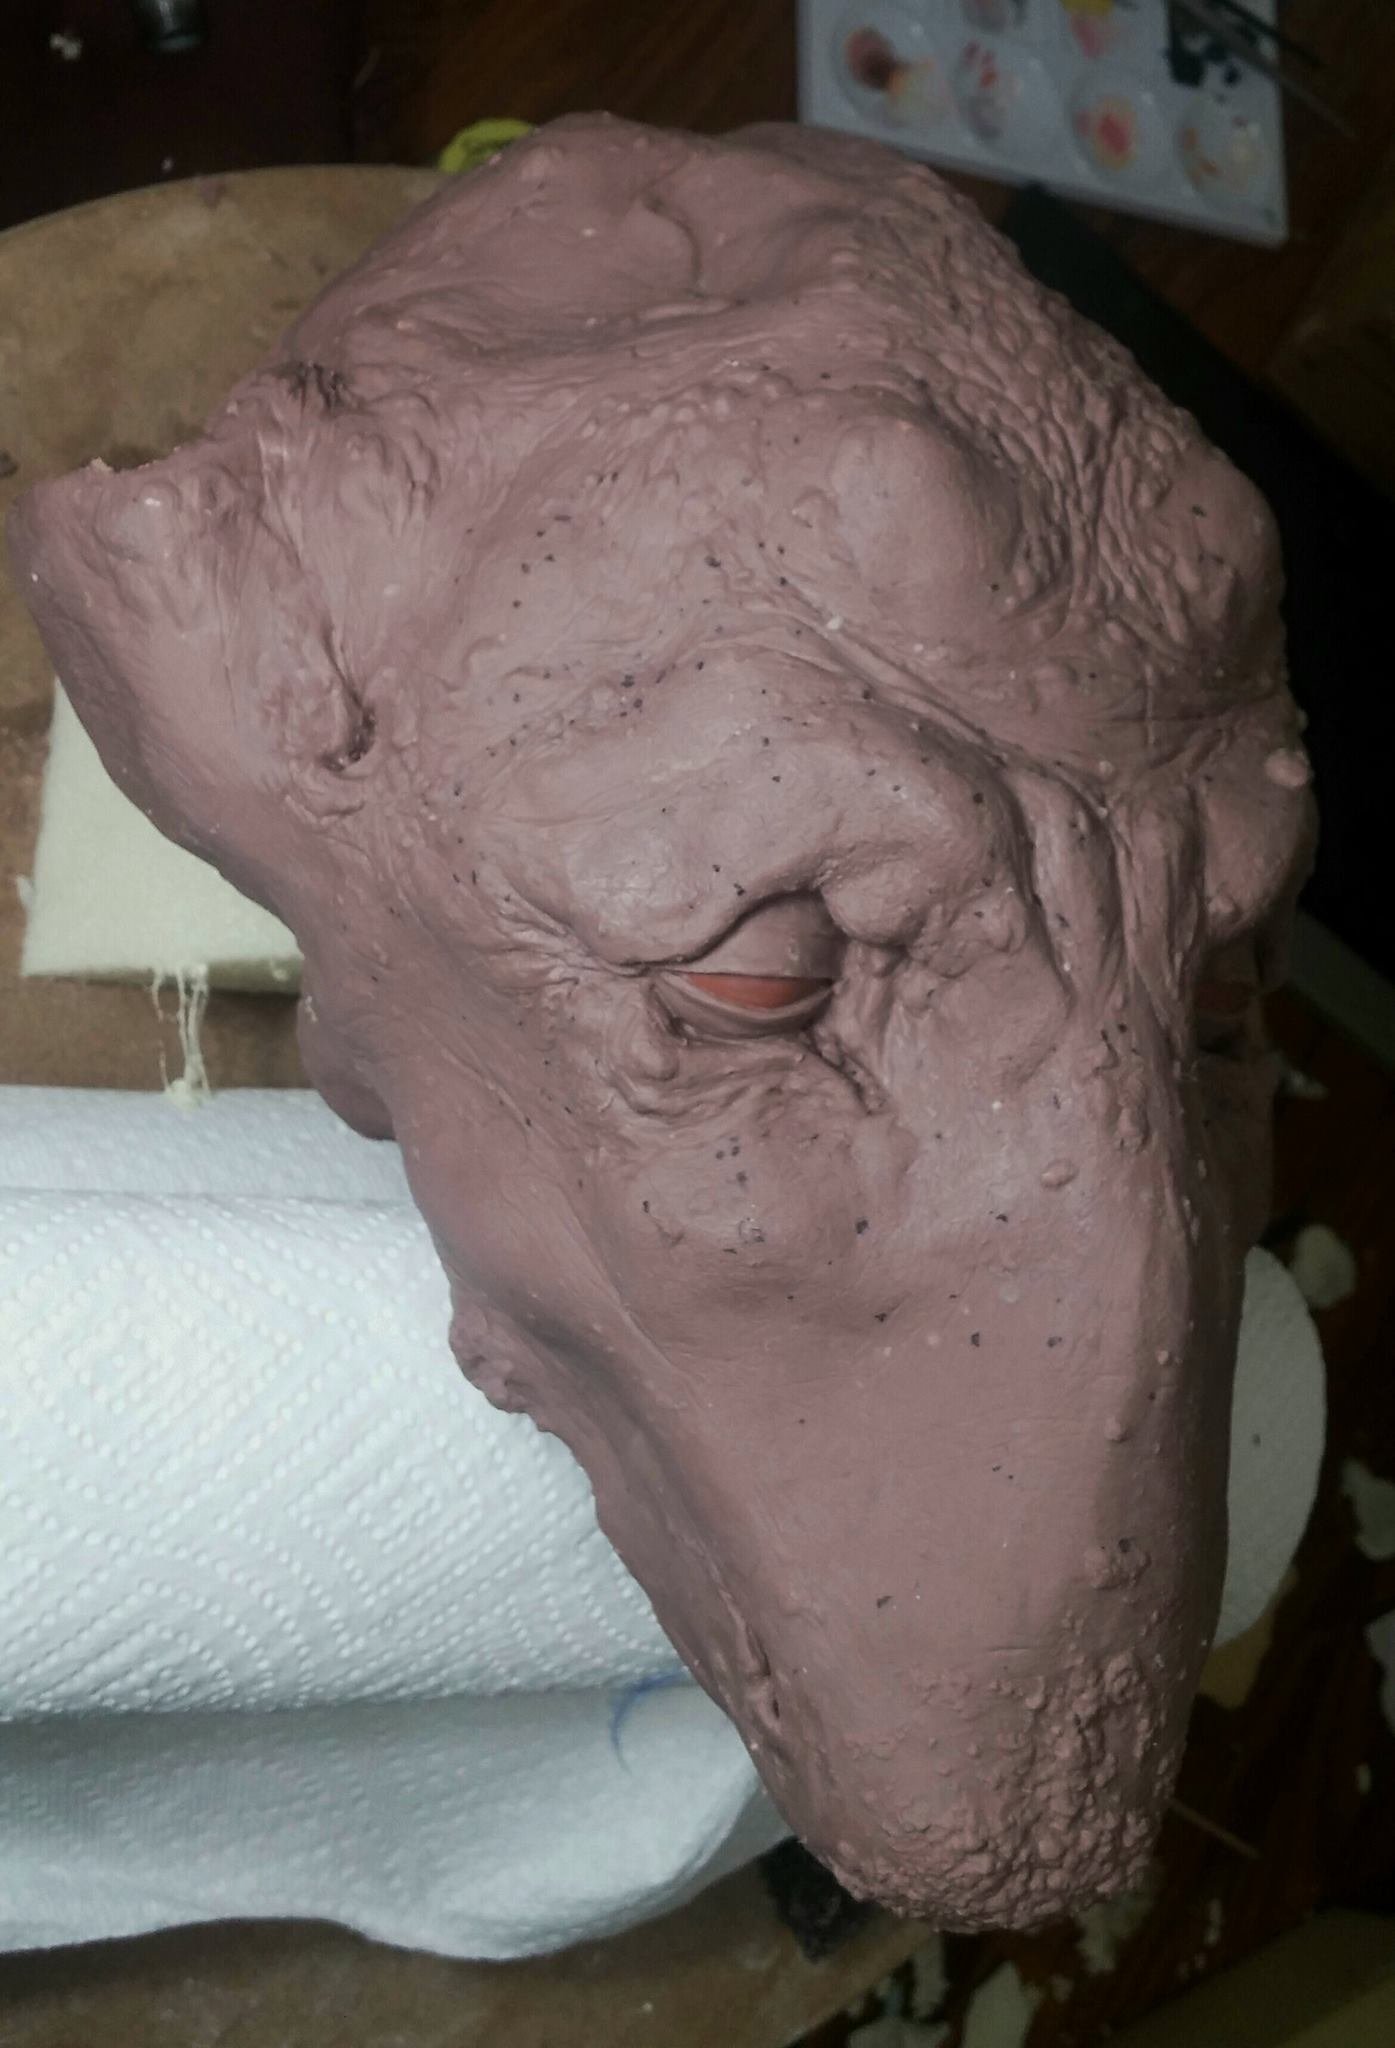
Once I'm confident and like the form I have, I'll go in and start to refine. Adding bigger details, such as veins and defining muscles. I use reference for inspiration and for creatures I sticking to the rule: If it looks wrong, anatomically or structurally. It probably is wrong. But it doesn't have to make scene as long as it's believable. With that in mind I spend a lot of time in this stage refining before I go onto small detail.
Once everything is in its respective position I begin to speraterate it by each part that'll be molded on its own. Then I focus on detail, I'm using monster makers clay, which is an oil and wax based clay. I use oderless mineral spirits with some artist brushes to feather and smooth. (Also work with a paint odor approved respirator, an over head fan on and an open window. Many hours of inhaling that stuff will make me feel like crumb. I made eyes to a specific dimension of 29mm out of sculpy and placed then in the sculpture. For this project I'm ordering some competition standard glass eyes from vandykes taxidermy. They haven't come in the mail yet so I'm not sure if they'll even work.
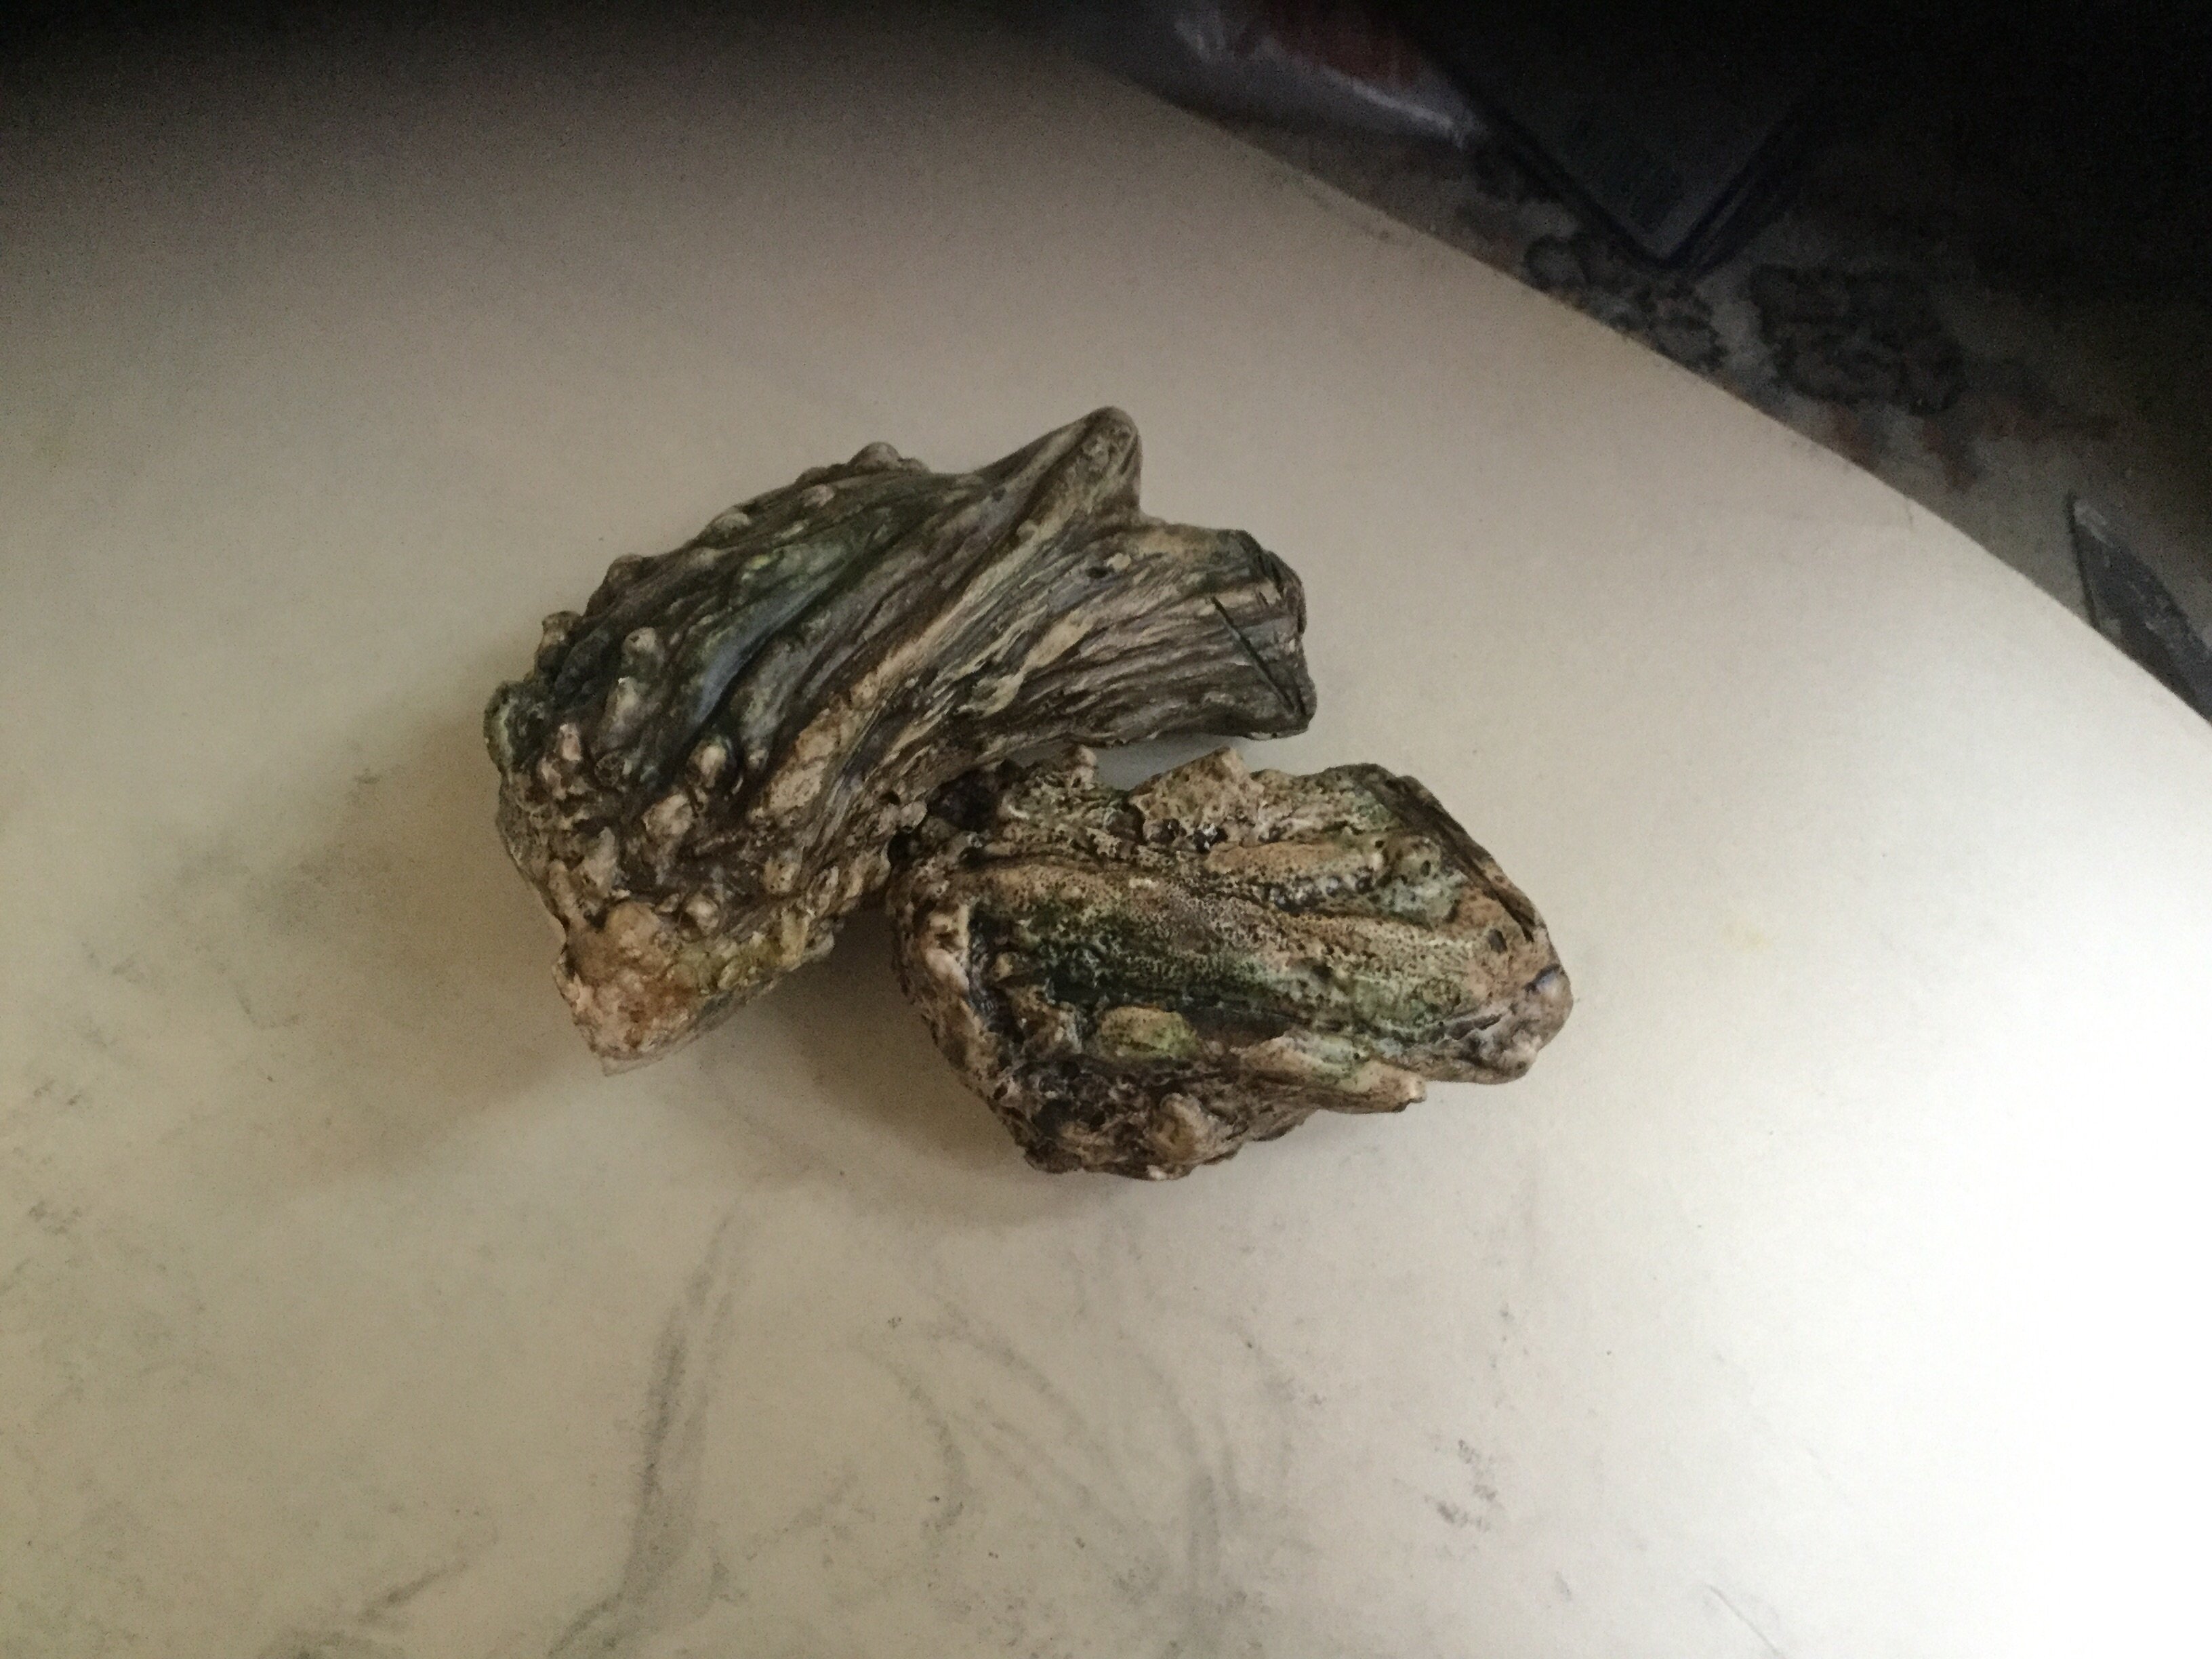
A cheap way to make a tin silicone mold is using silicone type 2 chalking, Naphtha and cheese cloth. This works great for detail and saves much money. It just takes more time to do but is about 1/3 the price. For the outer plaster mold I used a mix of 25lbs plaster of paris and 10lbs rapid set cement. There are some great turtional on YouTube with the process. Just don't cast platinum silicone into them! I learned that the hard way.

I poured the same mix of plaster and cement into the holds, painted with watercolor and inks. Sealed with a clear coat of nail polish then Krylon preserve it Matte. That's as far as I've gotten. Much more to come!
I wanted to share my current project with everyone and show some ways I go about saving money on sculpting and building.
This animatronic sculpture will be stationary and is more of an installation/fine arts piece. It'll all be preprogrammed so I can walk away and let it do its thing. It focuses on the movement of breathing. The belly and chest will fill, moving the top leg, ribs, and shoulder blades. There will be sensors that will detected proximate movements of people and the eyes will quickly look up to the position then back down. The piece will interacts with us more so than us interacting with it (Still working out the Logistics).
I started with the basic concept and drew an Ariel sketch on butcher paper for the correct sizing I wanted the sculpture to be.
Next, a maquette in sculpy to refer back to when sculpting the finished piece.
Laying down the original drawing on butcher paper (or a copy of the original) for length and size reference when sculpting. Taking old magazines, newspaper, plastic bags, foam piece or any other materials I can find I begin to build up the form. This helps build up thickness and saves TONS of money on clay. The downside is if you want to shorten or lengthen anything it involves cutting with a snap knife or a saw and takes a bit longer. That's why I stick to paper or foam as material and nothing hard, like glass. For smaller detailed shapes like hands, I'll use Tinfoil.
I try to think ahead when using material inside the sculpture. ex: The ribs, I knew I wanted to be able to shape each rib so I choice to use a piece of foam that I could carve into. I also love to use great stuff spray foam as "glue" to stick piece together. Such as arms torsos, hands to arms, etc. When mapping out placements of muscles and shapes I use nails as a temporary holder so I can step back and look.
Once I'm confident and like the form I have, I'll go in and start to refine. Adding bigger details, such as veins and defining muscles. I use reference for inspiration and for creatures I sticking to the rule: If it looks wrong, anatomically or structurally. It probably is wrong. But it doesn't have to make scene as long as it's believable. With that in mind I spend a lot of time in this stage refining before I go onto small detail.
Once everything is in its respective position I begin to speraterate it by each part that'll be molded on its own. Then I focus on detail, I'm using monster makers clay, which is an oil and wax based clay. I use oderless mineral spirits with some artist brushes to feather and smooth. (Also work with a paint odor approved respirator, an over head fan on and an open window. Many hours of inhaling that stuff will make me feel like crumb. I made eyes to a specific dimension of 29mm out of sculpy and placed then in the sculpture. For this project I'm ordering some competition standard glass eyes from vandykes taxidermy. They haven't come in the mail yet so I'm not sure if they'll even work.
A cheap way to make a tin silicone mold is using silicone type 2 chalking, Naphtha and cheese cloth. This works great for detail and saves much money. It just takes more time to do but is about 1/3 the price. For the outer plaster mold I used a mix of 25lbs plaster of paris and 10lbs rapid set cement. There are some great turtional on YouTube with the process. Just don't cast platinum silicone into them! I learned that the hard way.
I poured the same mix of plaster and cement into the holds, painted with watercolor and inks. Sealed with a clear coat of nail polish then Krylon preserve it Matte. That's as far as I've gotten. Much more to come!
Post edited by Blake Bradley on
1
Comments
https://instagram.com/p/BOJPt49Fg8f/
/Chris