How to add skin and feathers to a Worbla model?
Hi all, hoping someone can help with suggestions. My 11 year old
daughter is making a life sized half skeleton, half lifelike model of an
Anchiornis huxleyi (paravian - pre-bird dinosaur) for a science
competition. Yeah, I know, ambitious much??! Anyway she's made the
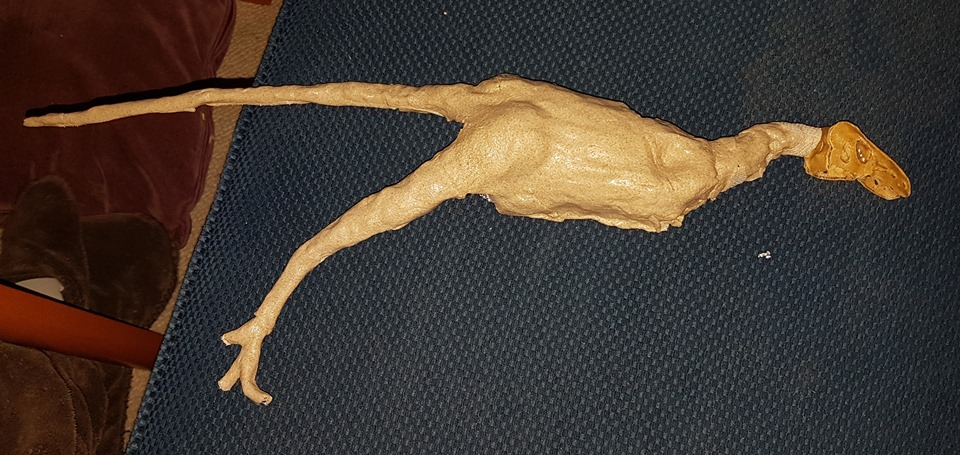
fleshed side of the body out of Worbla formed over an aluminium foil
shape & she's made the skull & jaw. She needs to cover just
that half with feathered skin & we're wondering the best way to do
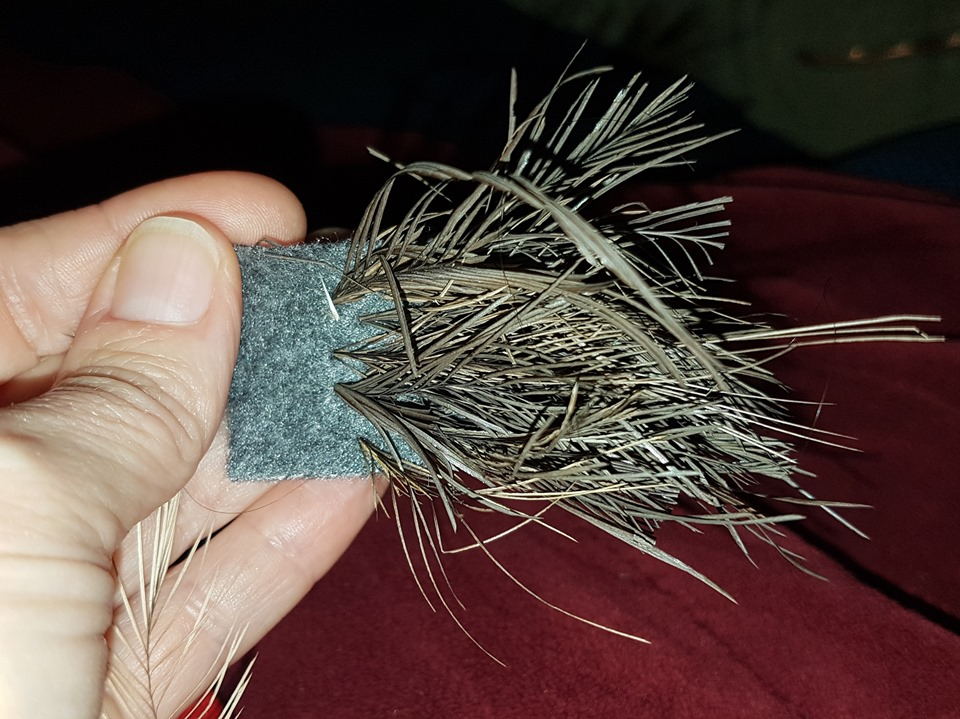
it. This is all new to us! So far she's tried putting emu feathers
into grey fleece fabric for the skin with the intention of gluing it
straight to the Worbla - what glue would be best if she did that? The
feathers are coming out though, so she is now thinking of a latex skin
& inserting feathers into it. How would she do that? Paint the
latex straight onto the Worbla & then stick the feathers in &
hope they stay put? She also needs to consider how to attach the longer
flight feathers on the legs which would take greater strength to stay
in place. Any hints, tips, ideas? Pics showing what an Anchiornis
huxleyi looks like, a half skeleton, half taxidermy rabbit to
demonstrate how she wants it to look & what she's created so far...
(And we're in Australia so any products we're likely to find here would
be great!)
0


Comments
Such a cool project! Sticking feathers into a latex skin would be a bit challenging since there would not be much material to stick the feathers into. But if needed you could do this for fleshy/skin areas by painting a base latex layer down first, then painting over the quills of the feathers with latex before moving on to the next row. (like laying shingles)
I think her idea of inserting the feathers into the fur is a great one, and might just be the ticket. I would see if you can get the feathers to go all the way through the fur backing, then apply some glue on the back where the quill sticks through. If you had the time you could even sew each quill in on the back, but gluing might be easier/faster. A fabric/craft glue should keep the feathers in place well enough to let you glue that fabric to the character and lock things in fully.
When looking for glues to bond different surfaces together I like to use this resource: http://www.thistothat.com
For gluing the fabric down to the worbla I would try a contact adhesive like Barge. Apply a coat to each side, let it dry for a few minutes, then press the two together. This should also help keep the feathers in place once everything is secured. Wear gloves, be in a well ventilated area (solvent fumes from the barge), and know that once you put the two pieces together they are not going to want to come apart without damaging things.
If you need a bit more time to adjust the alignment of pieces you can apply them while the barge (or other contact adhesive) is still wet, then let them sit to dry. With the adhesive being wet you have a bit more freedom to peel up and re-apply or adjust things. While things dry you can put pins in the fabric to hold it in place on the character.
That said, with things like feathers they will sometimes want to come out, so handling with care is always a good idea.
For areas that need to look like skin, liquid latex will work great. You can pigment it with acrylic paints like Liquitex. Just know that they will dry darker than they appear when wet, as wet latex is white but dries a somewhat clear yellowish tint.
When the latex is part way through drying you should be able to give the surface textures or sculpt subtle lines into it as well. I suggest doing some tests on something that is not your finished character to get used to how the color changes as it dries, and how it can be sculpted/shaped.
Using tissue paper/crepe you can build up wrinkles and other forms with the latex as well. This works much like paper mache.
Hope that helps, and we'd love to see this project once it's done, or even progress photos!
/Chris
She entered the statewide science competition & won her category - first place for Models & Inventions for years 6-7, then went on to win first place for Young Scientist of the Year for primary schools - the top primary school prize. And then the biggie, she won the Oliphant Trophy which is the top prize for all schools, reception to year 12! It's never been won by anyone under year 9 level before, she's year 6. From that she's been interviewed by three major newspapers, one of them in Japan, has done two podcasts, will appear in the winter edition of Prehistoric Times Magazine in the US, was invited to Flinders University Palaeontology Lab where she met everyone & was invited to SVP (Society of Vertebrate Palaeontology) global conference that was held in Brisbane, Australia this year & she was greeted warmly & gained much respect from global palaeoartists and palaeontologists! It's been incredible! And now her model is on display in the South Australian Museum, which has also never been done - they've never shown private work, let alone that done by a child. So, again, thank you so much for the part you played in all this too. We are very grateful.
Here are some pictures for you of her Anchiornis huxleyi, a mesozoic paravian dating back 151-161 million years. It is life sized and as scientifically accurate as it can be. The colours are scientifically proven to be correct. The only thing unproven was eye colour so she chose to leave it clear.
So glad everything worked out, she took on quite the project, and it looks like it really paid off! Did the process inspire her to make more in the future, or does she never want to see another glue covered feather again?
/Chris
Jo
After all that work with feathers I completely understand!
The animatronic pterosaur model sounds like an awesome project. We have a few lessons here on animatronics, but none cover wing movement yet. That said, some of the general principals still apply. If you have any questions about wing mechanisms I'd be happy to help.
/Chris