Makeup Appliance Using Thermoplastic
 Chris Ellerby
Admin
Here is an interesting and unusual project for the books.
I have a client that wants a character makeup and prosthetics designed with the following requirements:
 For those of you who are not familiar with products like InstaMorph, thermoplastics are solid plastics that when heated (ideally between 140f and 150f) they become pliable like a putty or clay.
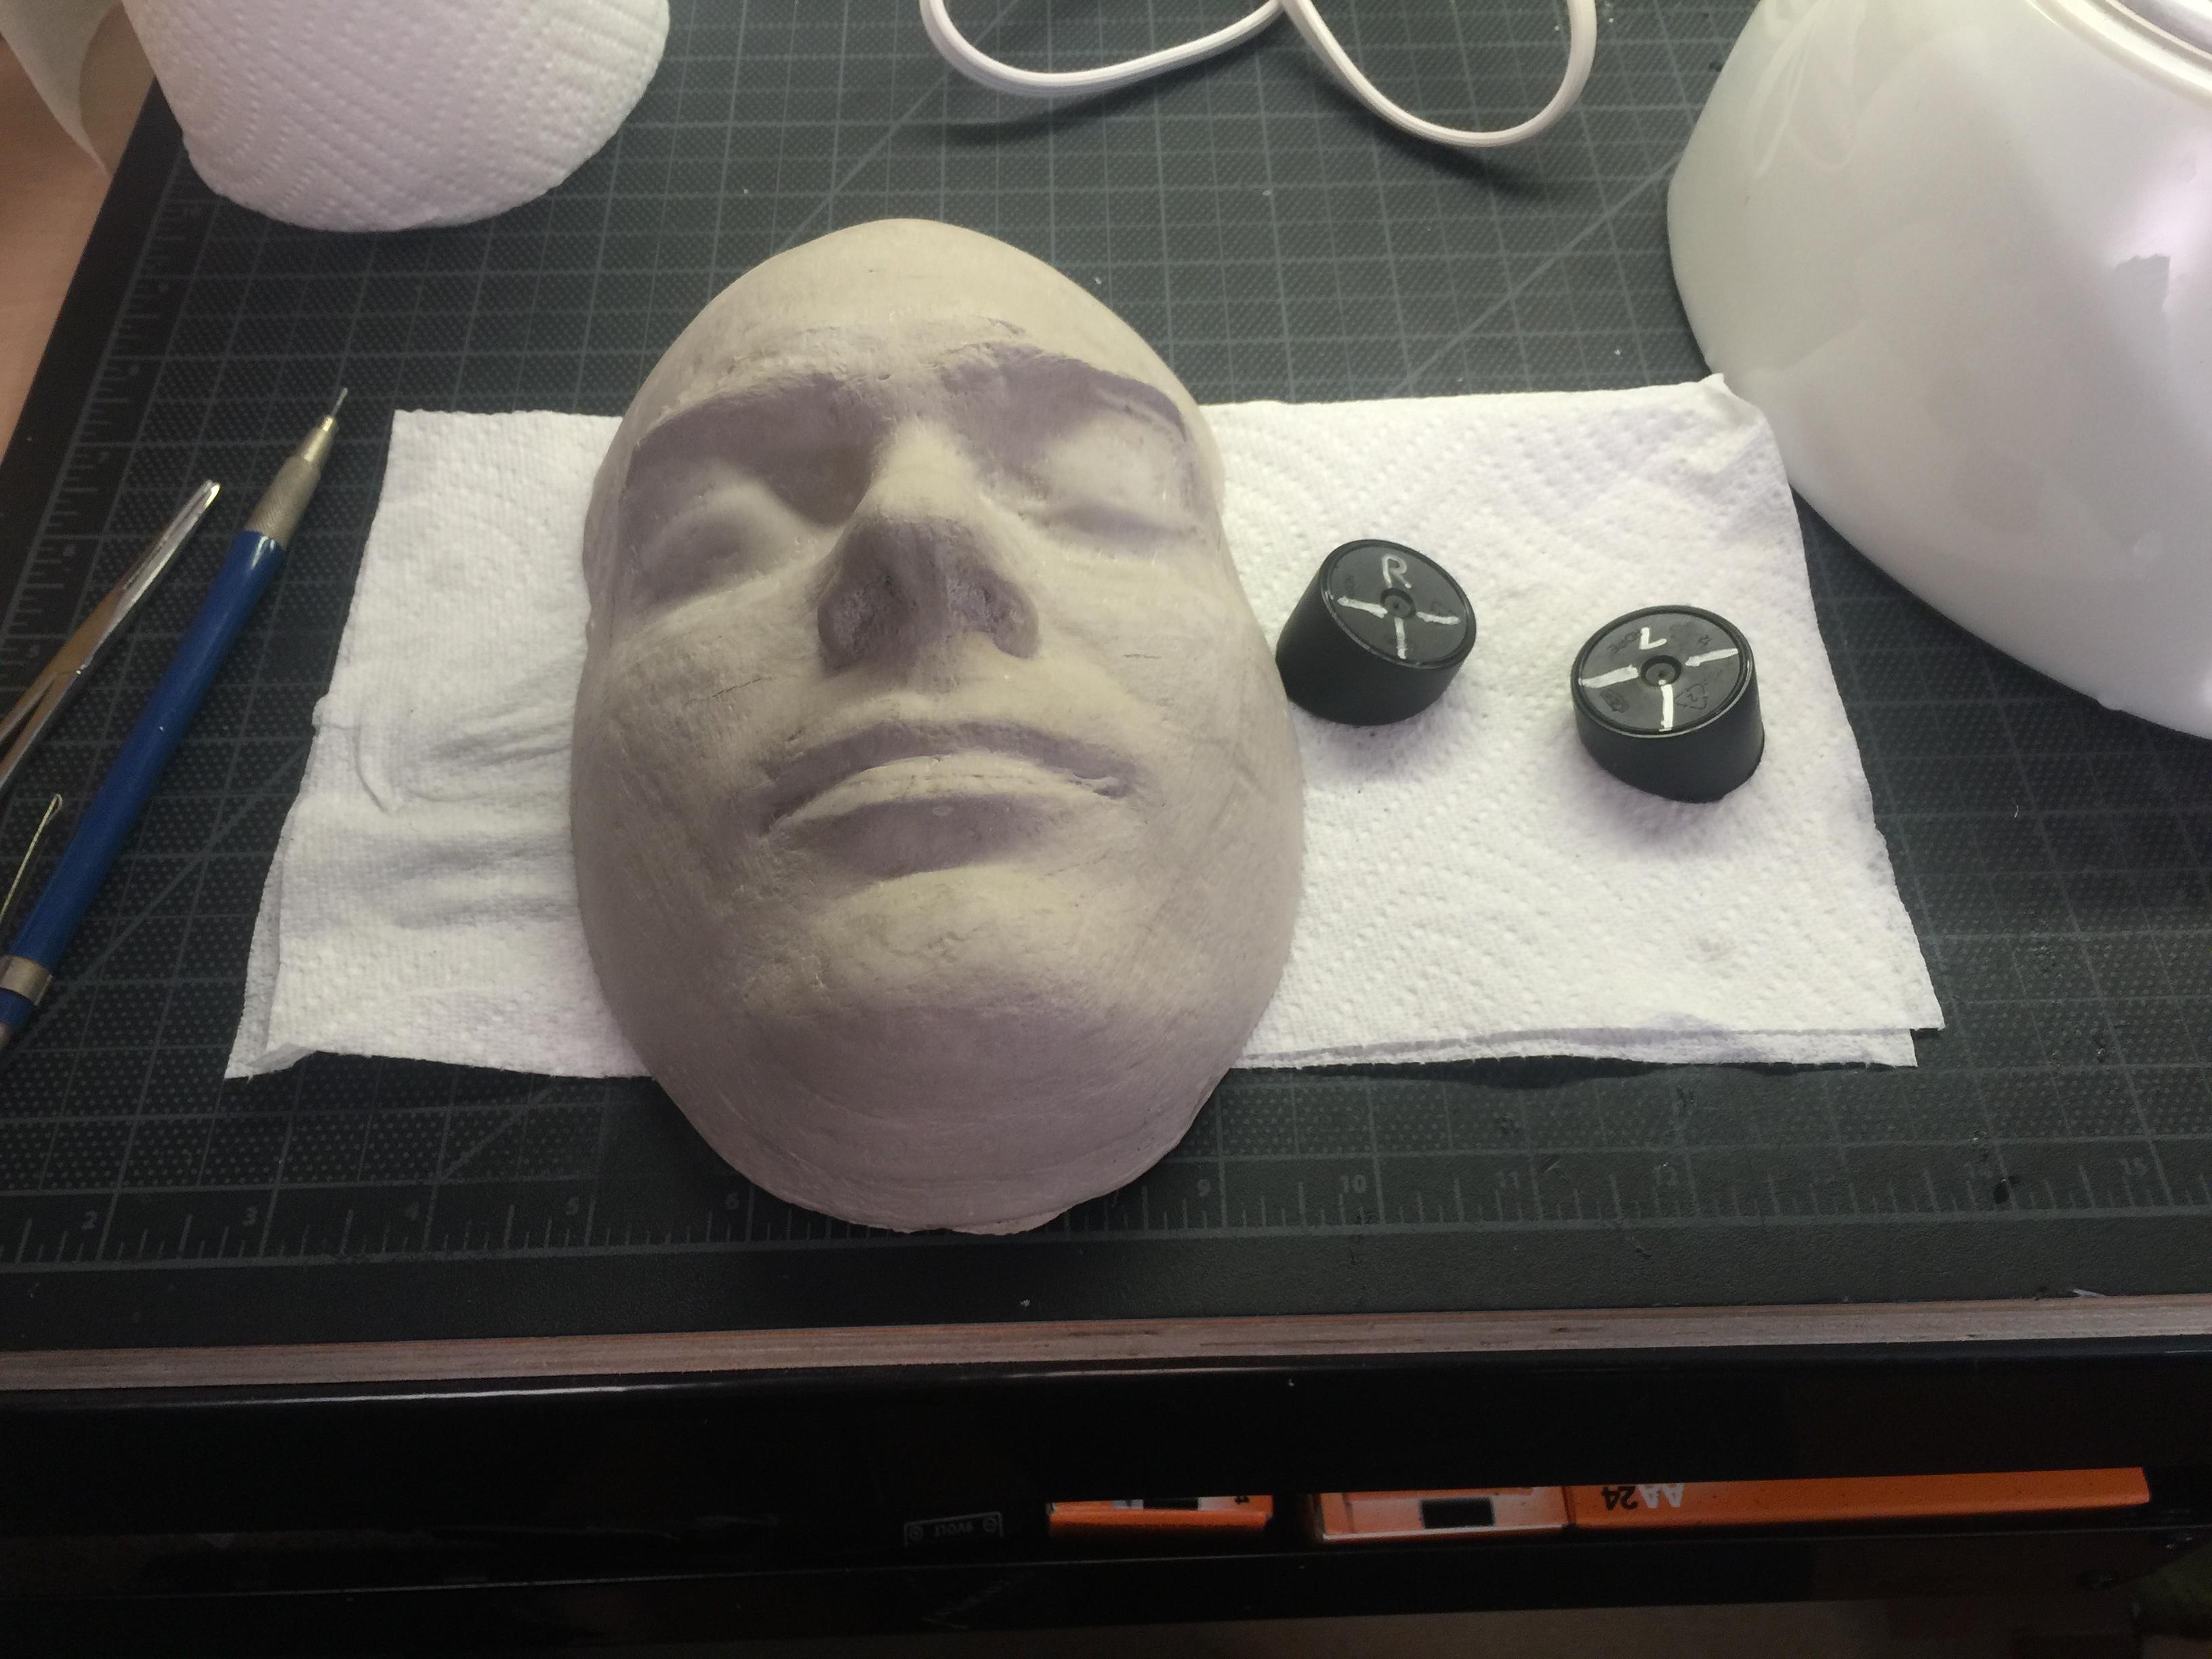
To start this project we first took an ultracal lifecast that we had for the client and some plastic canisters that matched the desired diameter for the metal spikes. The canisters were then ground down to match the contours of his face so they would properly sit over the eyes.

Next I took some InstaMorph and heated it up using an electric pot that was originally designed to heat wax for hair removal. This is a great tool for working with gelatin, which is why I originally got it. On its max setting it reaches temperatures between 145f and 150f which is perfect for this brand of thermoplastic.

InstaMorph (like most thermoplastics) is white when cooled, and clear when heated. For this project I wanted to have a nice neutral (but slightly light) skin tone as a base. InstaMorph sells tiny pigment pellets that are really inexpensive, and go a long way. For this batch I used 1 red pellet, 2 yellow pellets, and 1/2 blue pellet. (roughly) The red and yellow make a good skin tone (when combined with the natural white color of the material when cooled) and the blue darkens it slightly and dampens the red.

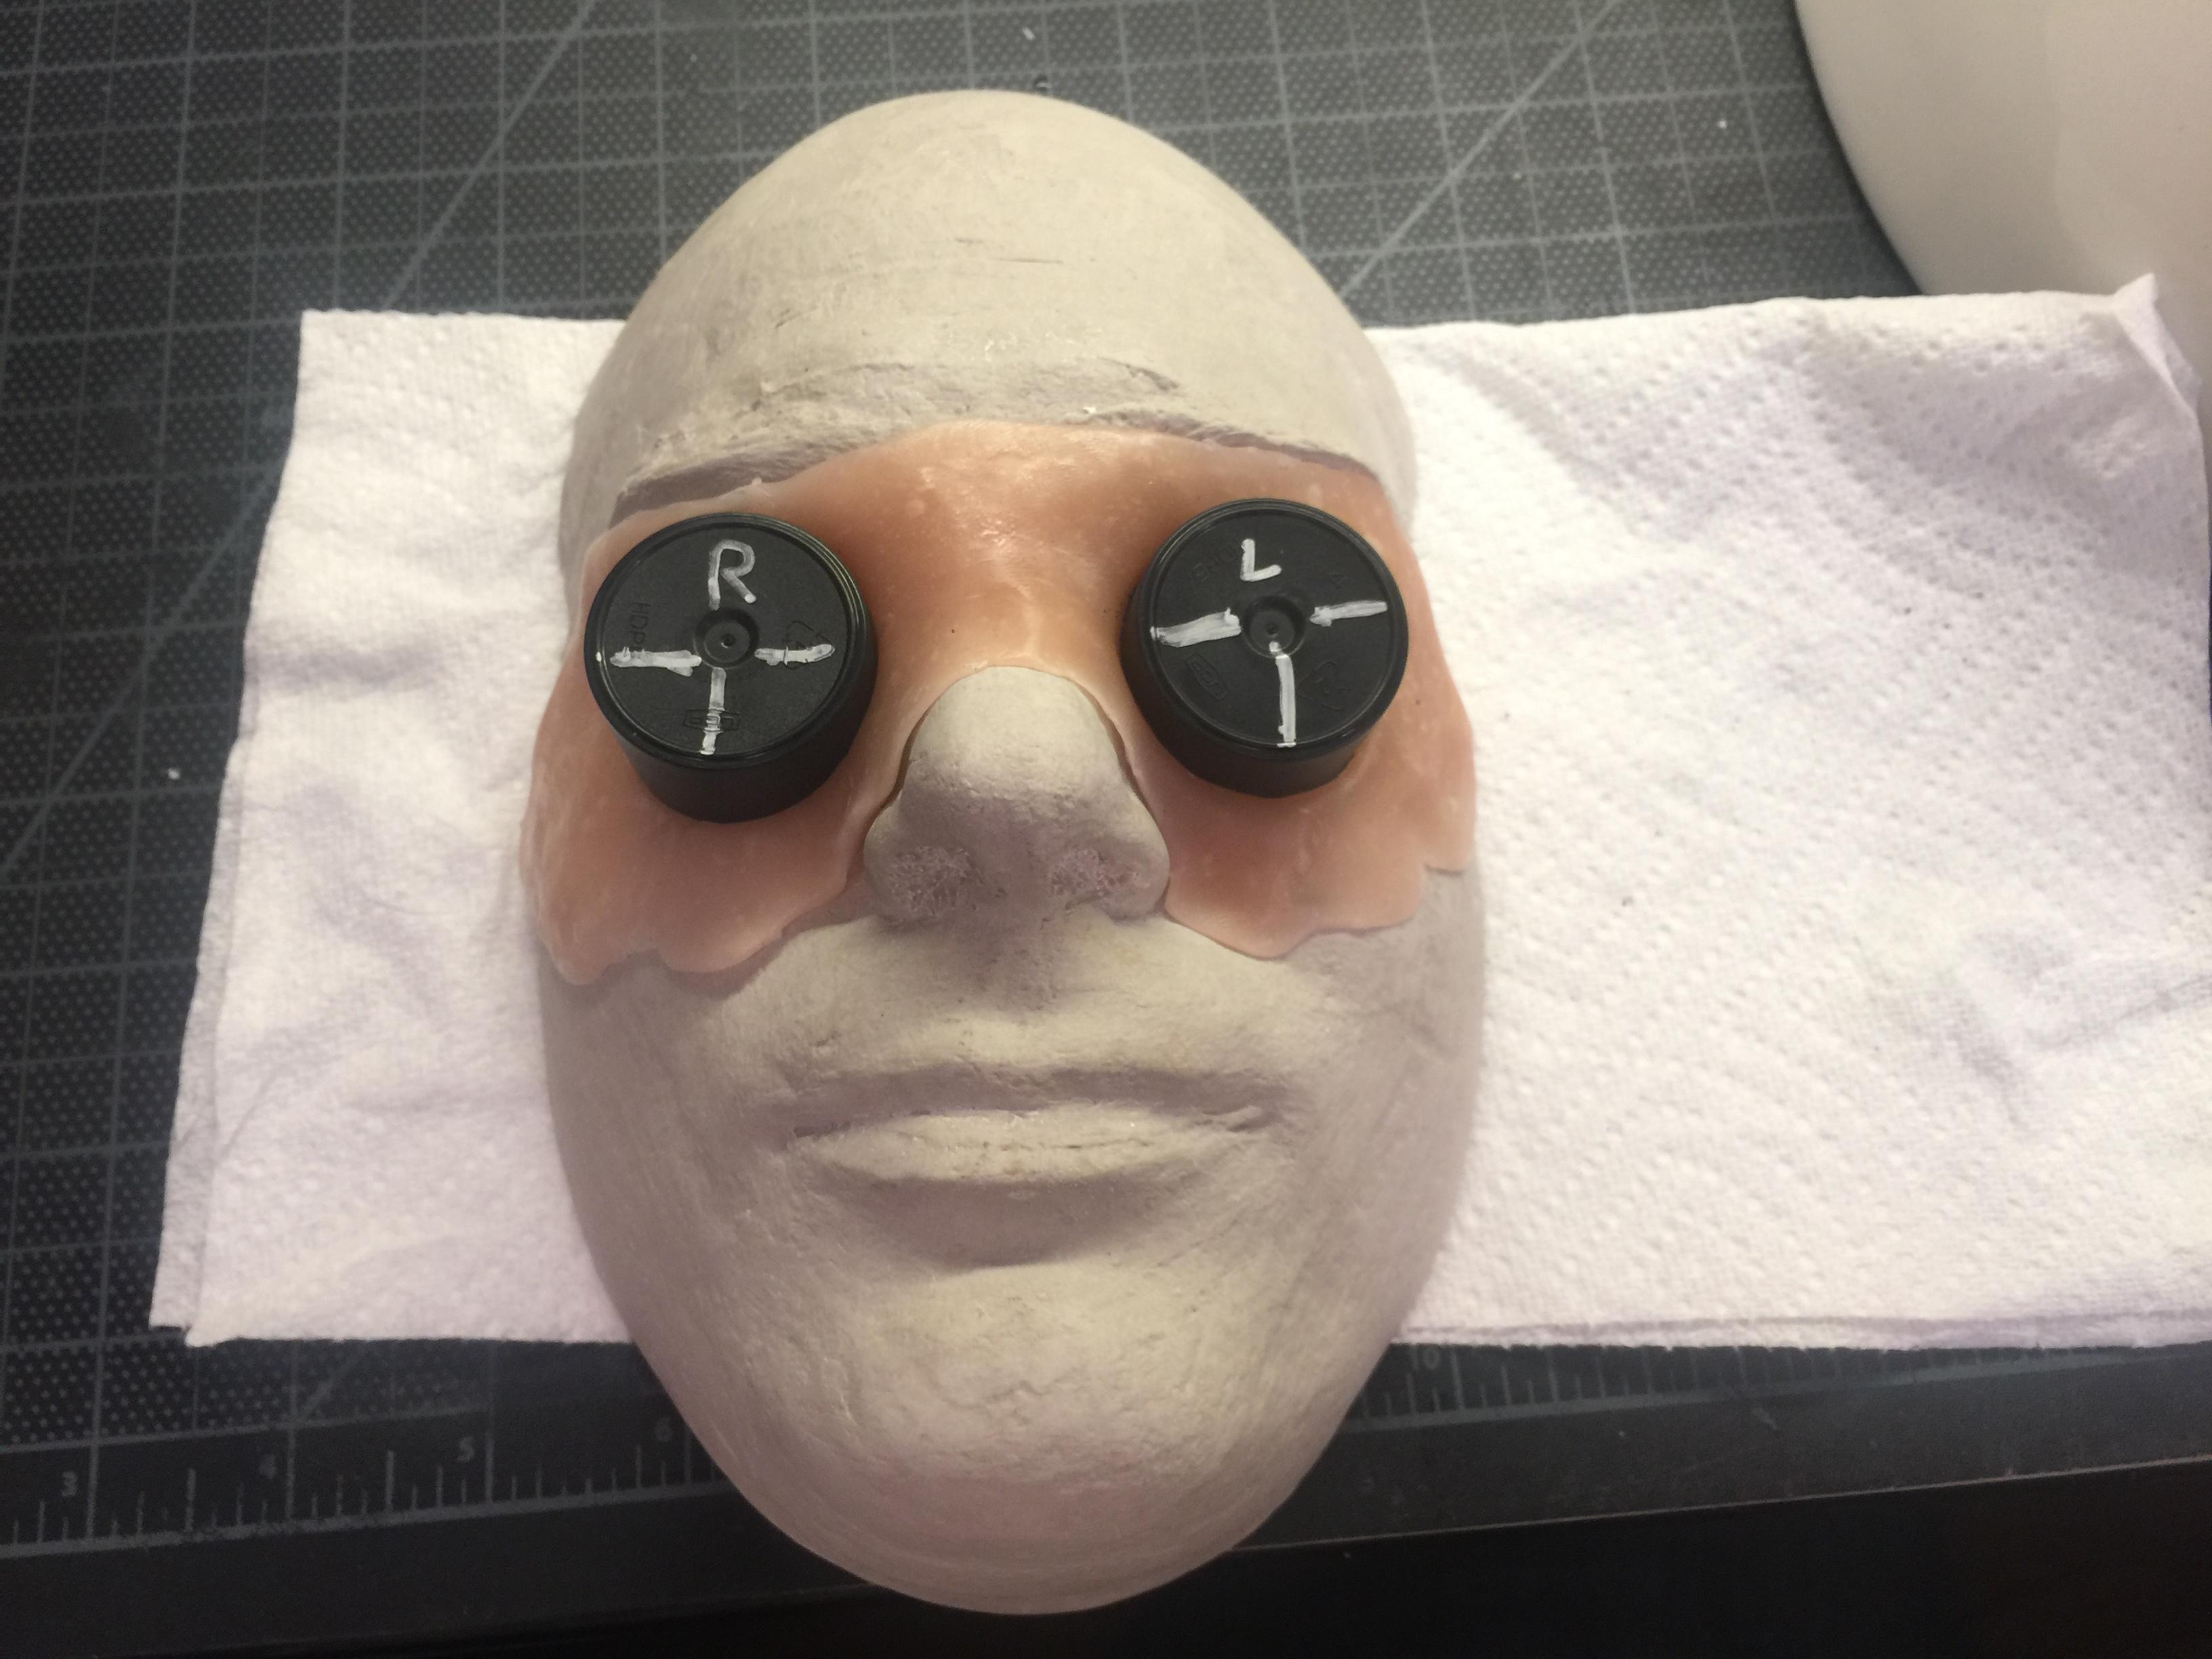
Next I took the melted plastic and applied it to the lifecast, carefully shaping it into a mask. The canisters were then pressed into place while the material was still soft.
We then did a quick test fit to make sure everything was lining up properly. Here you can see how I picked a color that was a bit lighter than his skin tone. This will give me some room to build up layers of color with alcohol activated makeup later.

Next I used an alcohol lamp and a metal wax sculpting tool to carefully carve out holes for the canisters.

Then, with the canisters in place, I built up some material on the inside that will help attach them to the appliance.

From here I refined the shape, removed as much material as possible (leaving just enough edge to glue the appliance down), and thinned out the blending edges.
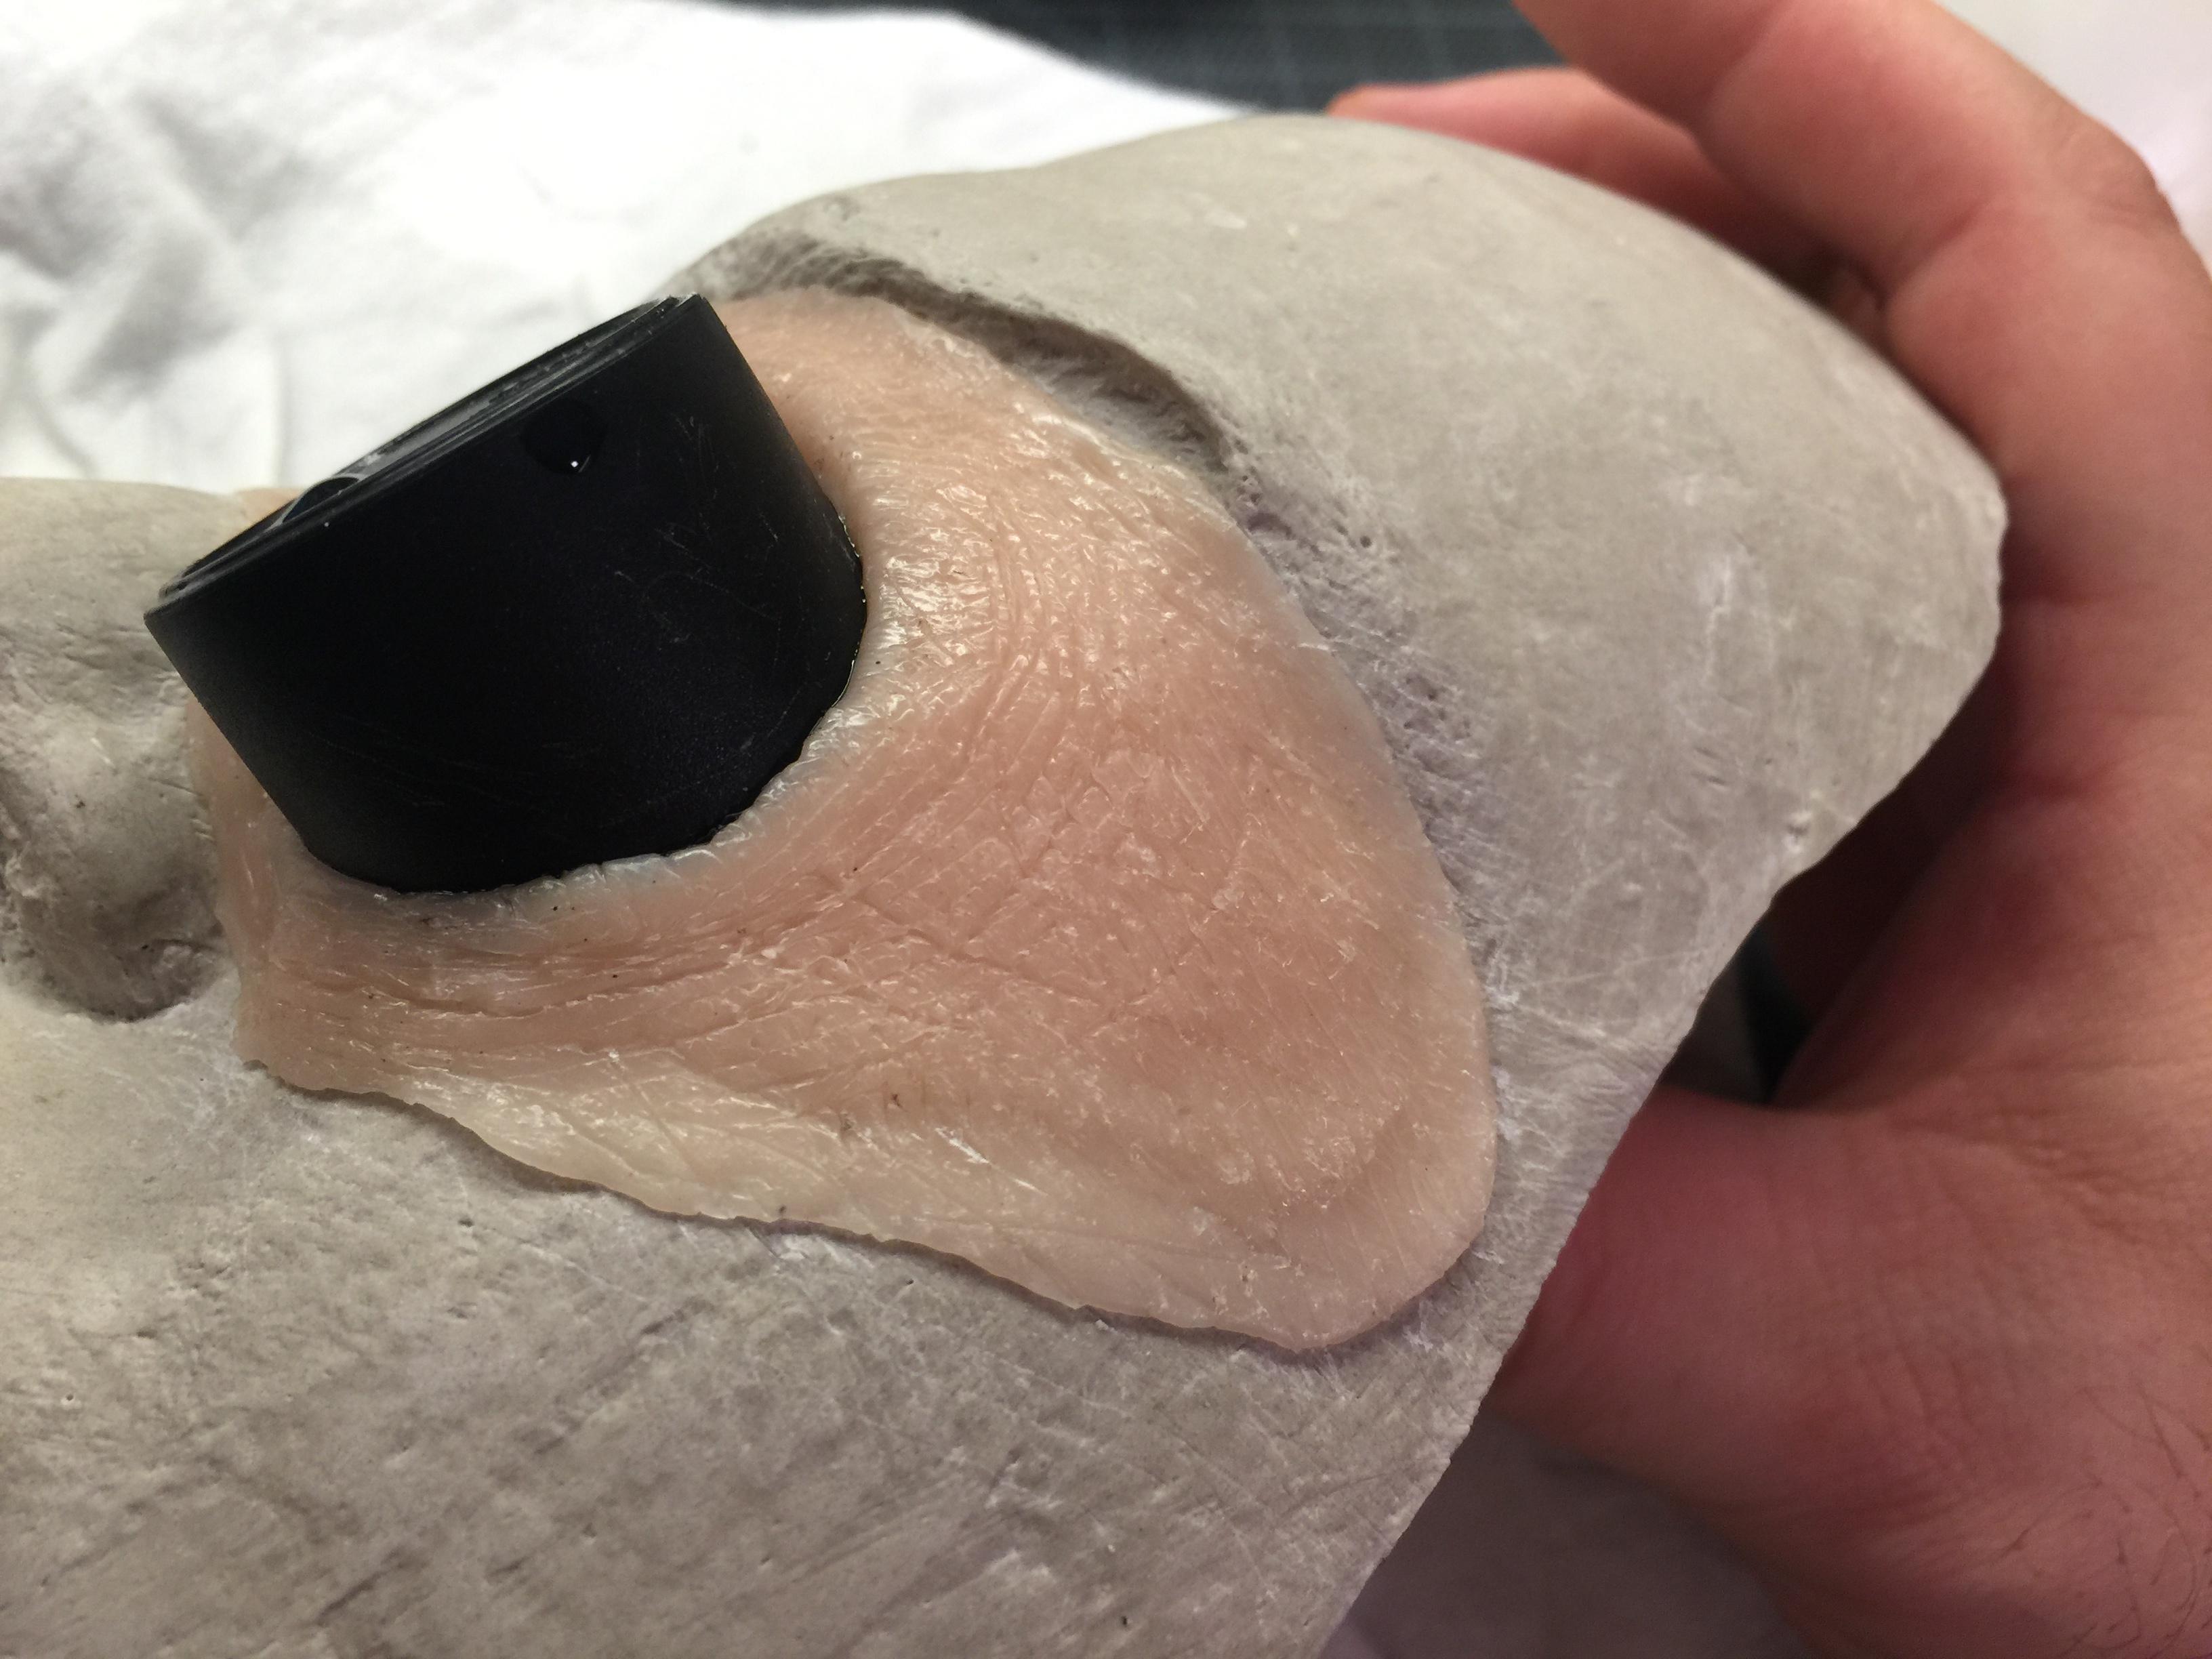
Then I used wax sculpting tools to sculpt in some skin detail. I used 2 techniques for this. Heating the tools with an alcohol lamp, or submerging the appliance in hot water to soften the material and then sculpting with a cold tool.
Thanks to Don Lanning's "power of the X" I was able to get a pretty reasonable skin texture in this rather unusual sculpting medium.


Next I'll be working on the metal spikes. For those I plan to use Magic Sculpt epoxy to give them a bit of a railroad spike appearance. Then it's a matter of making it so he can see out of the spikes (while making them look solid), and then it's on to paint.
I'll post more updates as this project continues.
/Chris
I have a client that wants a character makeup and prosthetics designed with the following requirements:
- He needs to be able to self-apply the appliance.
- For budget reasons he needs to remove and re-use the same appliance for multiple events. This mens durable edges.
- The appliance needs to be strong enough to support the weight of metal-looking spikes coming out of the eye sockets. For budget and time reasons this needs to be done all in a single piece, rather than having a rigid support structure that is covered by a more traditional appliance.
- The spikes should be removable so he can see to apply the makeup.

To start this project we first took an ultracal lifecast that we had for the client and some plastic canisters that matched the desired diameter for the metal spikes. The canisters were then ground down to match the contours of his face so they would properly sit over the eyes.

Next I took some InstaMorph and heated it up using an electric pot that was originally designed to heat wax for hair removal. This is a great tool for working with gelatin, which is why I originally got it. On its max setting it reaches temperatures between 145f and 150f which is perfect for this brand of thermoplastic.

InstaMorph (like most thermoplastics) is white when cooled, and clear when heated. For this project I wanted to have a nice neutral (but slightly light) skin tone as a base. InstaMorph sells tiny pigment pellets that are really inexpensive, and go a long way. For this batch I used 1 red pellet, 2 yellow pellets, and 1/2 blue pellet. (roughly) The red and yellow make a good skin tone (when combined with the natural white color of the material when cooled) and the blue darkens it slightly and dampens the red.

Next I took the melted plastic and applied it to the lifecast, carefully shaping it into a mask. The canisters were then pressed into place while the material was still soft.
We then did a quick test fit to make sure everything was lining up properly. Here you can see how I picked a color that was a bit lighter than his skin tone. This will give me some room to build up layers of color with alcohol activated makeup later.

Next I used an alcohol lamp and a metal wax sculpting tool to carefully carve out holes for the canisters.

Then, with the canisters in place, I built up some material on the inside that will help attach them to the appliance.

From here I refined the shape, removed as much material as possible (leaving just enough edge to glue the appliance down), and thinned out the blending edges.
Then I used wax sculpting tools to sculpt in some skin detail. I used 2 techniques for this. Heating the tools with an alcohol lamp, or submerging the appliance in hot water to soften the material and then sculpting with a cold tool.
Thanks to Don Lanning's "power of the X" I was able to get a pretty reasonable skin texture in this rather unusual sculpting medium.


Next I'll be working on the metal spikes. For those I plan to use Magic Sculpt epoxy to give them a bit of a railroad spike appearance. Then it's a matter of making it so he can see out of the spikes (while making them look solid), and then it's on to paint.
I'll post more updates as this project continues.
/Chris
0
Comments
A couple of other mediums you can use are Worbla and Wonderflex. And even PVC pipe that has been flattened and heated with a heat gun.
Personally I make a lot of things out of inexpensive PVC pipe and a heat gun..
This is a battery powered air gun for use when people are in costumes and need a cool down. You can stick the nozzle either in the characters mouth or wherever you need access to the actor.
http://www.marcwolf.org/gallery/?moid=1751
It's all made from PVC tubing heated and shaped.
/Chris