half size T-Rex Head display
Greetings from the UK.
I began this project last year. It was made for my amazing girl friend who is a photographer, the idea was to have a Jurassic Park style portrait for kids at Malls, Events, comic-cons etc etc
Final pics of what it was used and intended for will be the last picture.
Sadly due to time and life getting in the way, we had to close its operation down.
Anyhow, originally it was made using Pepakura for the base - blown up an approximate scale - a Huge thanks to the inventor of the Hot Glue Gun - this project would not have been possible without you.
A 3d model was found online and modified to suit what i needed.

Sizing..No an exact science..
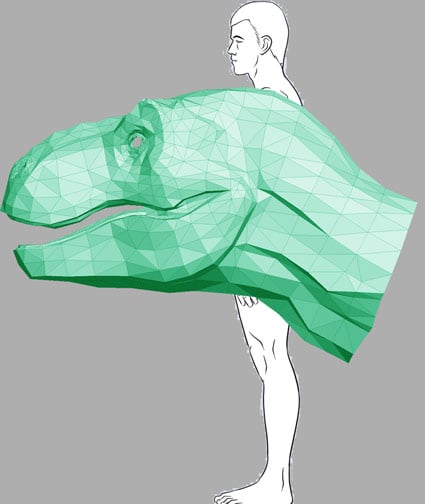
A3 printers are your best friend!..
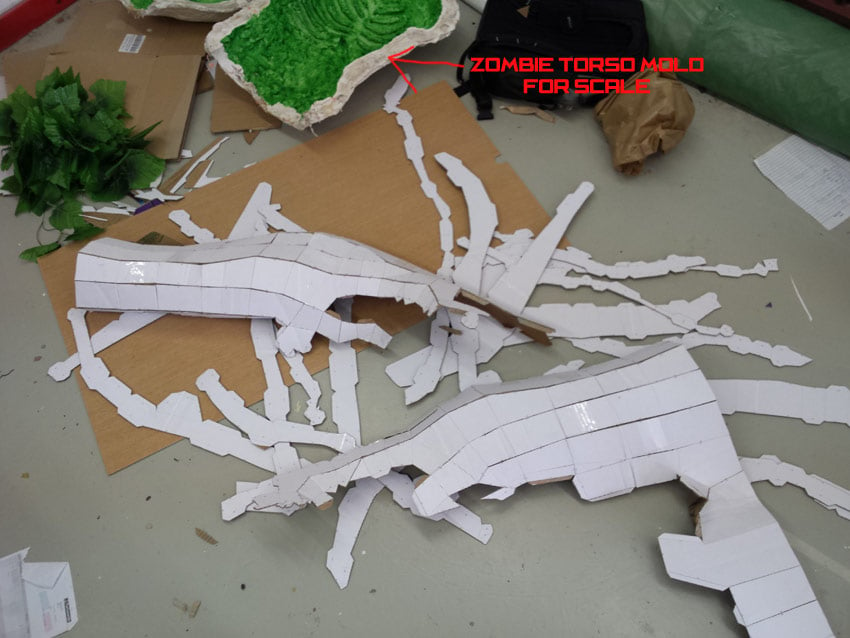
Thick Cardboard, Scissors and ExactO Blades on the other hand are not..
Notice the Zombie torso mold as a scale reference.

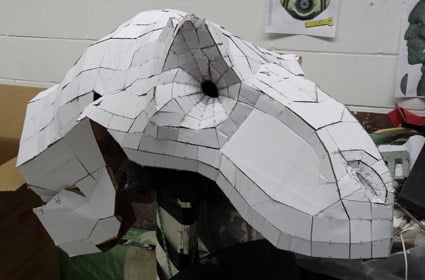
I swear there's an office chair around here...
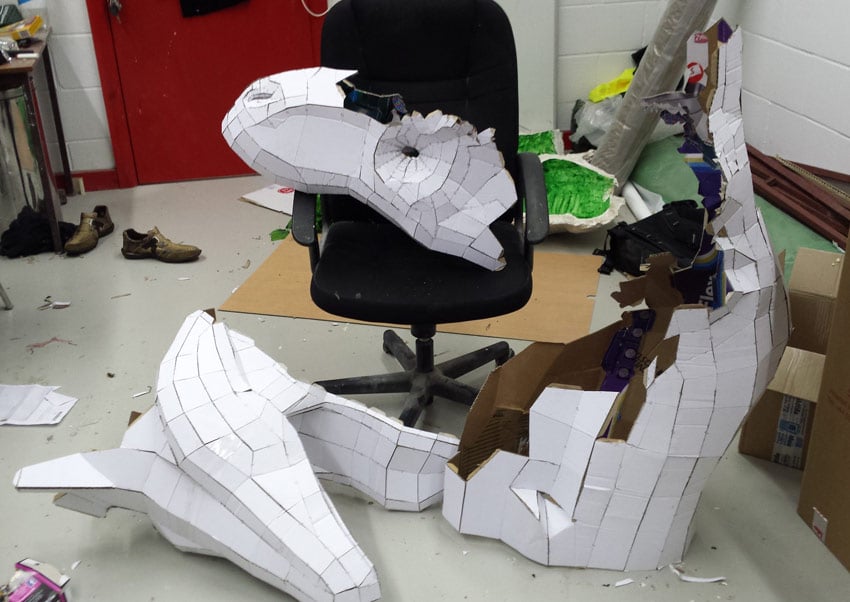
Finished.. kinda.. now to add some Rigid foam!
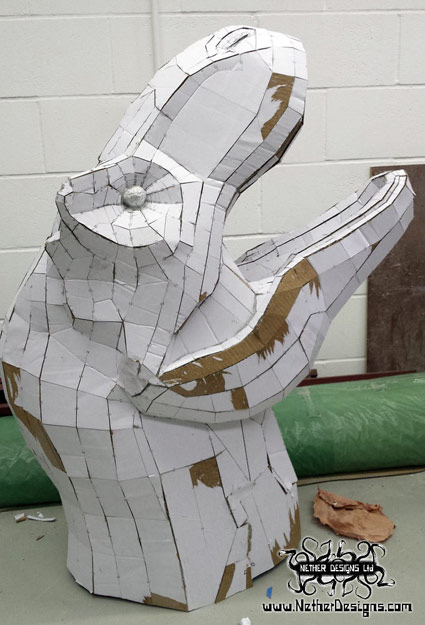

And once set Remove all that cardboard.. Yes this did take a while.. Urethane foam is quite good at coating the cardboard ,; meaning the idea of using water to.."Peel" the cardboard off did not go quite ( at all) to plan. sanded to remove sharp edges.
Covered in 5mm thick foam.

In the background is my projector which i used for reference of the Dinosaur's features and crudely drew them on.

Added More foam for details - Thanks to Ted Haines's tutorials.


After much foaming fun - and not wanting to set of the fire alarms in the building, instead of using a soldering iron to burn in details, I patterned sections of the Trex using plastic and followed the lines i drew earlier and laid them flat, rolled out some Water clay and began to sculpt some skin texture - the little bumps are in fact Polystyrene balls pushed into the clay.. worked like a charm. This was then Crystacal R (plaster/stone) molded and later cast in latex.
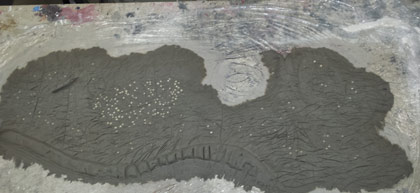
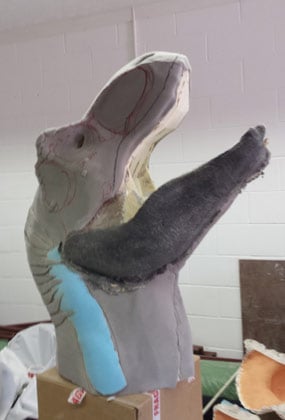
You can't tell on the above pic but the black jaw was a test as it looks a little too Alligator in texture.
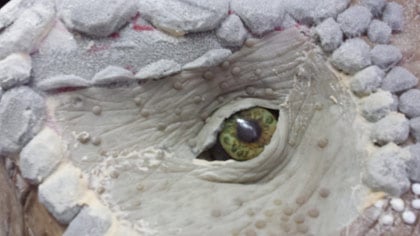

Same was done for the eye socked. the face, jaw, and neck. i did cheat and used the neck for the top and back of the head.

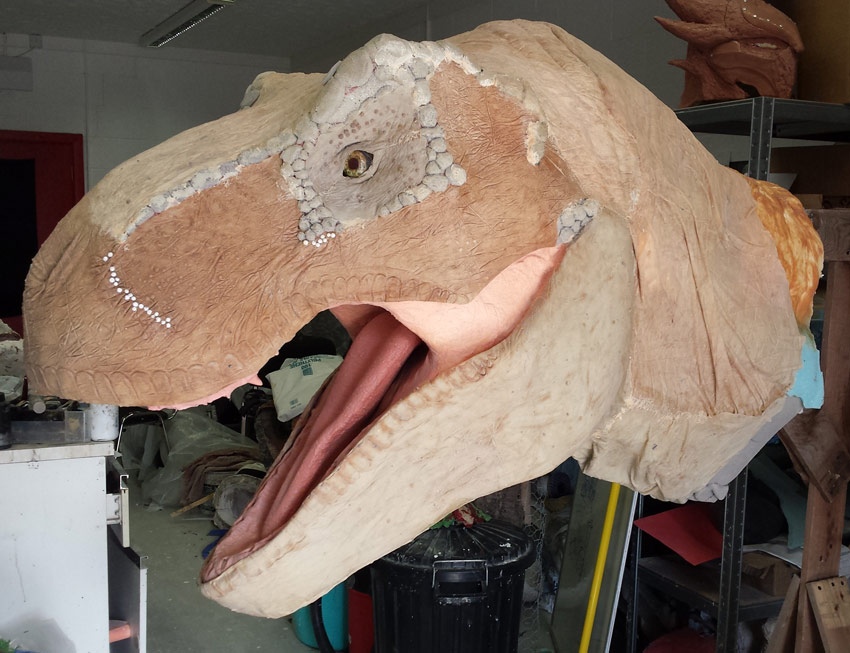
Added some more foam lumps for good measure.
The eye was made using Crystal Clear acrylic, and a printed pupil .. i pour the final eye into...
Easter Egg packaging. worked like a charm.

At this point i sculpted and molded some teeth and cast those in the same Rigid Foam and just cut the bottoms to size.
The inside of the mouth was patterned and sculpted the same as the skin and made plugs for the teeth in the clay.

Base base base base..

More paint!
I began this project last year. It was made for my amazing girl friend who is a photographer, the idea was to have a Jurassic Park style portrait for kids at Malls, Events, comic-cons etc etc
Final pics of what it was used and intended for will be the last picture.
Sadly due to time and life getting in the way, we had to close its operation down.
Anyhow, originally it was made using Pepakura for the base - blown up an approximate scale - a Huge thanks to the inventor of the Hot Glue Gun - this project would not have been possible without you.
A 3d model was found online and modified to suit what i needed.

Sizing..No an exact science..

A3 printers are your best friend!..
Thick Cardboard, Scissors and ExactO Blades on the other hand are not..
Notice the Zombie torso mold as a scale reference.


I swear there's an office chair around here...

Finished.. kinda.. now to add some Rigid foam!


And once set Remove all that cardboard.. Yes this did take a while.. Urethane foam is quite good at coating the cardboard ,; meaning the idea of using water to.."Peel" the cardboard off did not go quite ( at all) to plan. sanded to remove sharp edges.
Covered in 5mm thick foam.

In the background is my projector which i used for reference of the Dinosaur's features and crudely drew them on.

Added More foam for details - Thanks to Ted Haines's tutorials.


After much foaming fun - and not wanting to set of the fire alarms in the building, instead of using a soldering iron to burn in details, I patterned sections of the Trex using plastic and followed the lines i drew earlier and laid them flat, rolled out some Water clay and began to sculpt some skin texture - the little bumps are in fact Polystyrene balls pushed into the clay.. worked like a charm. This was then Crystacal R (plaster/stone) molded and later cast in latex.


You can't tell on the above pic but the black jaw was a test as it looks a little too Alligator in texture.


Same was done for the eye socked. the face, jaw, and neck. i did cheat and used the neck for the top and back of the head.


Added some more foam lumps for good measure.
The eye was made using Crystal Clear acrylic, and a printed pupil .. i pour the final eye into...
Easter Egg packaging. worked like a charm.

At this point i sculpted and molded some teeth and cast those in the same Rigid Foam and just cut the bottoms to size.
The inside of the mouth was patterned and sculpted the same as the skin and made plugs for the teeth in the clay.

Base base base base..

More paint!

MORE POWER

Hang on. Forgot a tongue!
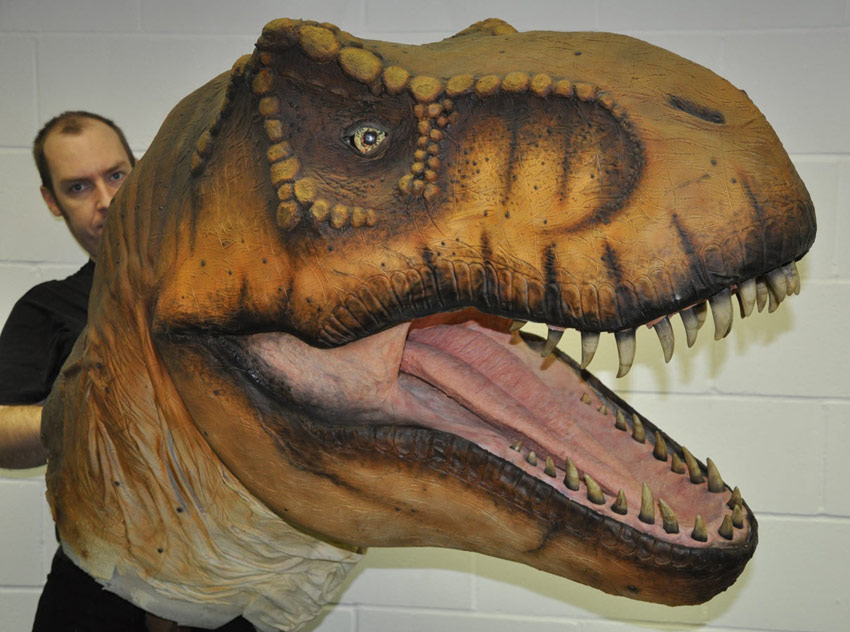
He's a little heavy... so is the Trex head..
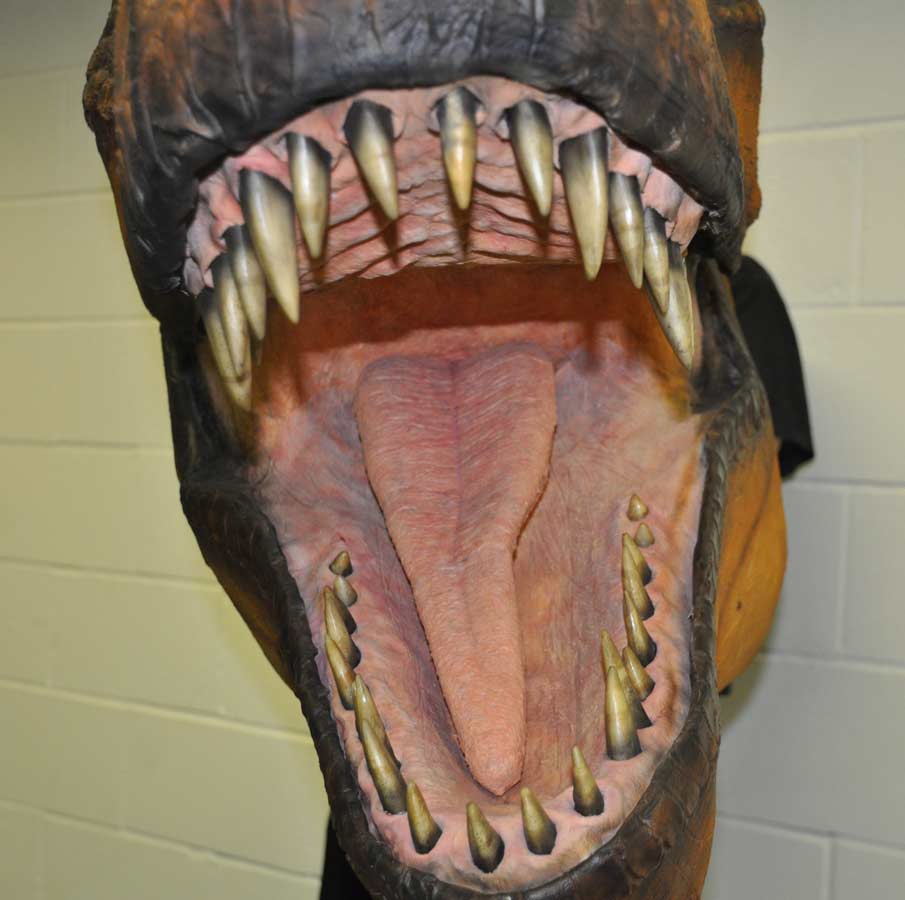
And this is what "winston" was created for. It was an awesome adventure making him so my gf could have a photography business. Right now he is living in the Garage.
T
Hope you've all enjoy the pictures
Joe
- Nether Designs.
0
Comments
My email: artur2012_8@hotmail.com
Thks!