Best Of
Re: What's On Your Workbench? (Summer 2026)
Hey everyone,
Firstly, thank you @Chris Ellerby for starting this thread and for giving us artists a place to showcase our work. It's greatly appreciated dude!")
So, I've been working on this particular model for months, but with extremely long breaks inbetween. So I haven't gotten very far with it at all. But slow progress is always better than no progress!
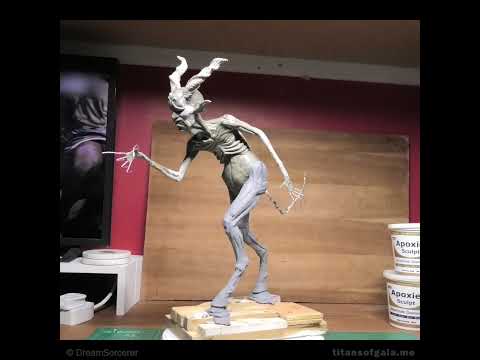
I've created a fictional world called 'Titans of Gaia' which I started in 2025 and it's an ongoing project. I'm telling my story through illustration and sculpture. This is actually just one of several characters I've made and about to make.
This character is the main villain, and although it's incomplete at this time, I wanted to show you how far I've come so far. (It's only 74 seconds long)
 https://www.youtube.com/watch?v=SCab3A20IUk
Materials used: Galvanised steel wire, Wood, K&S Square brass tubes, Apoxie Sculpt, Super Sculpey and Sculpey Firm.
I will post update videos now and again!
Best wishes and stay awesome!
© DreamSorcerer
Firstly, thank you @Chris Ellerby for starting this thread and for giving us artists a place to showcase our work. It's greatly appreciated dude!
So, I've been working on this particular model for months, but with extremely long breaks inbetween. So I haven't gotten very far with it at all. But slow progress is always better than no progress!
I've created a fictional world called 'Titans of Gaia' which I started in 2025 and it's an ongoing project. I'm telling my story through illustration and sculpture. This is actually just one of several characters I've made and about to make.
This character is the main villain, and although it's incomplete at this time, I wanted to show you how far I've come so far. (It's only 74 seconds long)
https://www.youtube.com/watch?v=SCab3A20IUkMaterials used: Galvanised steel wire, Wood, K&S Square brass tubes, Apoxie Sculpt, Super Sculpey and Sculpey Firm.
I will post update videos now and again!
Best wishes and stay awesome!
© DreamSorcerer
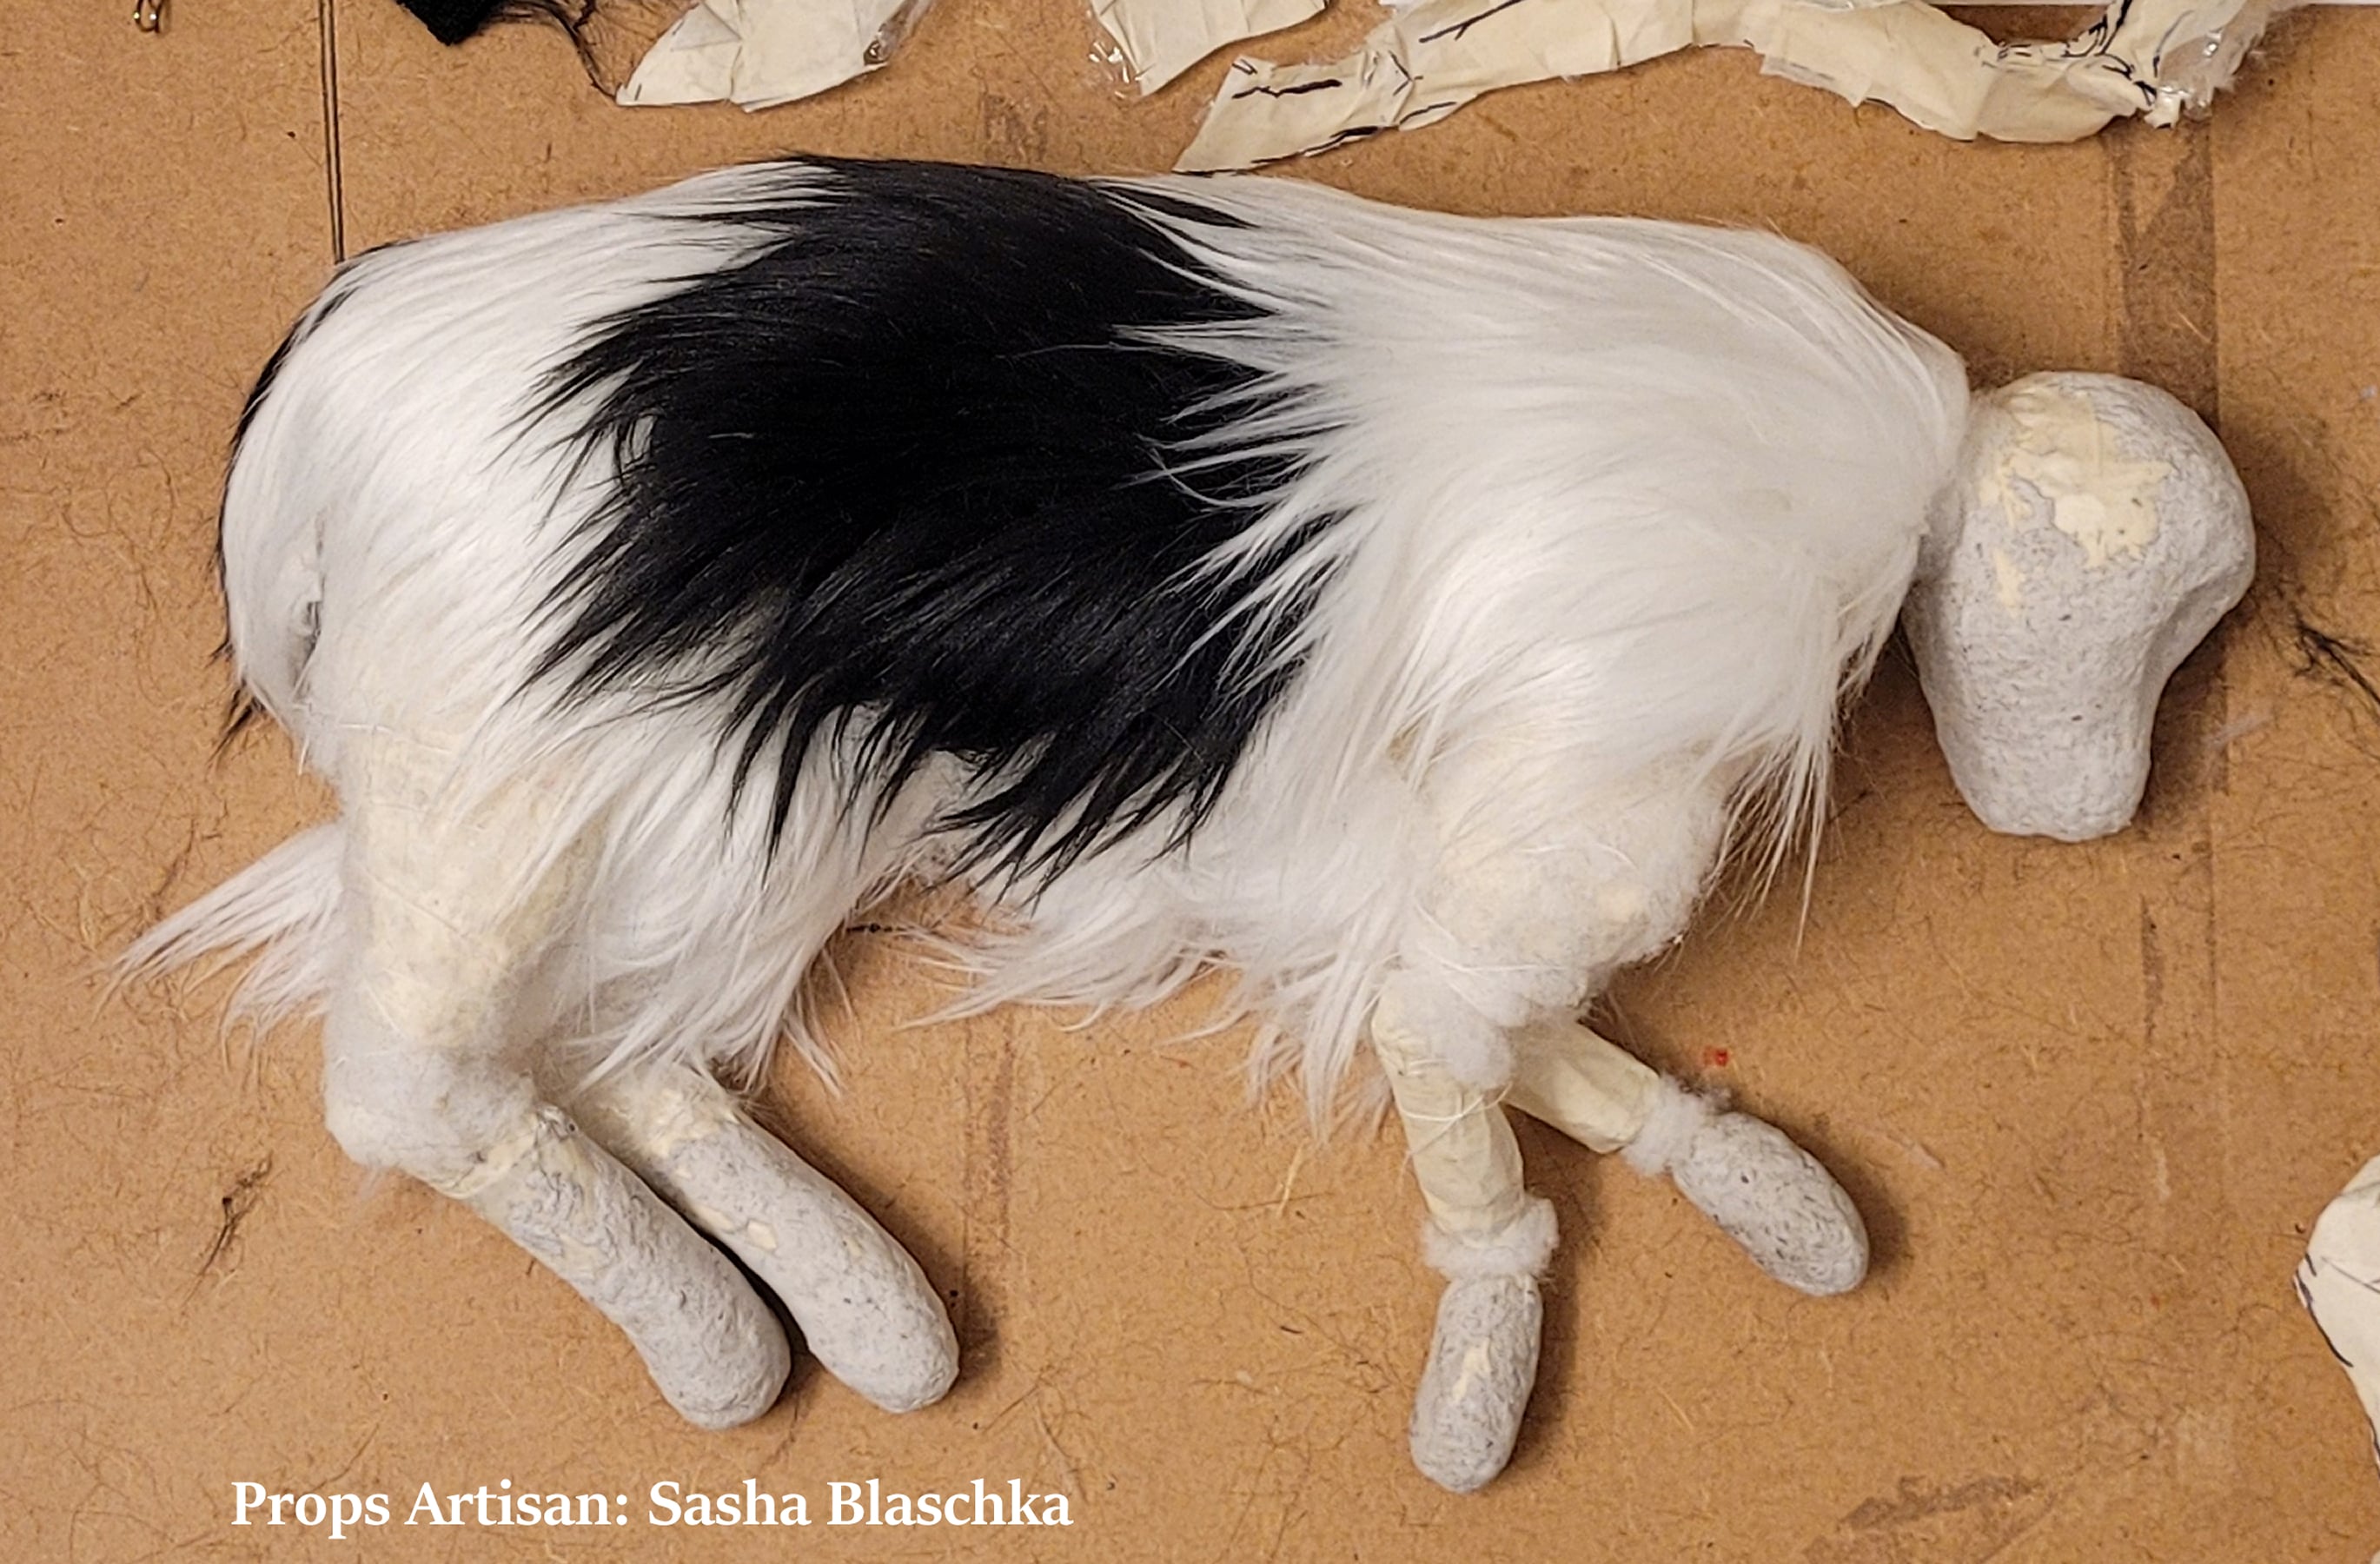
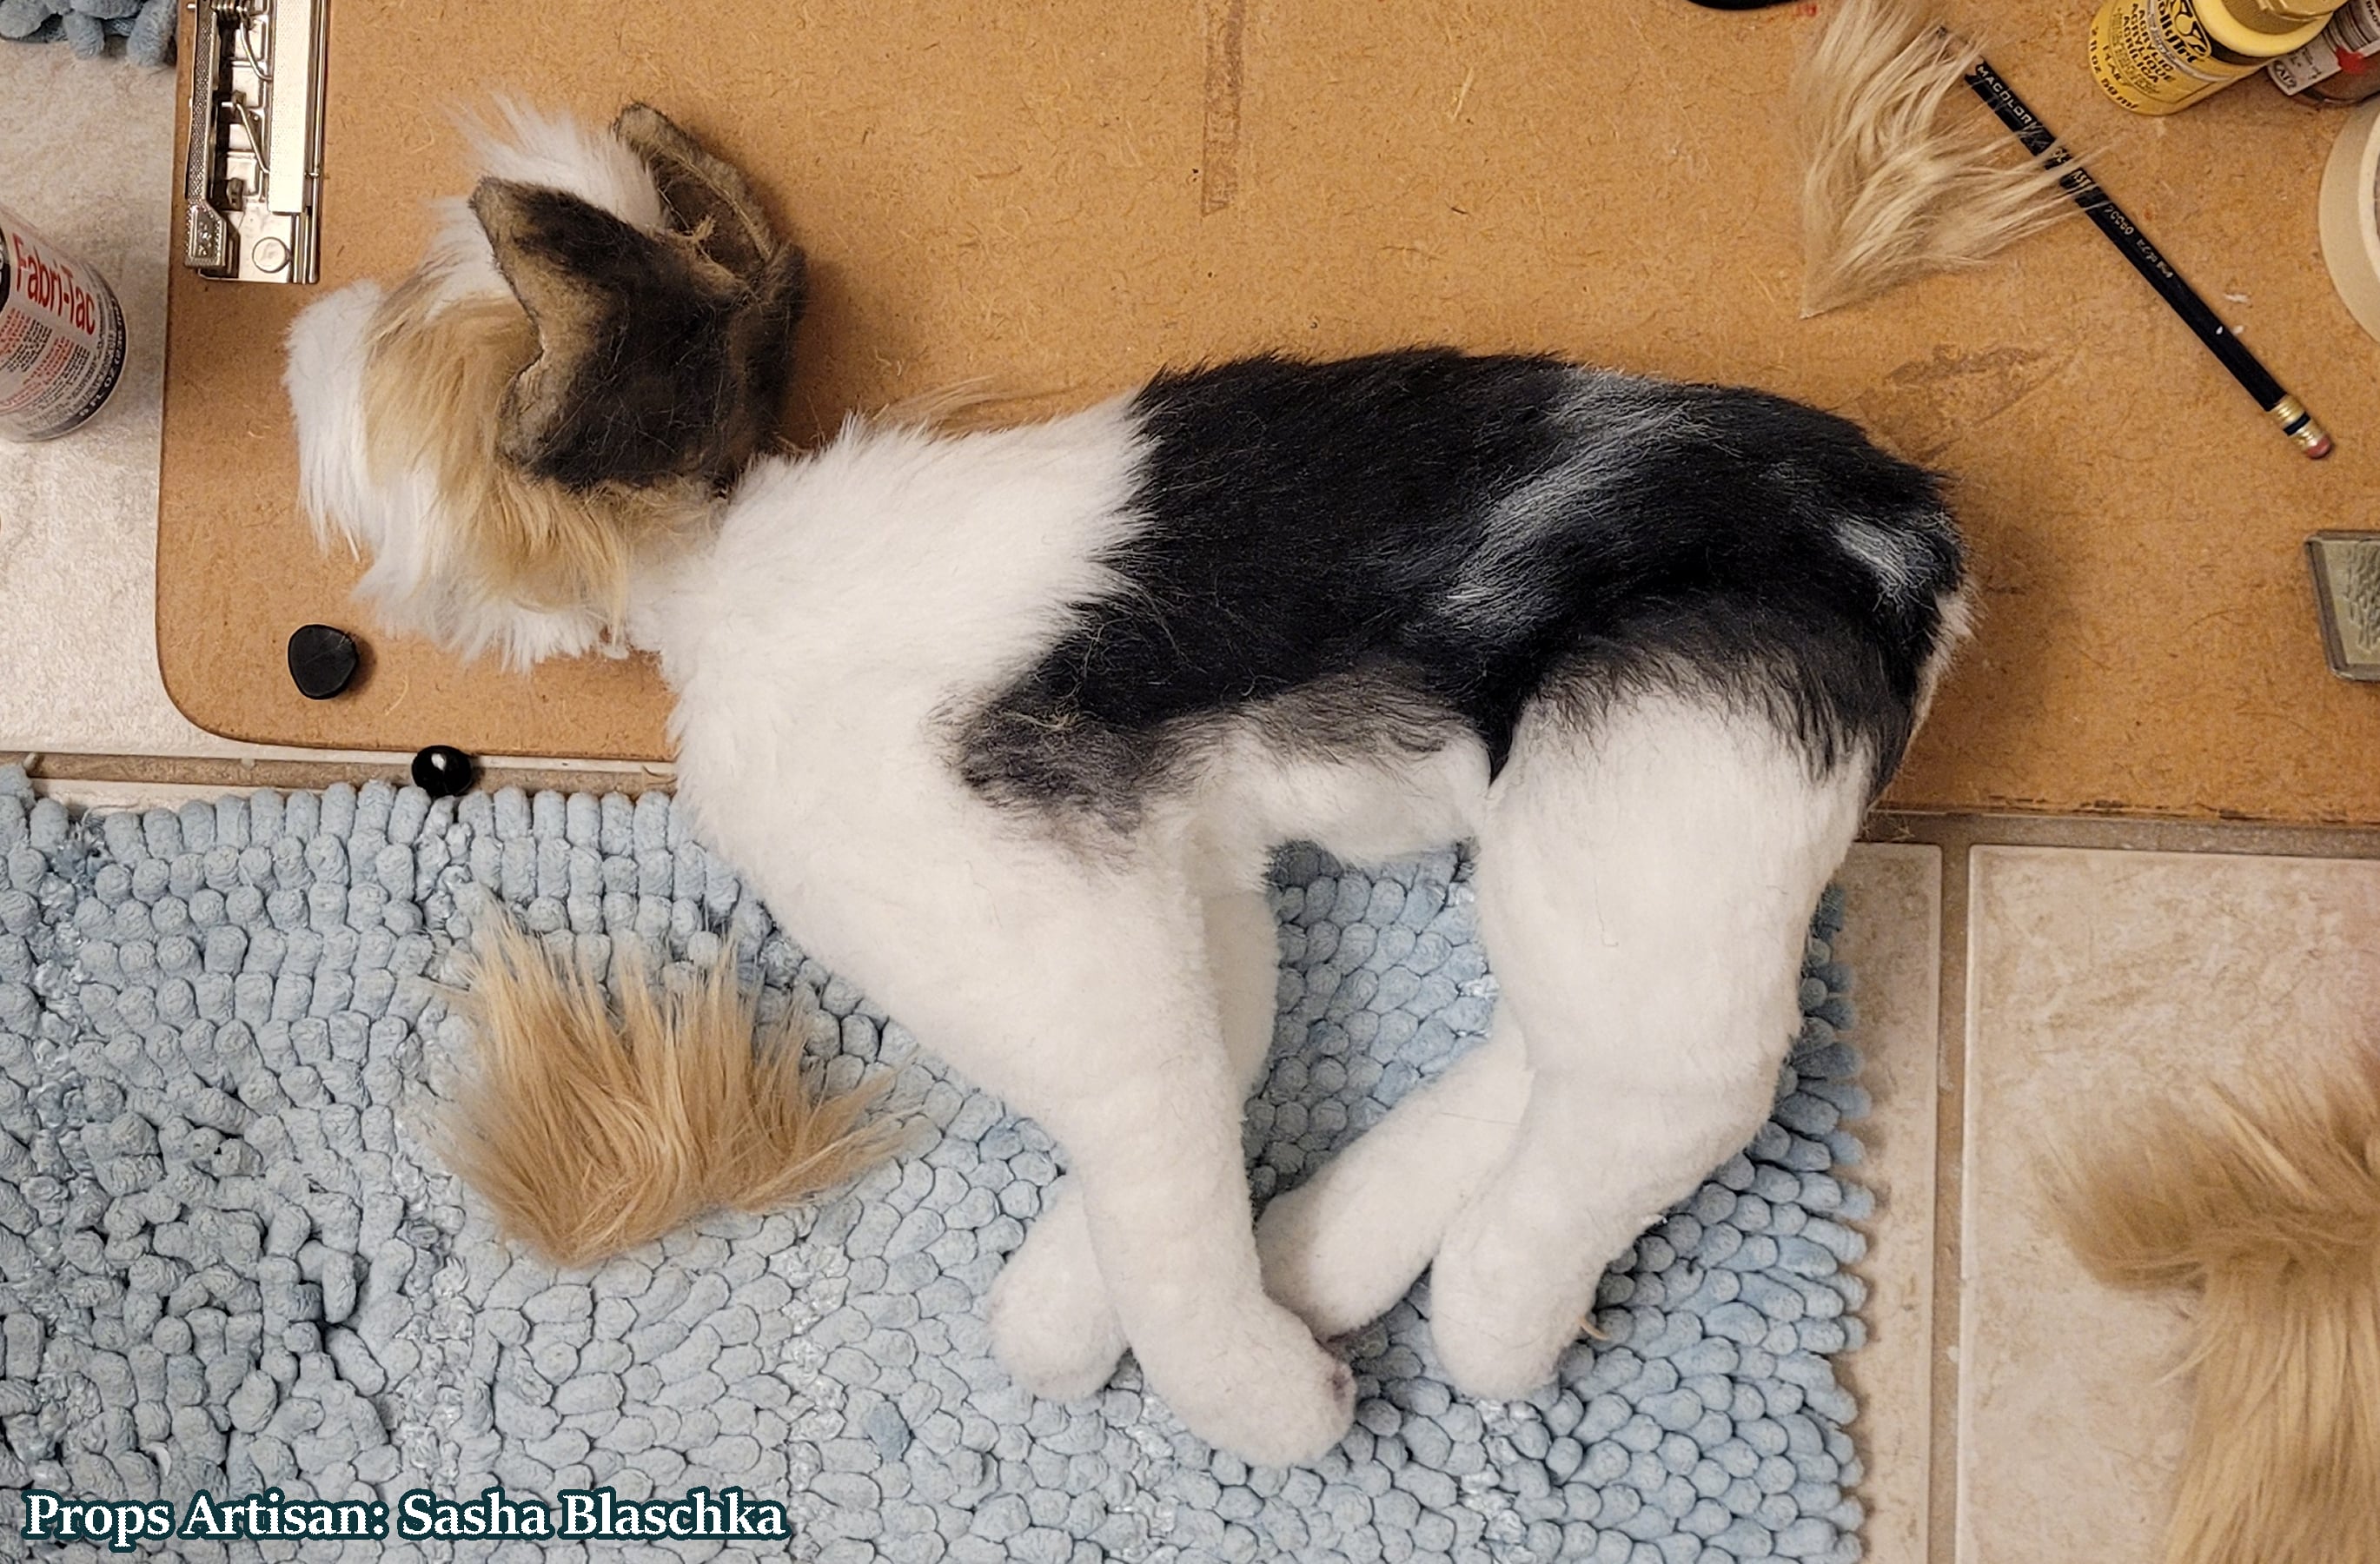
Dead Dog Prop (Theatre - Of Mice & Men)
I recently had the bittersweet pleasure of crafting a (dead) puppy for Houston Grand Opera's production of "Of Mice & Men". 🥀
Handmade. 🙌 Materials: paper, tape, rope, quilt batting, faux fur, felt, glass cabochons, and a lil' polymer clay nose.

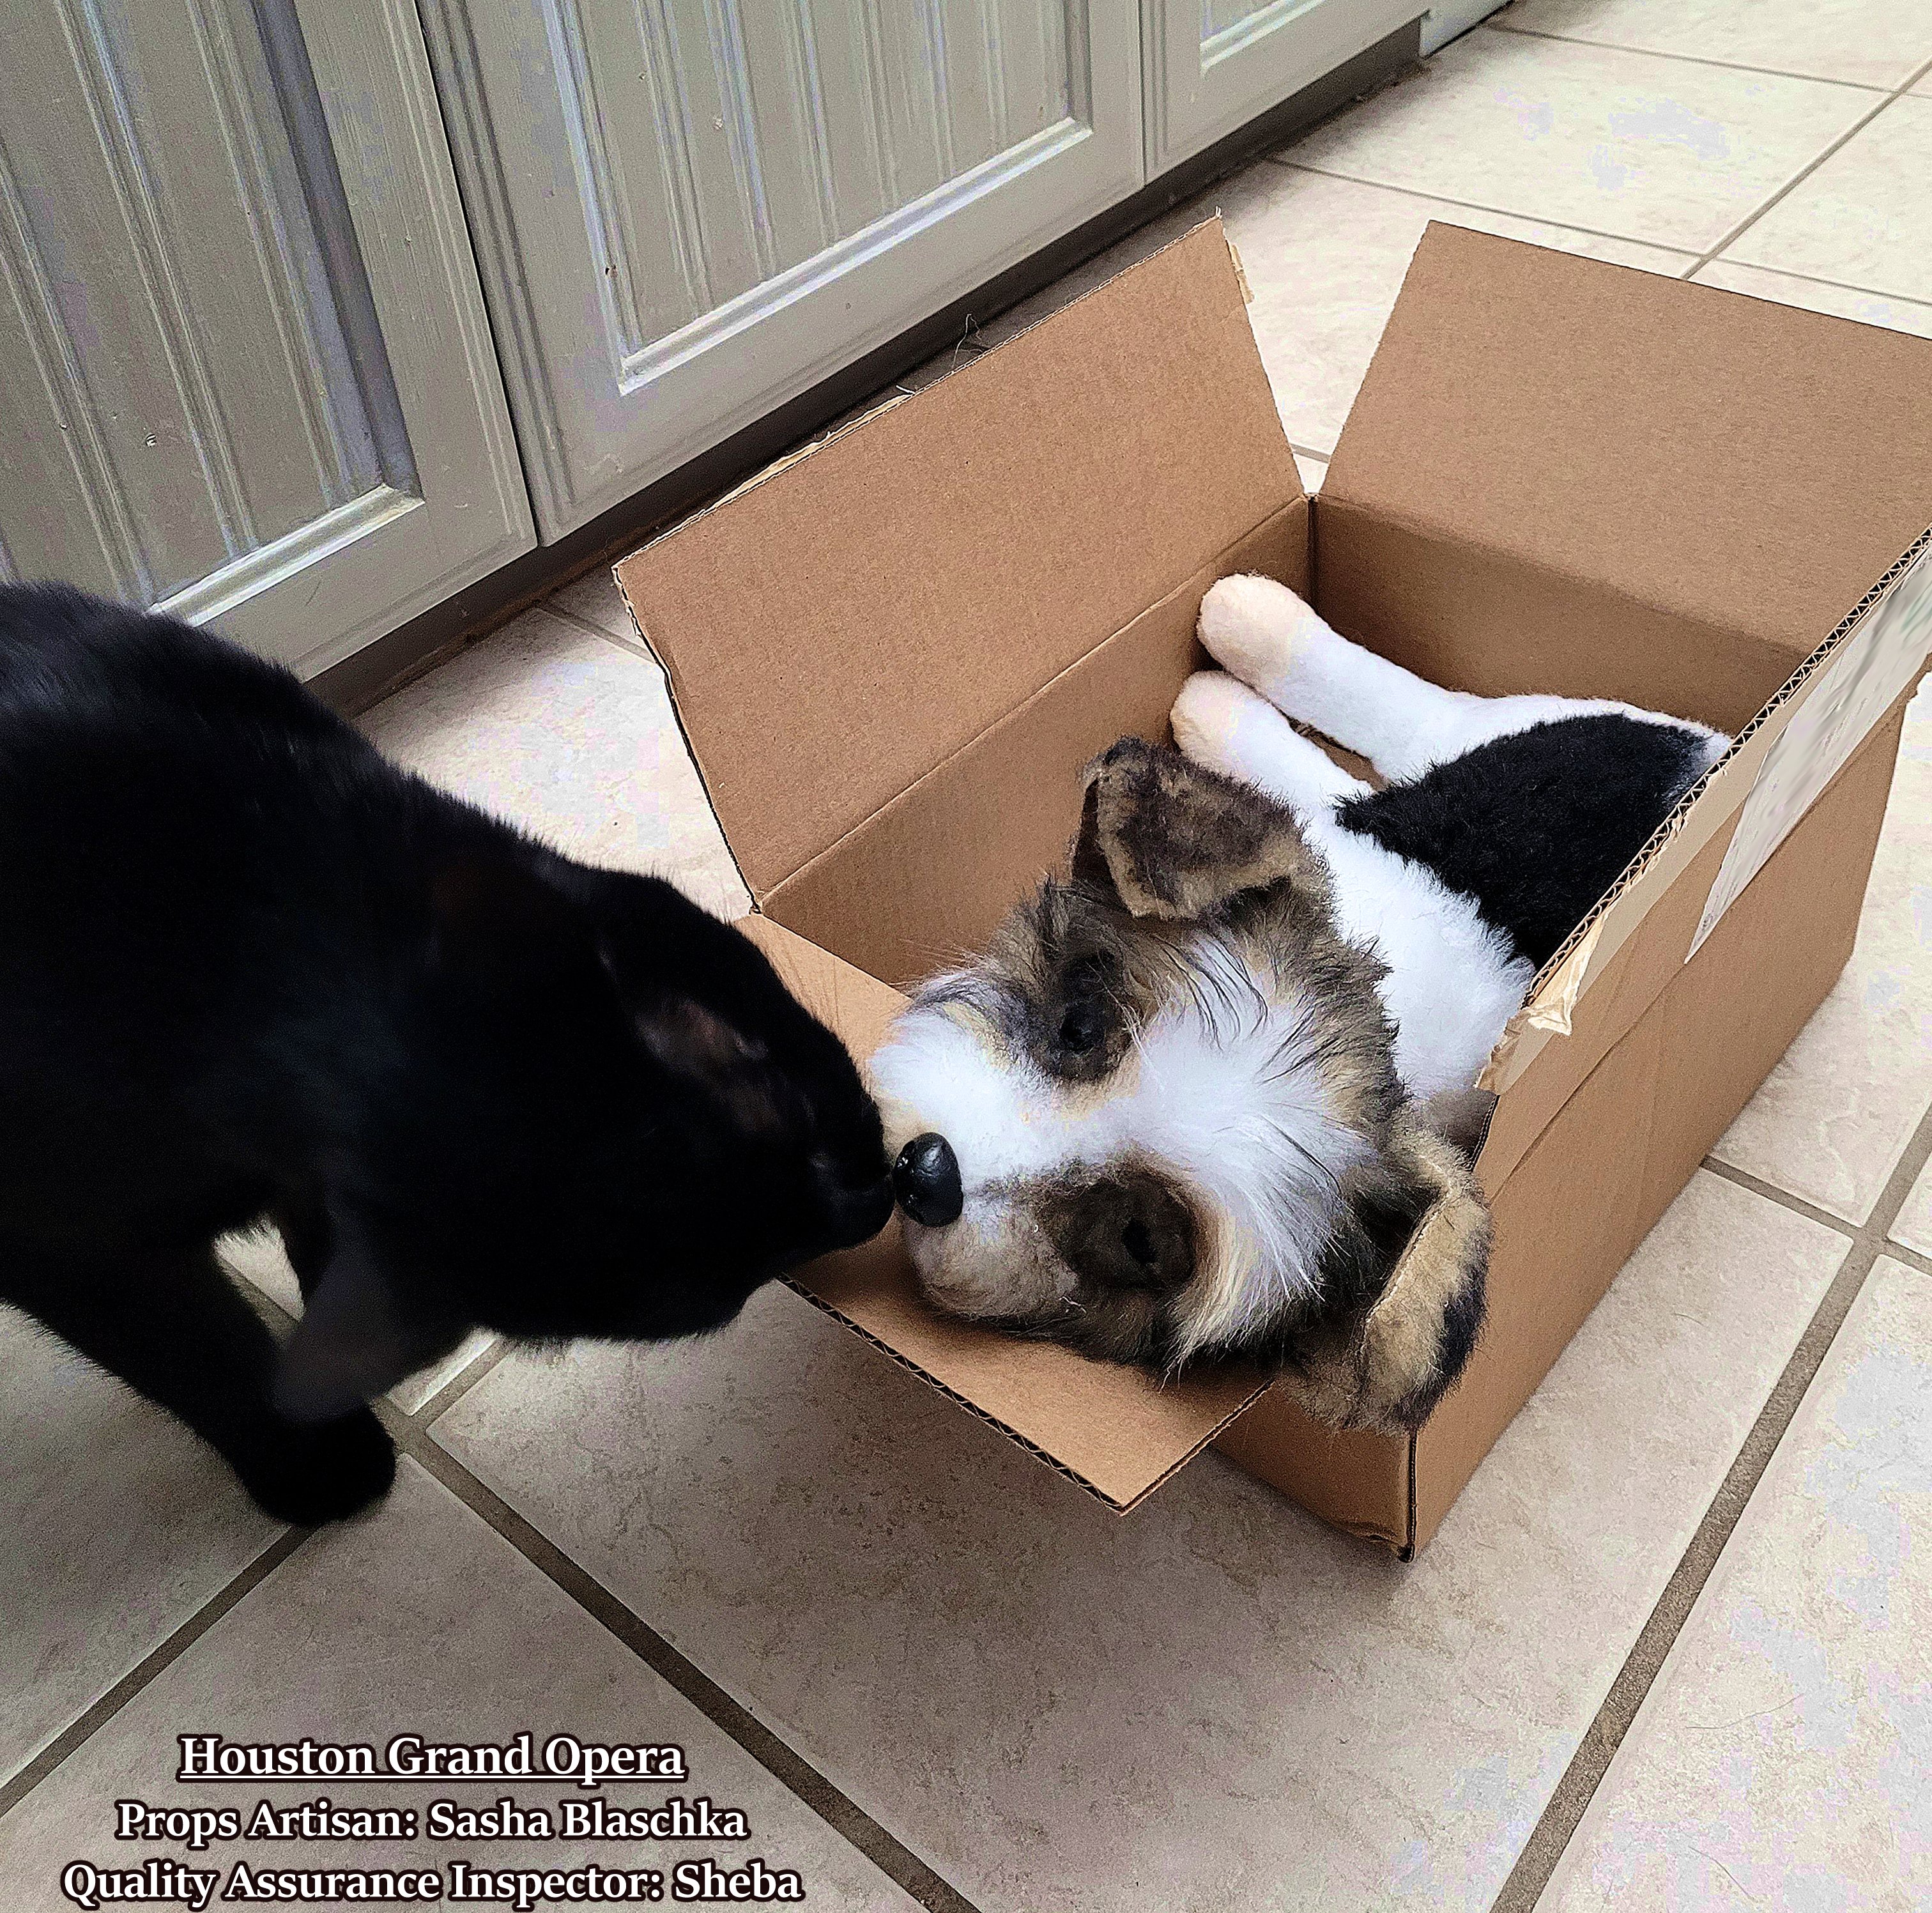
vvvv - Some Progress photos! - vvvv


Re: Icing Recipe for a Foam Cake
Hey there! This is a belated post (sorry!), but you can totally mix craft acrylics, pastel, etc into 100% clear silicone (like the type used for tub & tile) for colored frosting! I keep this little swatch I made years ago comparing different add-ins to silicone.
Of course the appearance depends on how the silicone is applied... some of these look kinda boogery, haha! The ones on the end look more frosting-like, though.
Just a future reference for anyone who needs to make flexible-type frosting or a similar consistency with color.

Of course the appearance depends on how the silicone is applied... some of these look kinda boogery, haha! The ones on the end look more frosting-like, though.
Just a future reference for anyone who needs to make flexible-type frosting or a similar consistency with color.
Re: My clay keeps cracking and not sticking together, help please
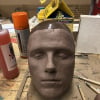
Hi there! Is there an armature underneath? I see a bit of wire for the lower jaw, but for Sculpey you really want to use a thinner layer (even an inch thickness is too much), as it's heavy and it will also crack again if you ever cure/bake it.
Sculpey is much much softer than Monster Clay. It looks like the weight of the clay is making it fall/tear over time. I would make sure that most of the sculpture is some other material, (like aluminum foil etc), and then layer the Sculpey over it. Think of it like a skeleton! The armature is the skeleton/muscles, and the clay is the skin.
Sculpey is much much softer than Monster Clay. It looks like the weight of the clay is making it fall/tear over time. I would make sure that most of the sculpture is some other material, (like aluminum foil etc), and then layer the Sculpey over it. Think of it like a skeleton! The armature is the skeleton/muscles, and the clay is the skin.
Re: Prop of a stump
There are 3 main parts to this: the harness, the prosthetic stump, and the wardrobe.
The harness would be similar to a corset; either laced or velcro straps would work, and it does 2 jobs. 1: Helps hold the actor's arm behind their back so they don't have to strain their muscles holding that position manually. 2: Gives you an attachment point for the prosthetic stump.
It's important to work with the actor when designing the harness so you can ensure it both fits properly and that it is able to hold their arm in the desired position without applying too much pressure, cutting off blood flow, or causing discomfort. Every performer will have differing levels of flexibility and tolerance for discomfort. It's also important to design both the harness and the wardrobe so that it is easy to release the actor's arm between takes or setups so they can move around freely, eat, drink, use the restroom, etc.
Finally, the wardrobe helps cover the harness and the point where the prosthetic blends into the body.
How you attach the prosthetic to the harness is up to you. It could be straps, snaps, velcro, etc.
/Chris

Re: Baby Spinosaurus sleeping <3
Wow, that is awesome, especially for your first-ever sculpt! Congrats! I hope you had enough fun to want to keep sculpting more, and if you do, please continue to share your work with us here!
/Chris
/Chris
Baby Spinosaurus sleeping <3
Hey there! I just wanted to share my very first sculpture ever, I wanted to make this as a gift for someone who loves the Jurassic Park 3 Spinosaurus so much and I thought it would be cute to make a juvenile version inspired by the in-game model of Jurassic World Evolution 3.
I know there’s lots of improvement areas to explore, especially in the skin detailing so I’ll get to work more on that by sculpting a dinosaur head next, excited to get started.

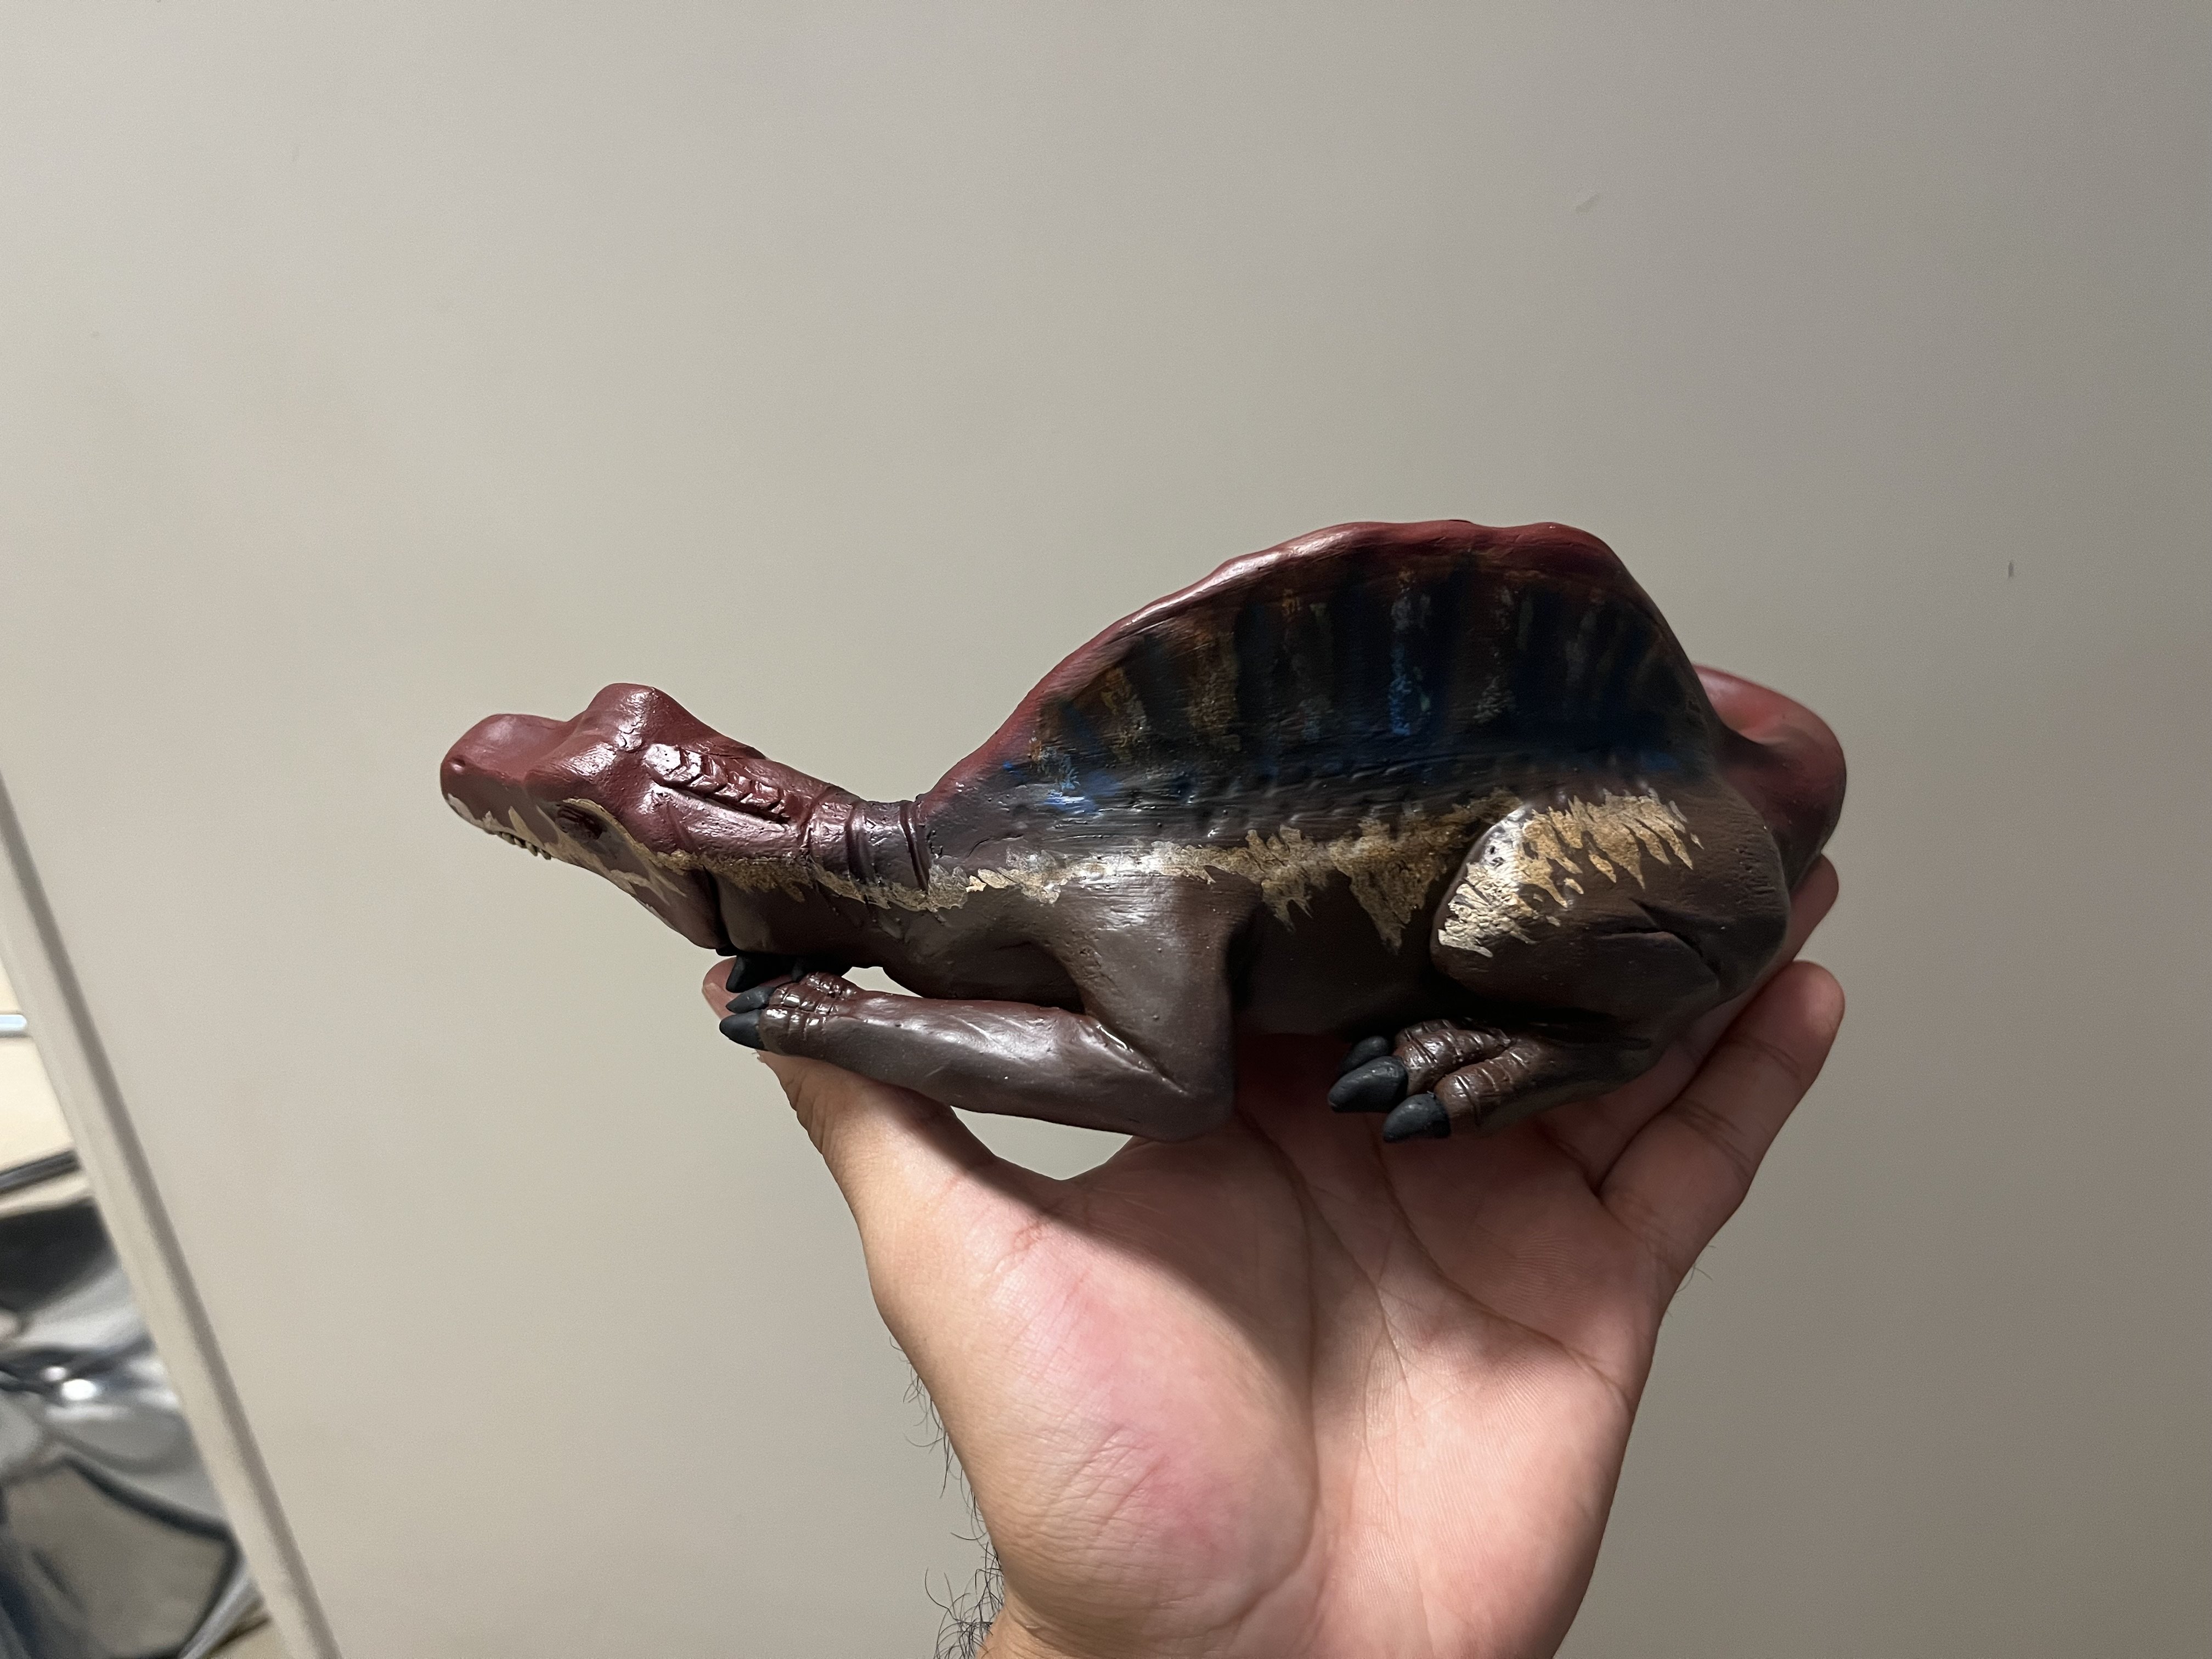
I know there’s lots of improvement areas to explore, especially in the skin detailing so I’ll get to work more on that by sculpting a dinosaur head next, excited to get started.
Re: Icing Recipe for a Foam Cake
Thanks for your suggestion Chris! I reckon a silicone could've worked, though from what I've seen in the past they're a bit of a pain to paint.Chris Ellerby said:My first thought would be to frost it using thickened silicone, which would work almost exactly like regular icing. The challenge would be getting the exact surface finish you want. That could be achieved by using different additives like cabosil, formica powder, etc. You could start with some small test batches to see how the surface finish changes with different combinations and amounts of additives.
/Chris
I ended up "sealing" the iced areas with contact cement, and then using E6000 to cover it. Still not exactly cheap (since the retailer kinda rips you off), and booooooy did my place smell real bad for a while - but, it's extremely flexible with no apparent creasing or cracking, and simple acrylic paints can be painted on and remain flexible. Alas, I didn't take any pictures before dropping it off to the theatre.

Re: What's On Your Workbench? (Spring 2026)
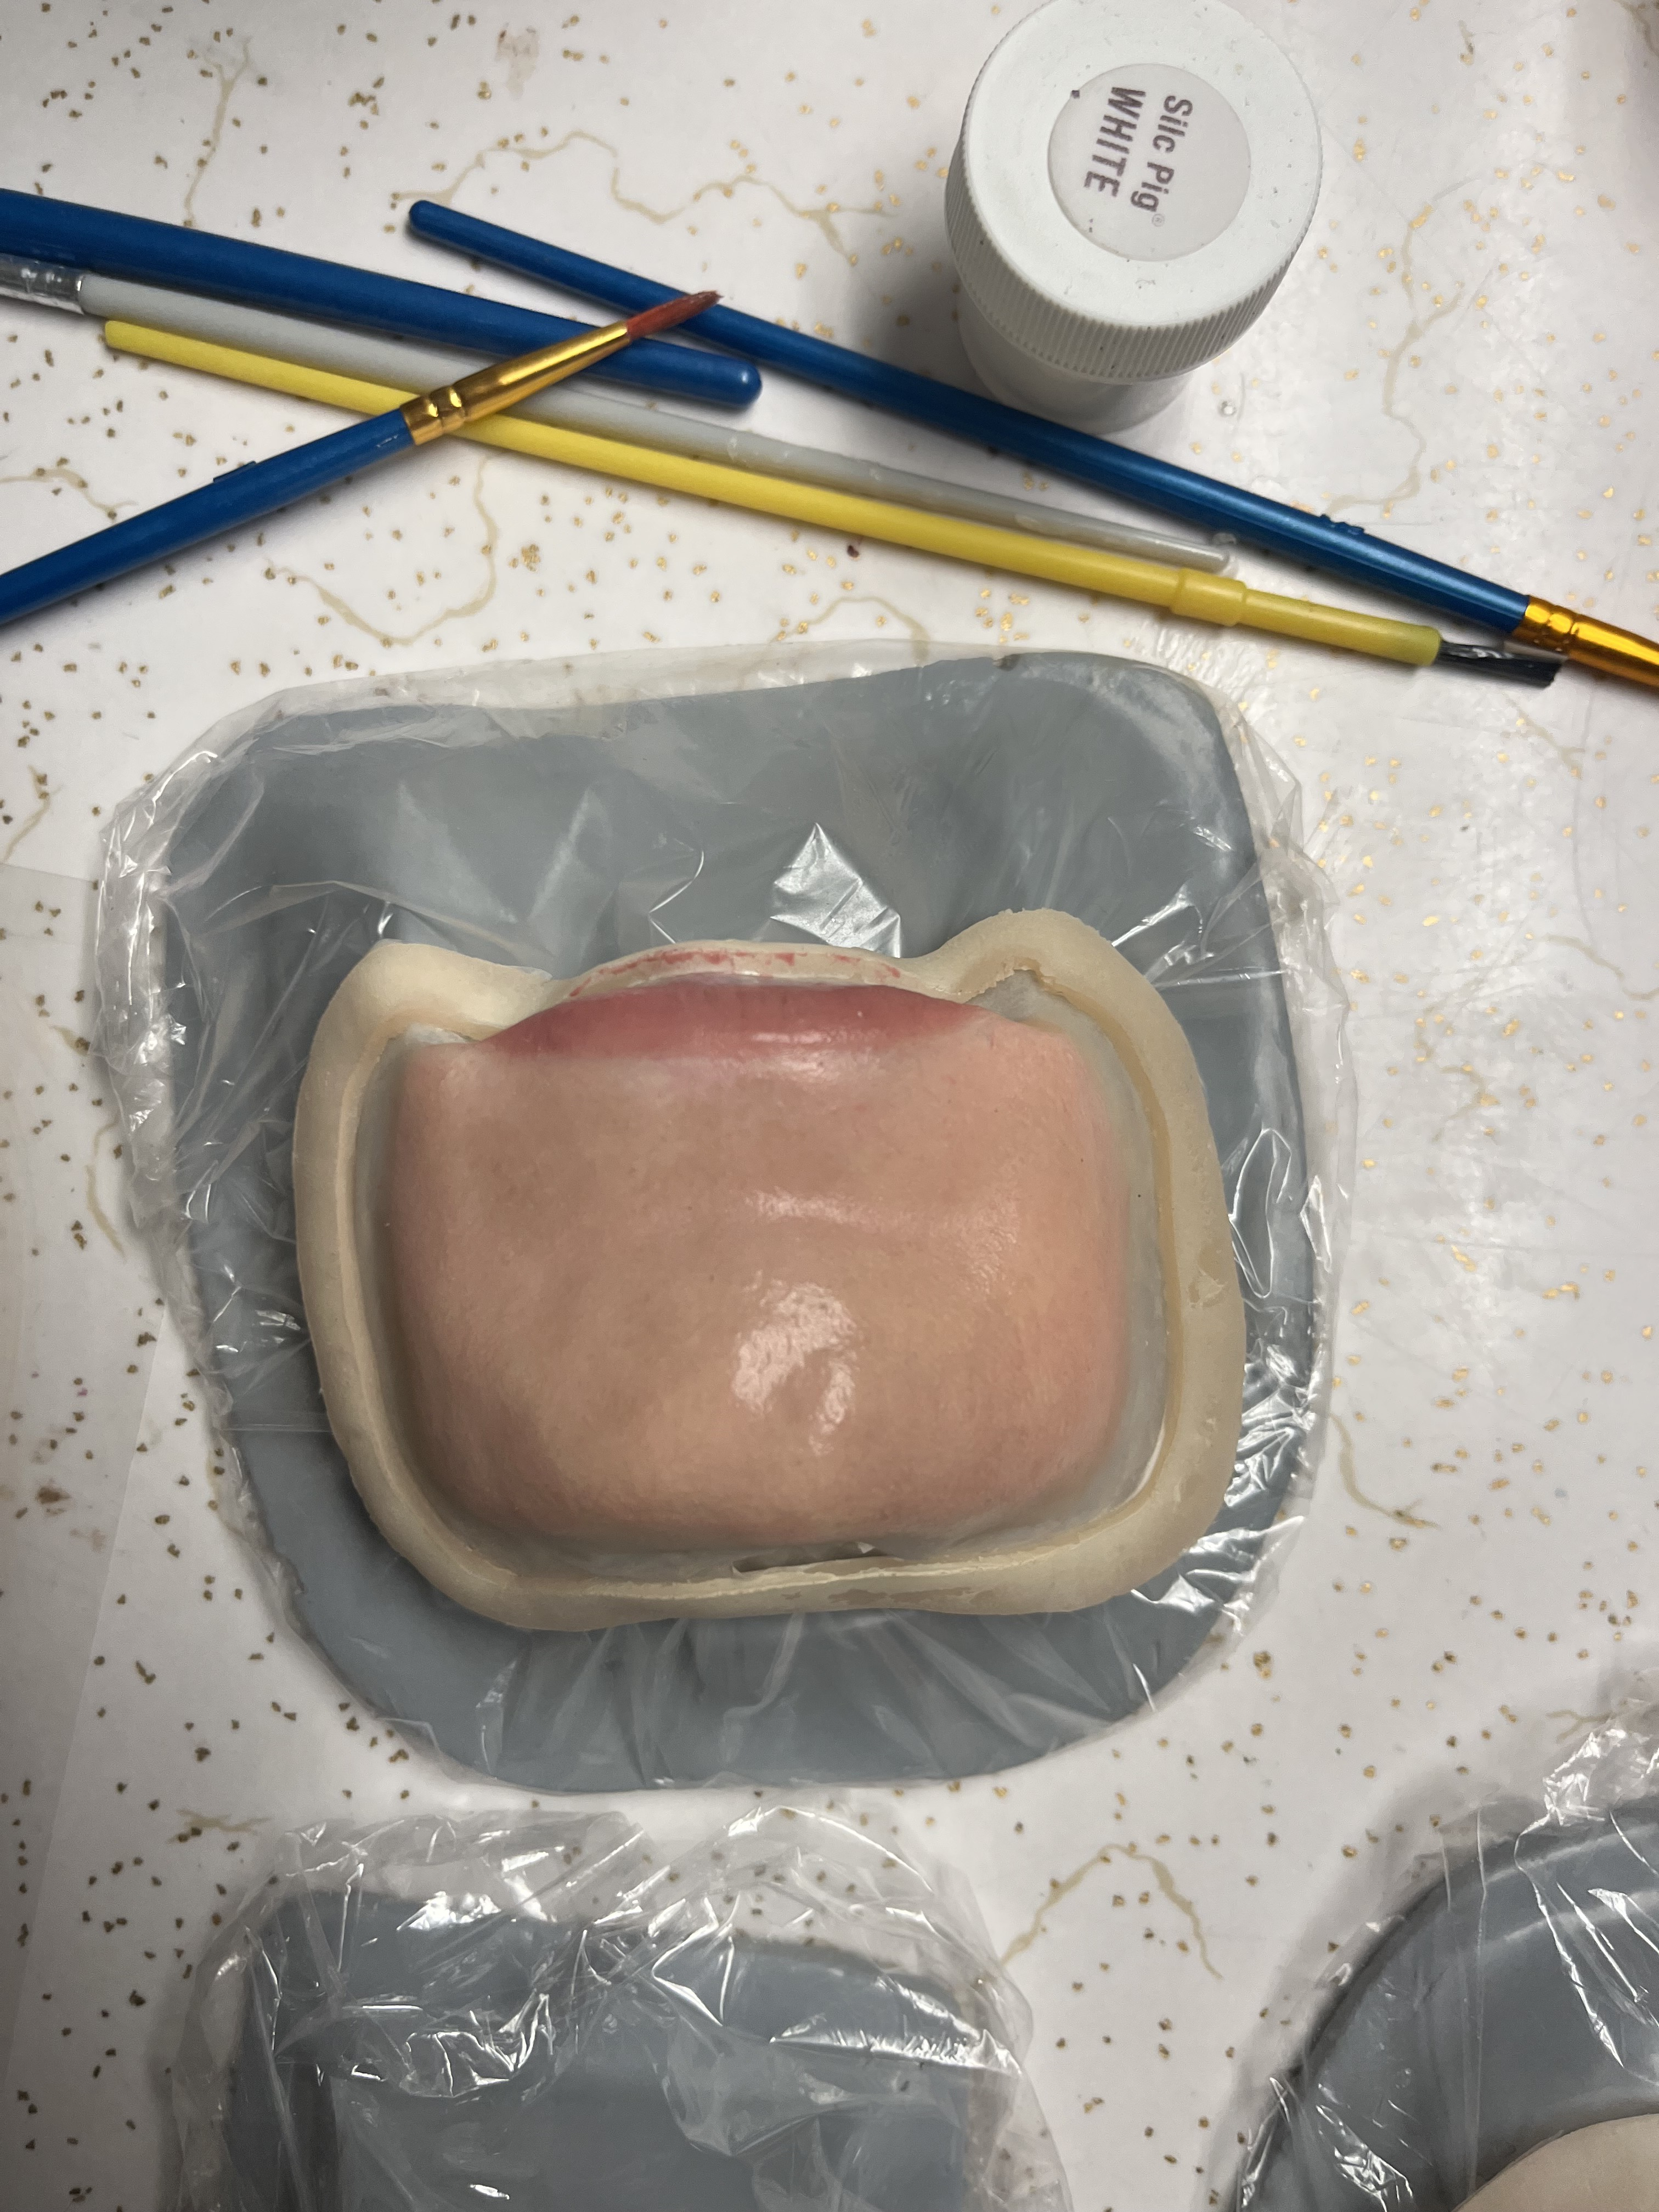
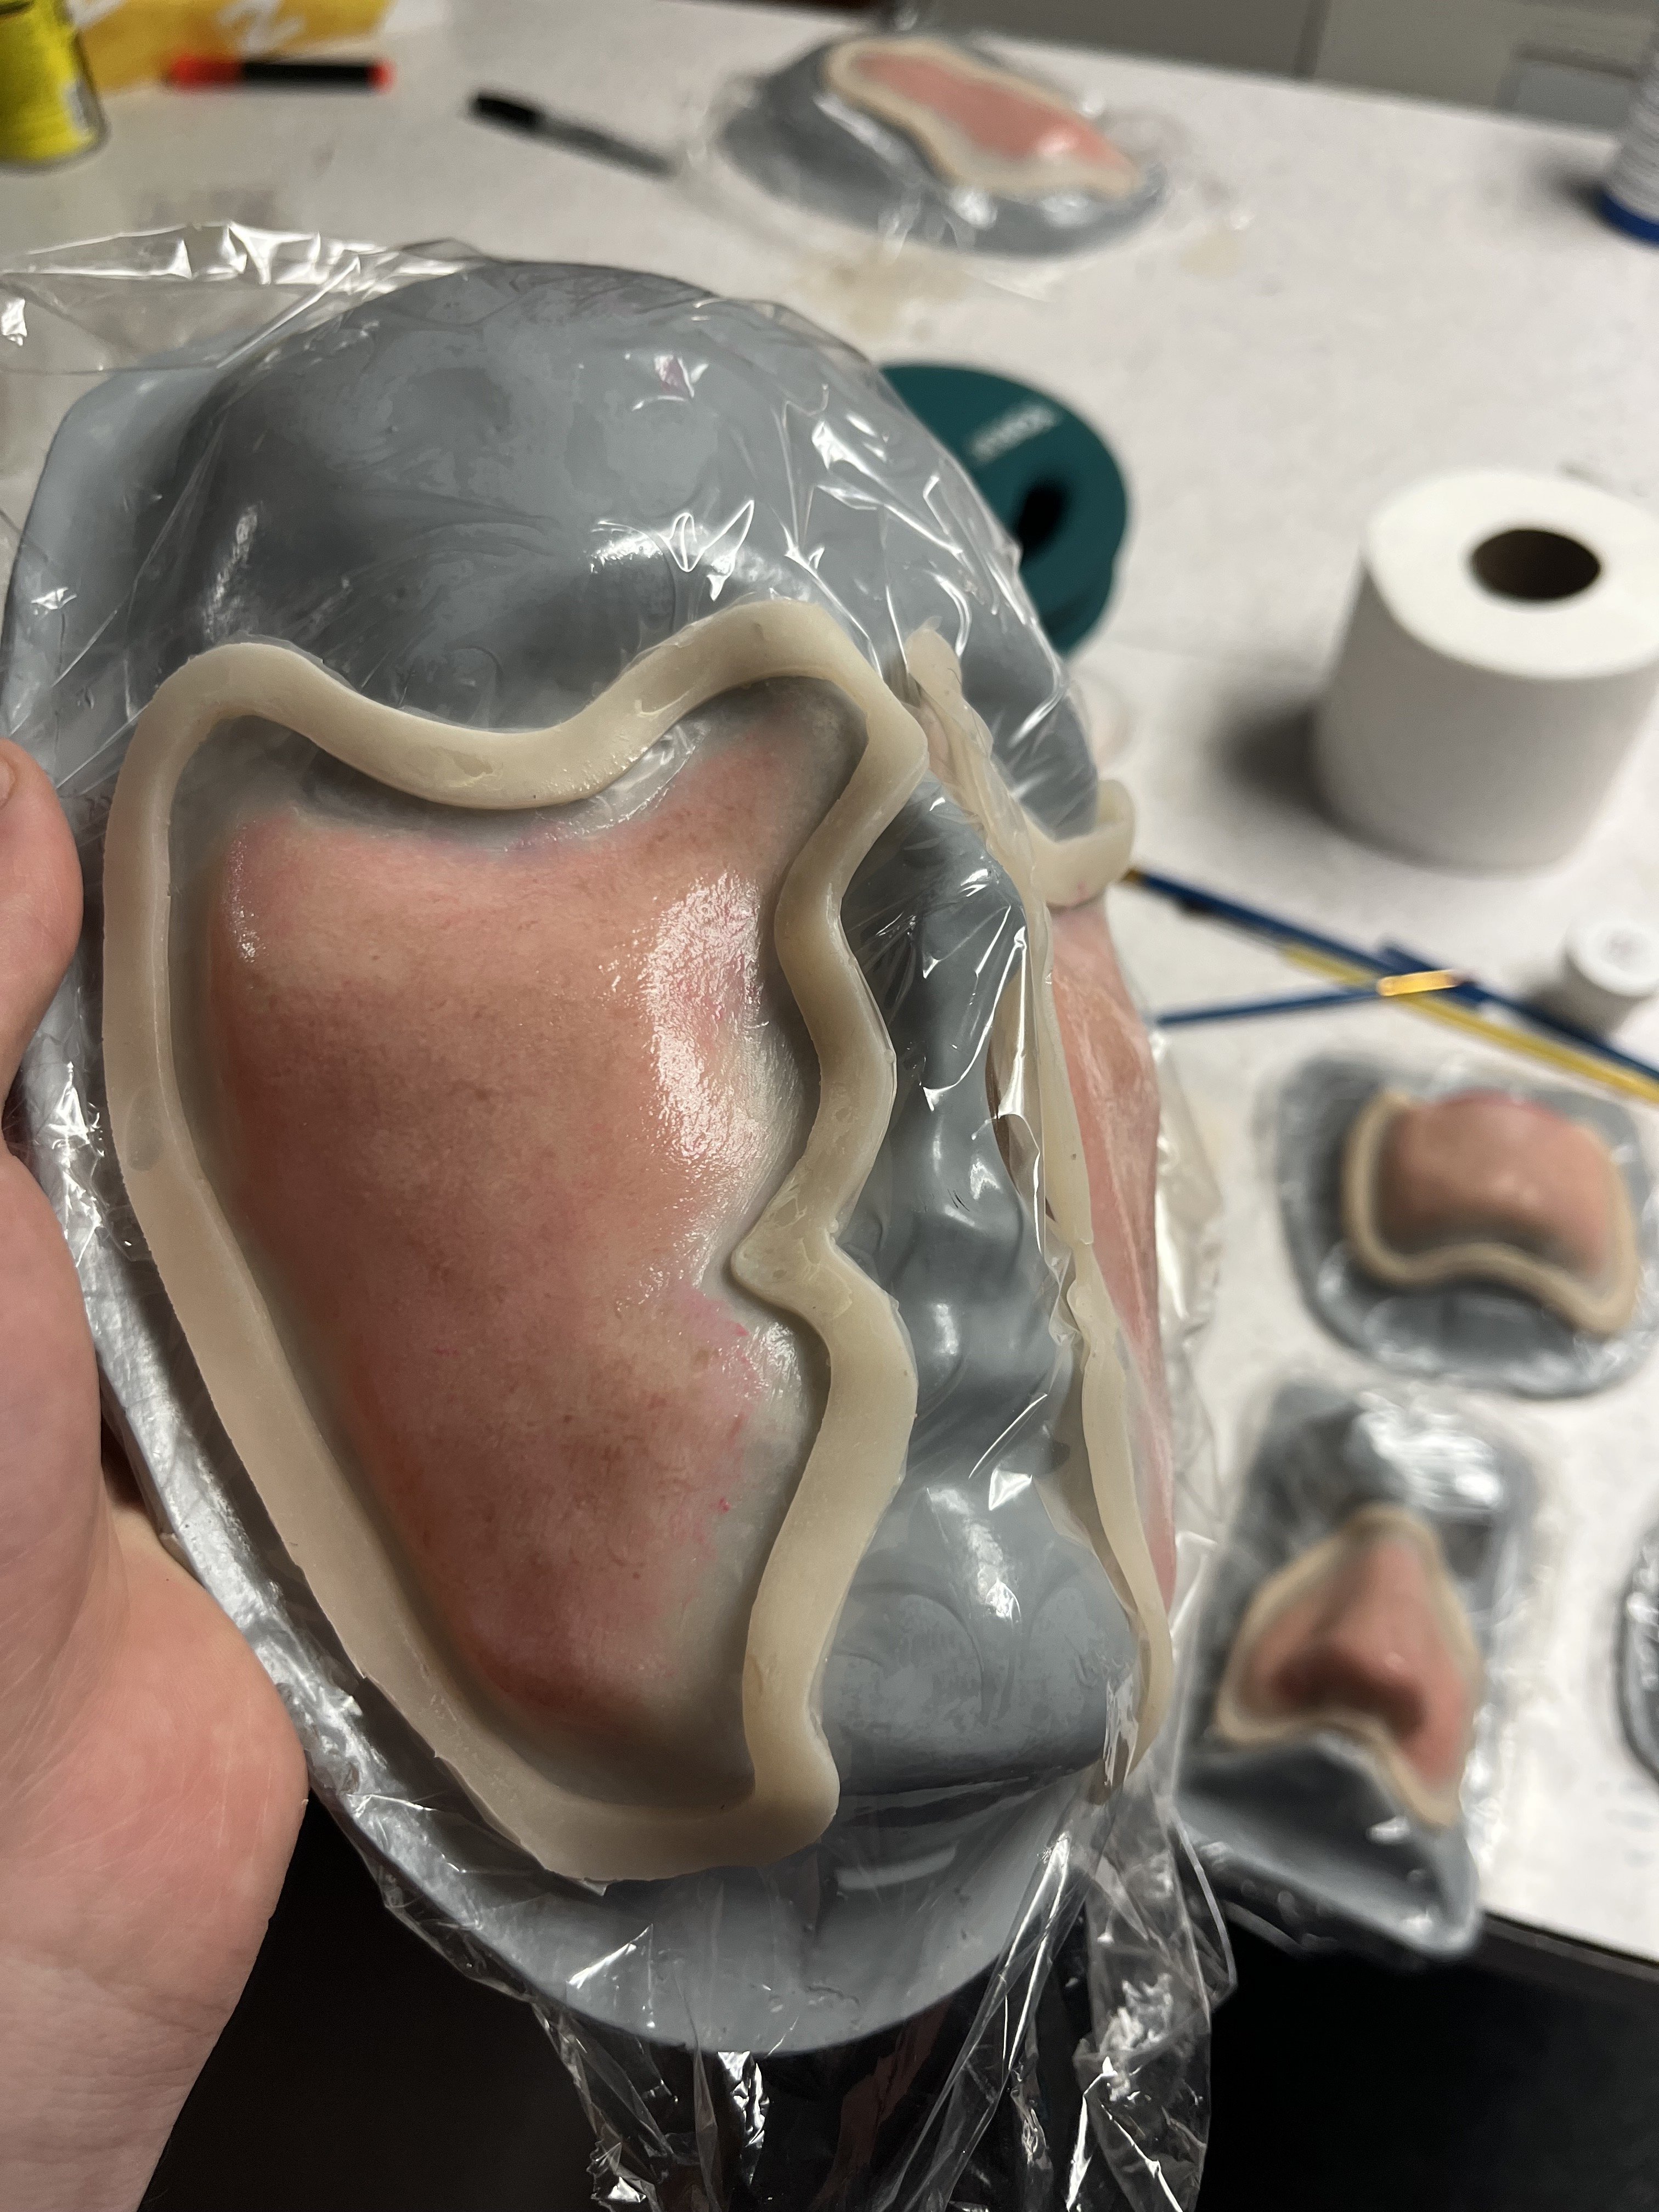
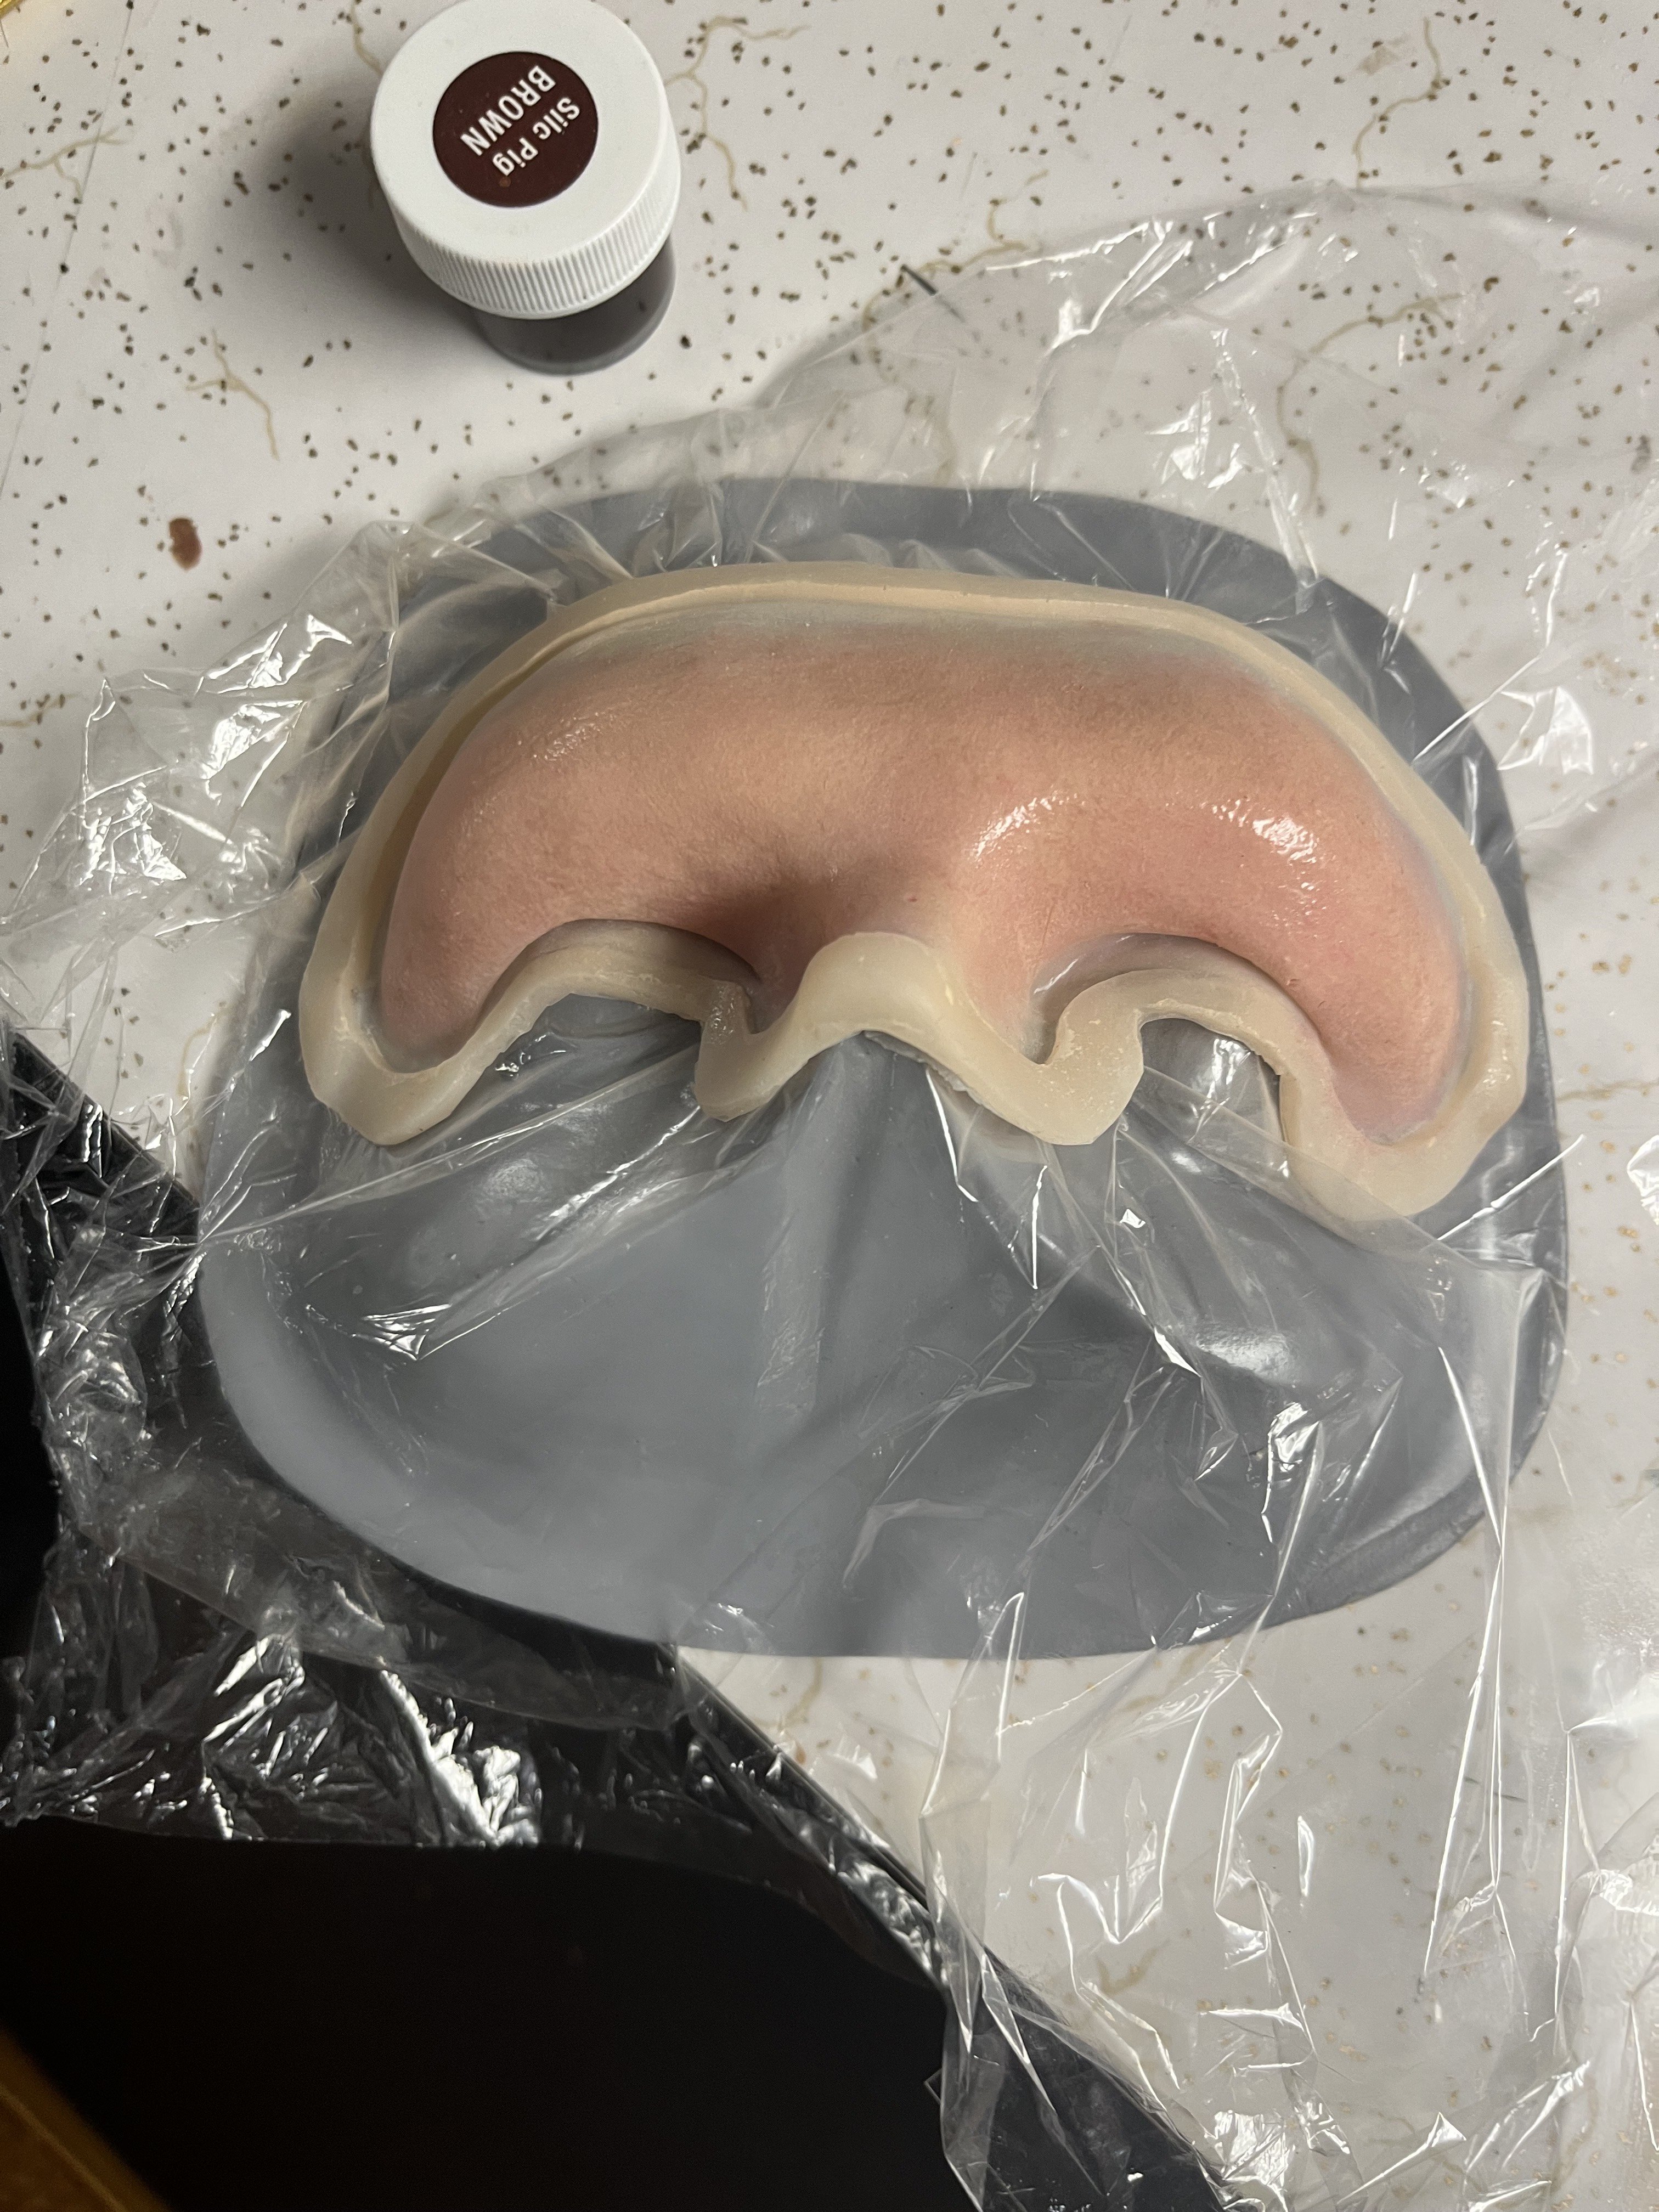
Thanks a lot! Well, right now I am trying to use ONLY silicone to create seamless edges; which is easier said than done. The trick (from what I've seen) is spraying an ultra-thin layer of silicone into the mold beforehand and then having a uniform air-tight fit to the core and the mold. To ensure compression, right now I am drilling holes on the sides of my "face cores" in order to bolt the positive mold on top. We will see how this goes.
 BoBn
BoBn
2