Best Of
Re: Things I Should Have In My Studio
Take this as the beginner input that it is, not a pro here. But for a really nice budget addition with an upscale look, check out grabbing some oven hoods from Lowes or Home depot and attach them to your high power ventilation, once it is in place. Any small detail station using dremel, airbrush painting, fuming glues or soldering can be bumped up a level for under 200 dollars. These, made for home kitchens, over the stove hoods have nice stainless steel, easy to clean surfaces, some already included ventilation control, a lighting source (can be increased with a change of bulbs) and are easily installed and often come with a standard wall extension cord. Not a replacement for shop ventilation (they have only light duty fans) but a sharp looking addition for a single user workspace or per desk in the right environment. The over island ones are more around 500 but beware any over that price as it is generally hype pricing. Make sure to grab the ones meant for removing the air into a ventilation system rather than the ones only meant to circulate room air.
Re: Tips for successfully creating a face cast/mould with a longish beard?
Hi Stevic,
While that video is quite old (and wow, that music!) Alja-Safe is a great material for low-cost lifecasting. There are more expensive alternatives like platinum silicone lifecasting silicones, which have the benefit of letting you make more castings from the mold, but if you are on a budget and only need a single casting alginate is a solid option.
Lifecasting subjects with beards can be a challenge, but it's not that difficult if you properly slick down the beard with a conditioner or other medium. The real challenge is in prepping the final casting if you need to carve away the beard.
The products mentioned in that video are all good options!
We also have a course in lifecasting that shows working with alginate as well as silicone. It's a bit more in-depth and has some great tips. https://www.stanwinstonschool.com/tutorials/how-to-life-cast-character-creation-tutorial
/Chris
Re: Things I Should Have In My Studio
Wow! Thanks for putting this together Chris! Excuse me while I send this off to Santa.
Our organization is about to transition warehouses starting in July. Our last move was 2015, and we thought we'd never outgrow... Hah
Currently my department occupies 2 separate "rooms" at roughly 800 square feet. Both with only 8 ft. ceiling. We will be moving into a 4,000 square foot blank canvas with 14.5 ft ceiling.
I'm hoping to have one of my guys do a sketch up layout that maybe I could share here, but having this rough list from you Chris is a great starting point. And I can show the bosses just an idea of how much it takes to make our work come to life.
Re: Aeon Calcos Lizardman
Found another one of your awesome full costume builds in the archives so now I am amped you are working on the new project you listed in the Workbench thread. Awesome step by step writeup. This really gives me ideas of what can be done with soft foam. I think the real closer on your projects is your attention to skin textures and tones on your creatures. Wouldn't have believed that was sculpted soft foam instead of a poured foam mold piece. I come across this material all the time.
Re: Aeon Calcos Lizardman
I love seeing all the behind-the-scenes shots of what goes into creating such a complex character/costume. A lot of different materials and techniques were needed!
Awesome work as always!
/Chris
Awesome work as always!
/Chris
Re: Things I Should Have In My Studio
A lot of that will depend on the scale and type of projects you plan on working on.
This is by no means a comprehensive list, as that would take days to write up, but hopefully, this gives you some ideas. This is also all very generic. If there is a specific type of effects work you want to focus on you would need a lot more detailed lists than this.
Modern tools like 3D printers (resin and FDM), laser cutters, and CNCs are all very useful and use a lot in modern effects.
To start with are the most basic aspects of a shop. Good lighting everywhere, plenty of clean work surfaces at a comfortable height, plenty of access to power plugs and compressed air hookups, a clean and organized setup for expendables and materials, good air filtration, ventilation, and dust removal, well maintained and organized tools, and plenty of focus on health and safety.
A clean area for painting, with a spray booth/ventilation, if you can, is also ideal. Then have a good stock of everything from primers, spray paint, acrylics, catalyzed paints, etc.
A clean area for sculpting with a good selection of tools, a toaster oven/lightbox to soften clays, and a collection of water-based and oil-based clays for different applications.
A clean area for molding and casting, stocked with all the typical supplies. Mixing buckets, mixing sticks, mold releases, silicones, epoxies/resins, reinforcement materials like hemp/sisal/fiberglass, scrap wood for handles/supports, mold wall materials, shims, ultracal/hydrocal, dental stone, alginate, scales, degassers, pressure pot (properly rated and maintained for safety), drill mixers, stand mixers if you will be doing foam latex, a latex oven, etc.
You'll notice a "clean" trend, as cross-contamination or dust and dirt can cause a lot of problems. The last thing you need is dust from someone sanding/grinding landing on a freshly painted prop, or in your clay. Or overspray from painting landing on pretty much anything.
If you plan to do electrical work from props, animatronics, etc, you should have an area dedicated to that with soldering irons, wire, connectors, heat shrink, benchtop power supply, good lighting, magnification, work vises to hold small parts, fan/filter for soldering fumes, etc. The actual selection of tools here is nIf early endless.
If you'll be doing fabrication you'll also need a large collection of tools. Basics would be a drill press, band saw, hand drills, a rotary tool like a Dremel, and all the basic hand tools. You'll also want a large collection of adhesives, and hardware (nuts, bolts, screws, washers, springs, rivets, threaded inserts, Chicago screws, etc), and fabrication materials like aluminum (channel, flat stock, and extrusions like 80/20), steel, wood, foam, plastics, fabric.
And most importantly, safety and PPE. Have eye protection available at every spot in the shop without having to open a drawer or take a step. Plenty of respirators and filtration masks for sanding or working with VOCs. Gloves that are rated for various types of chemicals. Nitrile is a good common glove material, but for some applications, you may need another type.
At least one easy-to-find, clearly marked, first aid kit. The same goes for fire extinguishers, though you may want more depending on the size of your shop and the type of work you are doing. For example, a laser cutter should have a fire extinguisher within arm's reach, the same for welding stations, soldering stations, etc.
And I have to again stress that this is a very incomplete, off the top of my head, quickly put together, list. I urge anyone else to post their ideas/suggestions here as well to help cover what was missed.
/Chris
Aeon Calcos Lizardman
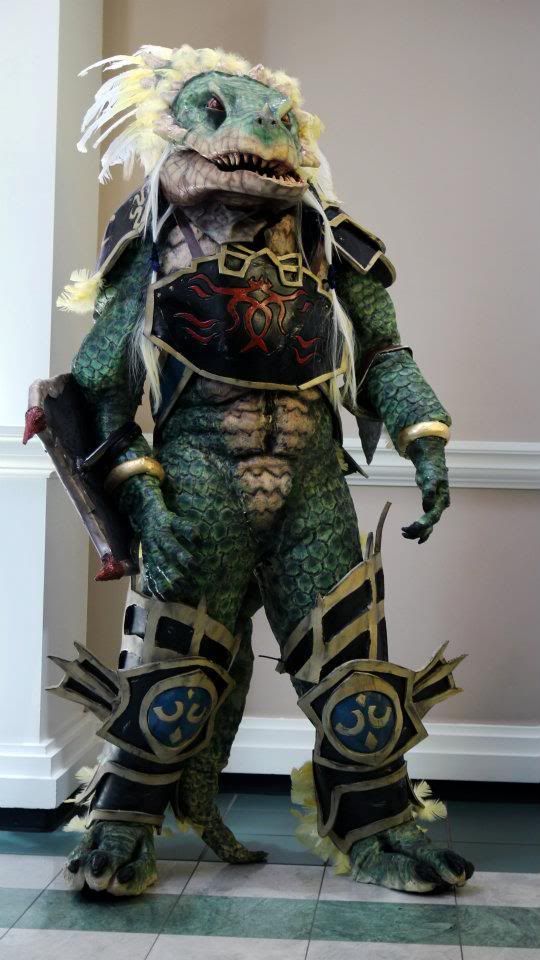
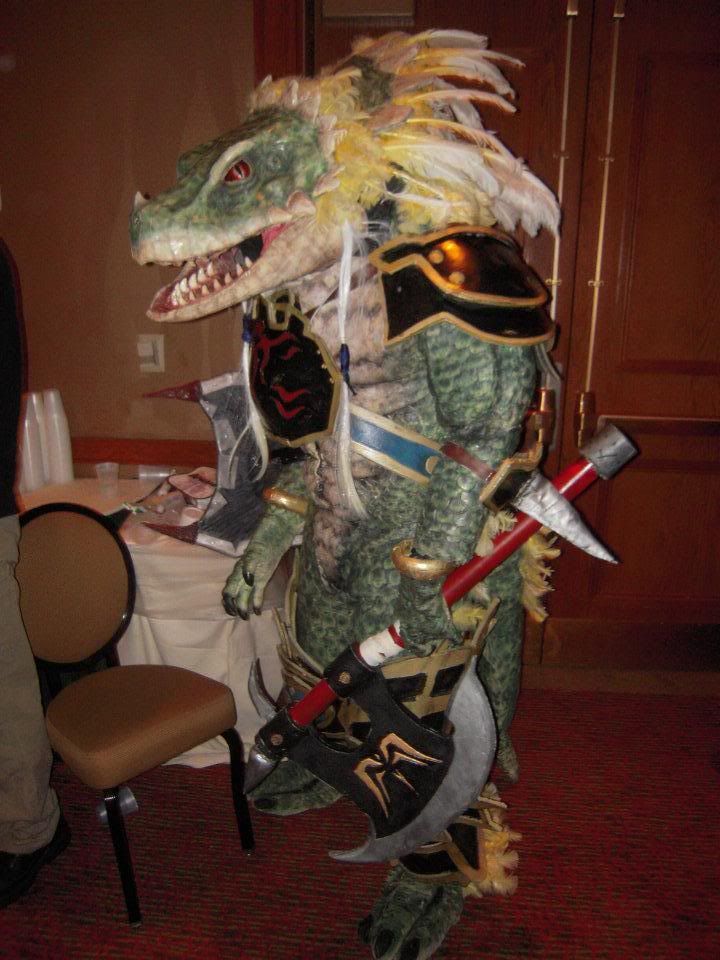
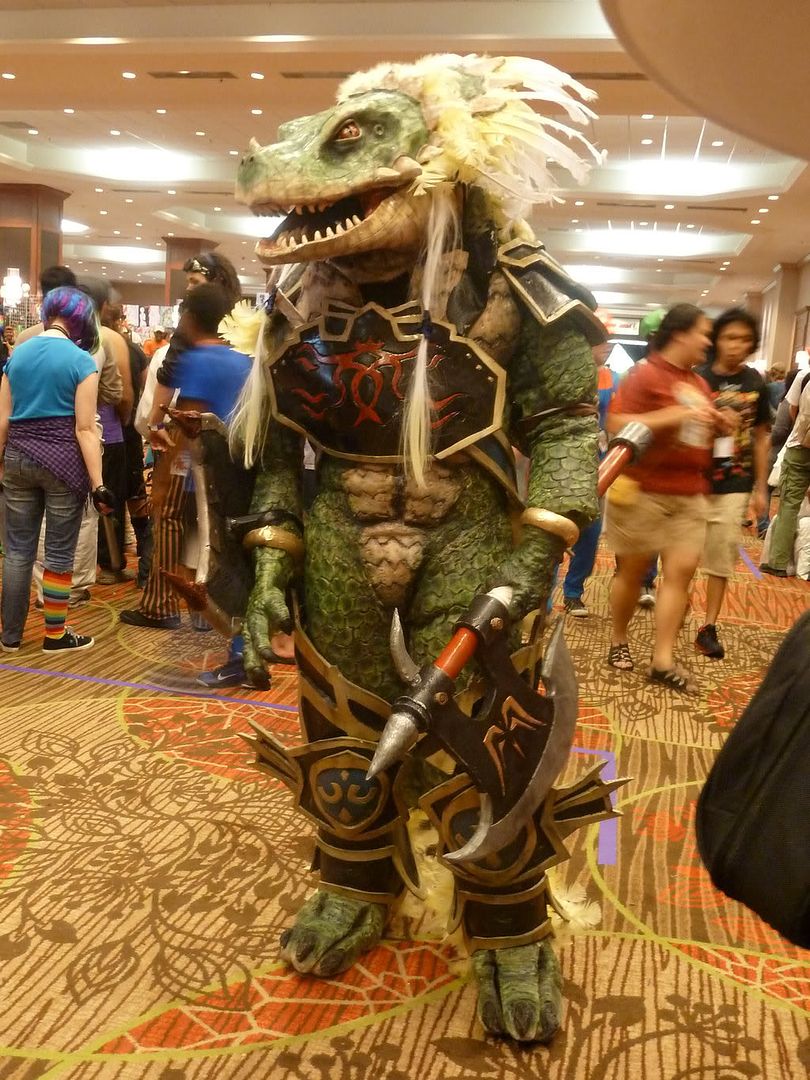
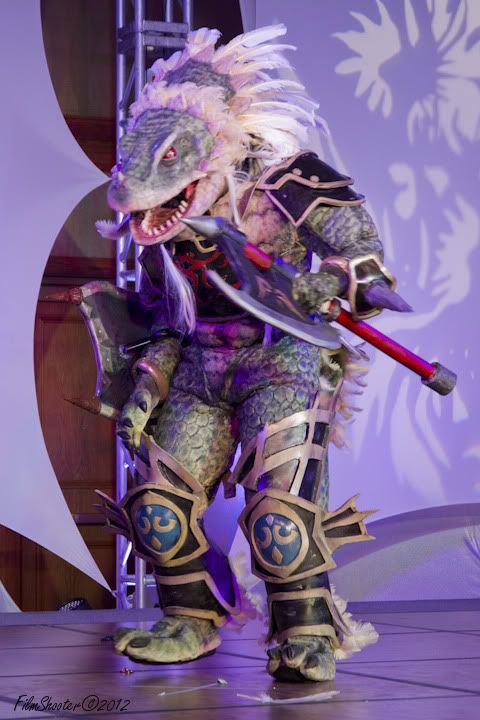
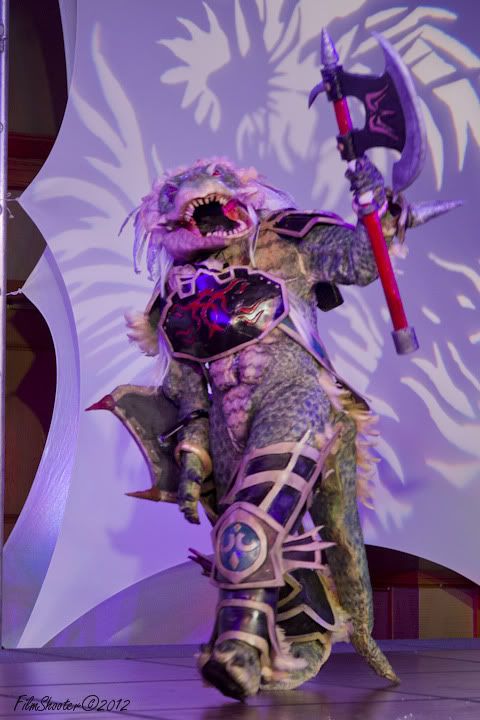
This character's name is Aeon Calcos. He is from the game Soul Calibur 3.
It is odd making this post with the finished post being up so long ago, but here is how I made this creature.
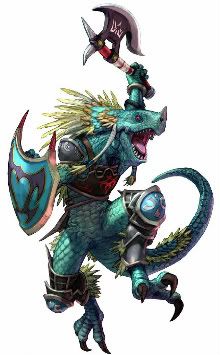
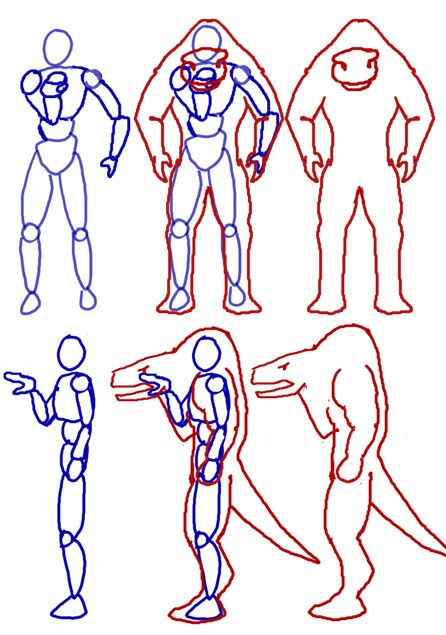
The right arm of the Lizard man was fake.
I puppeted the head with my right arm, and carry my axe in my left hand.
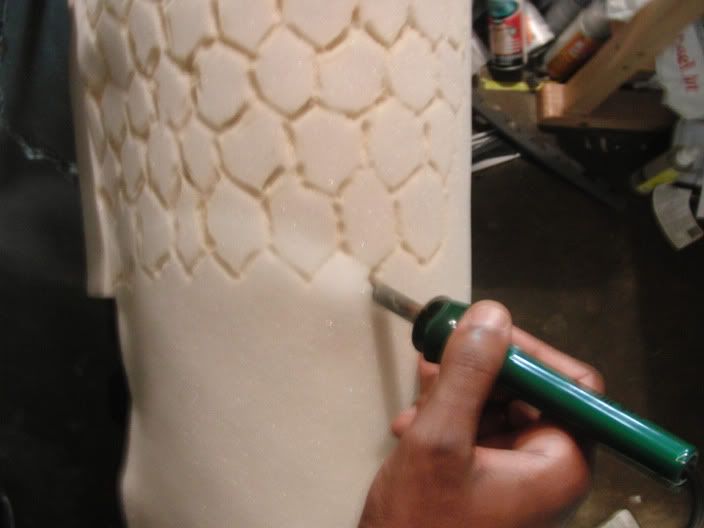
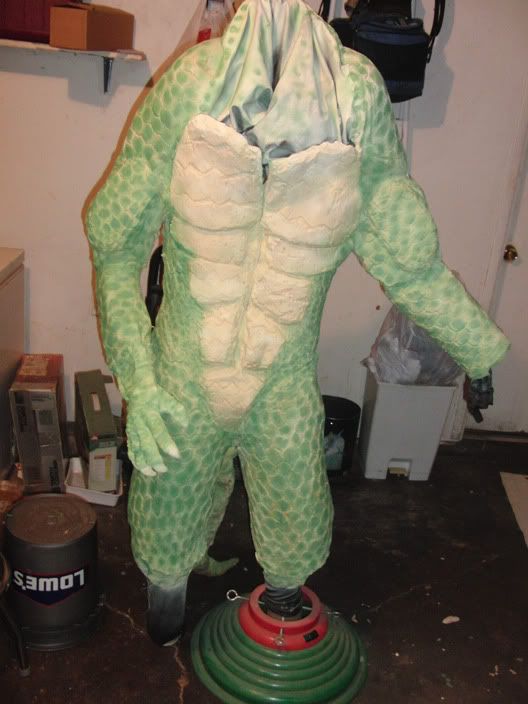
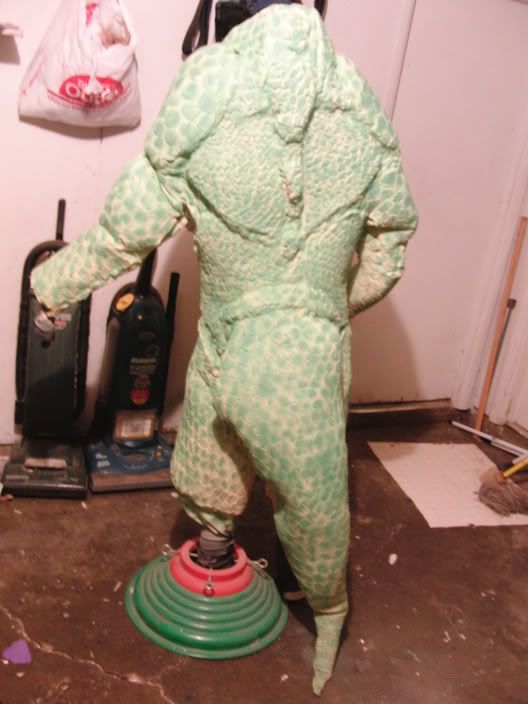
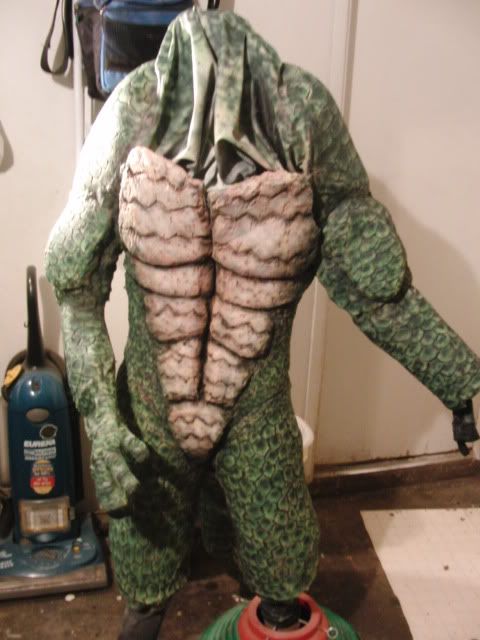
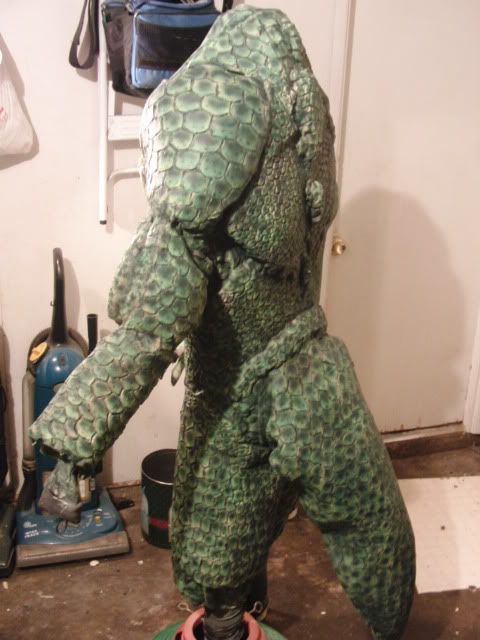
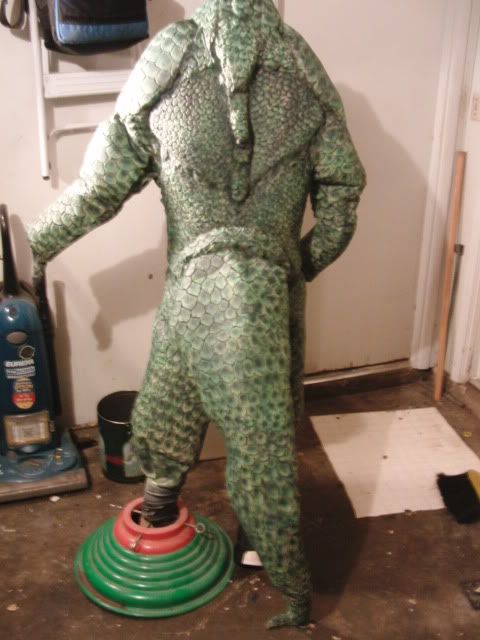
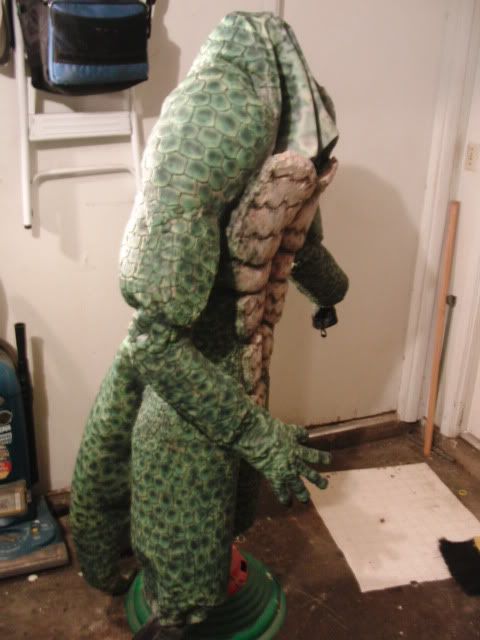
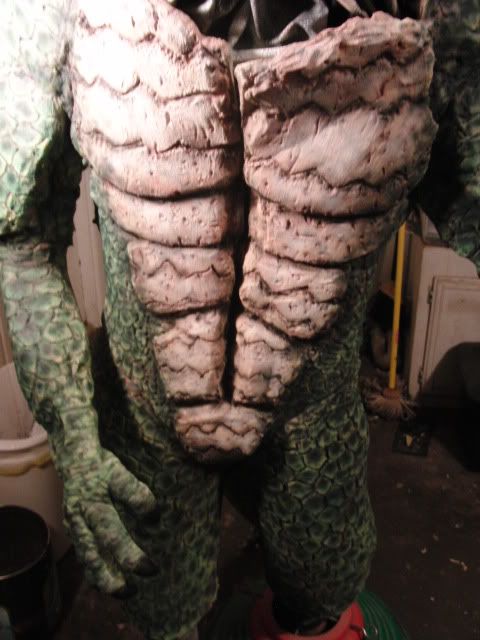
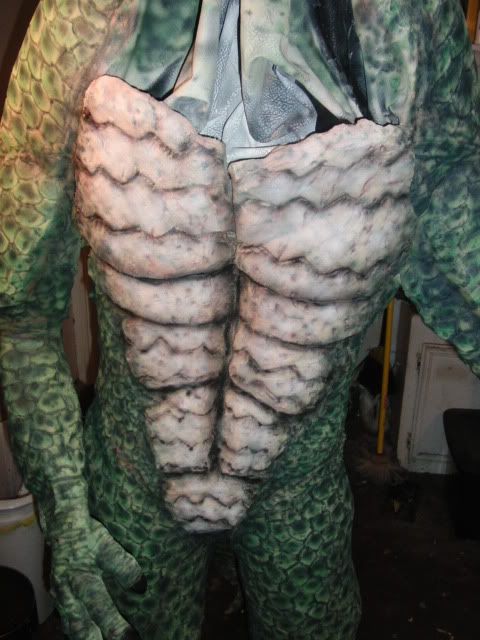
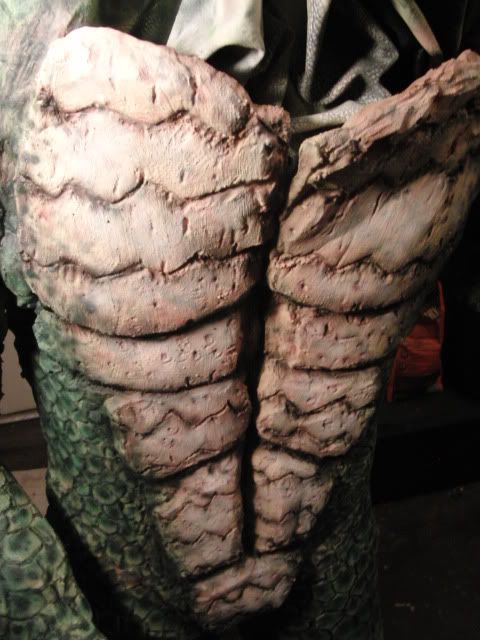
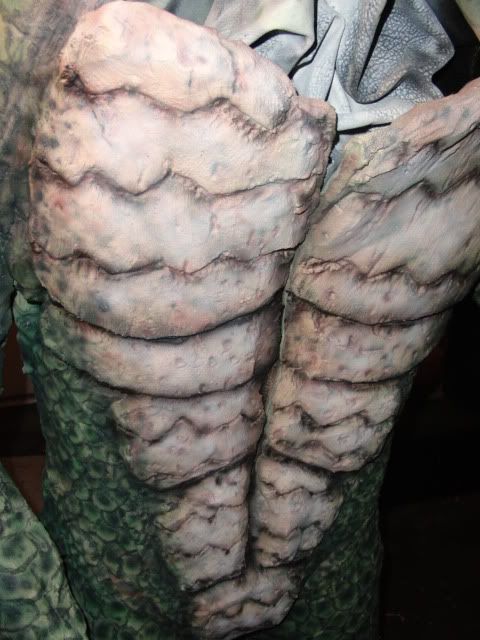
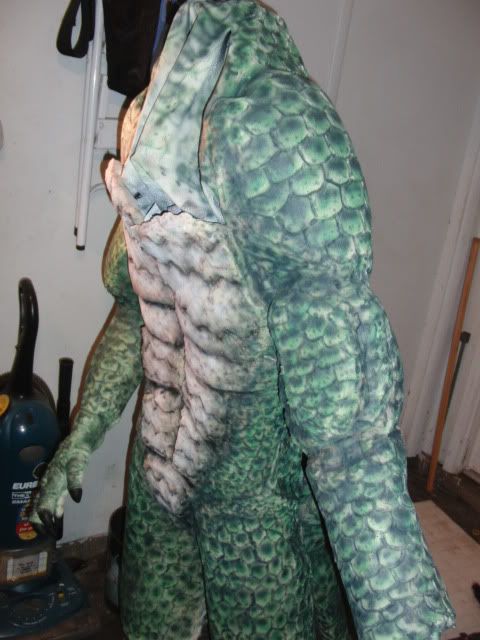
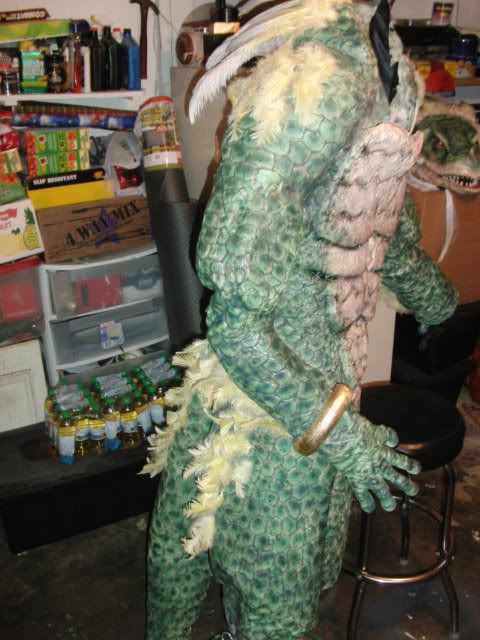
The armor and weapons I am made out of EVA foam. For the body I used a method used for making fan Predator costumes. I got a spandex skin suit then spray glued upholstery foam muscles to it. Then I burned textures in with a wood burning tool, added liquid latex, and airbrushed it.
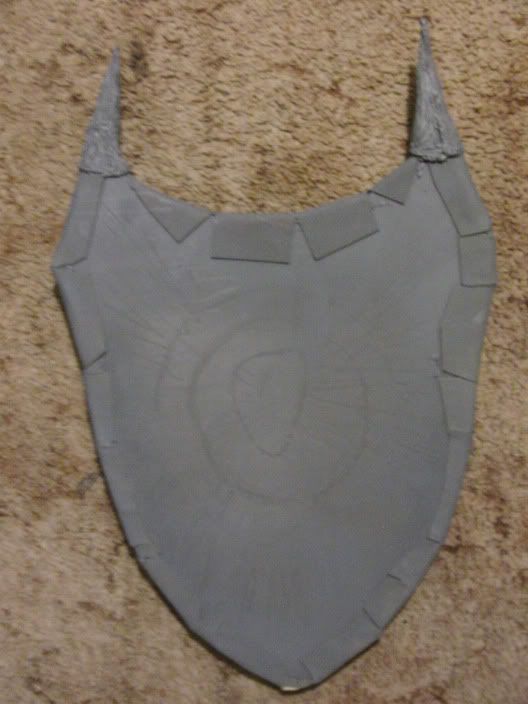
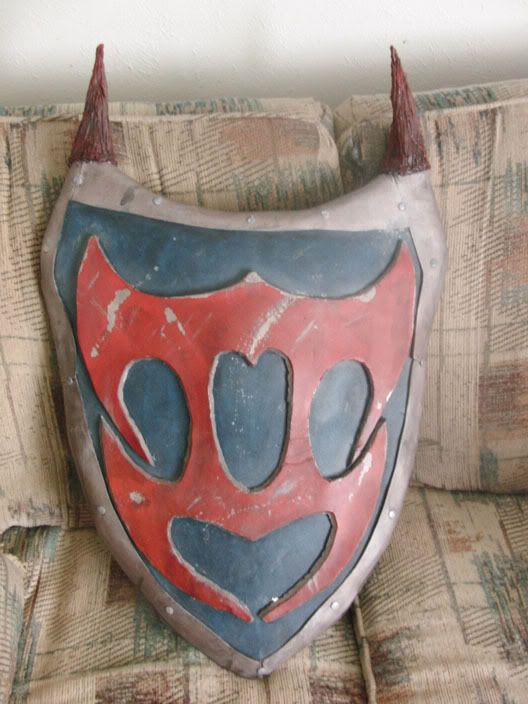
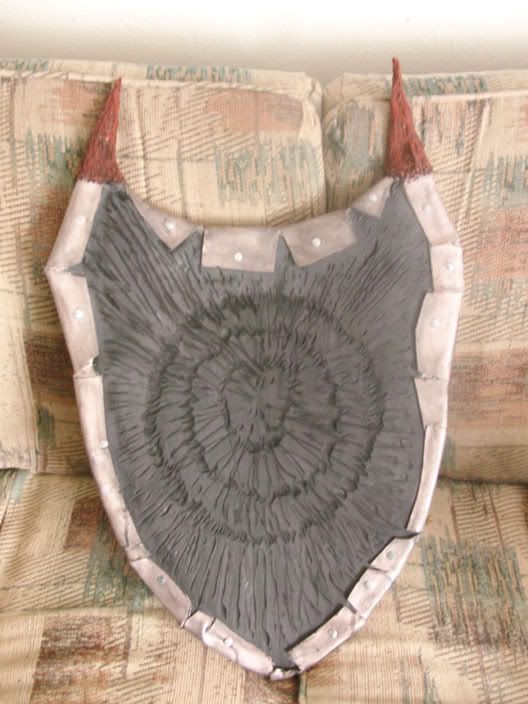
Shield
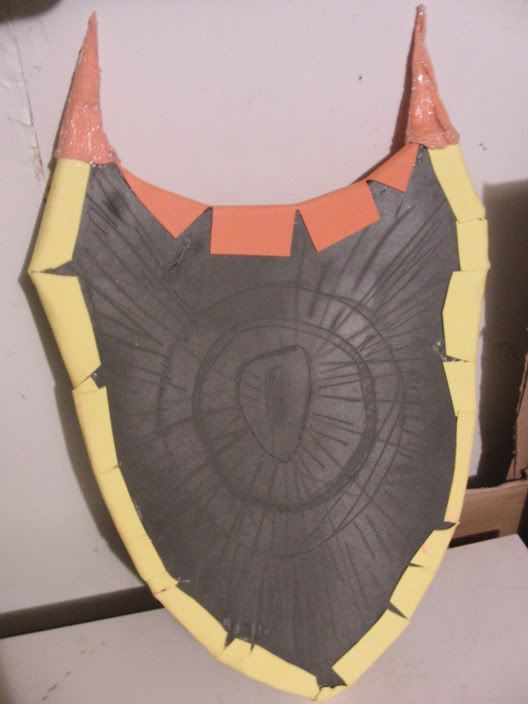
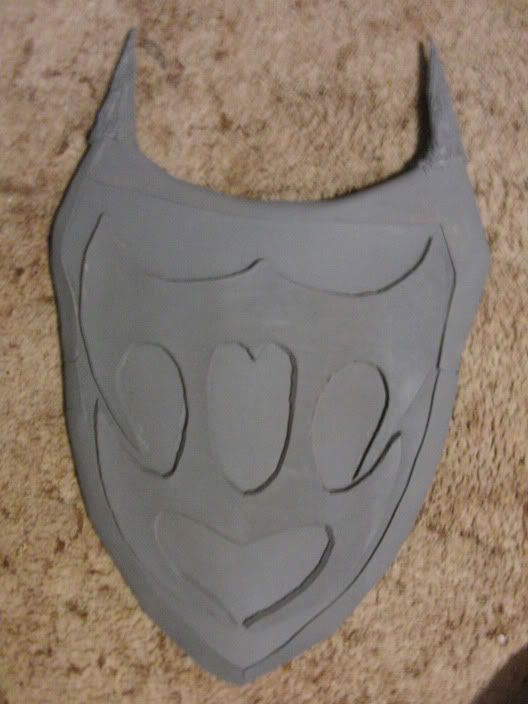
I didn't want to try this build unless I could find out a way to get the eyes and mouth to move.
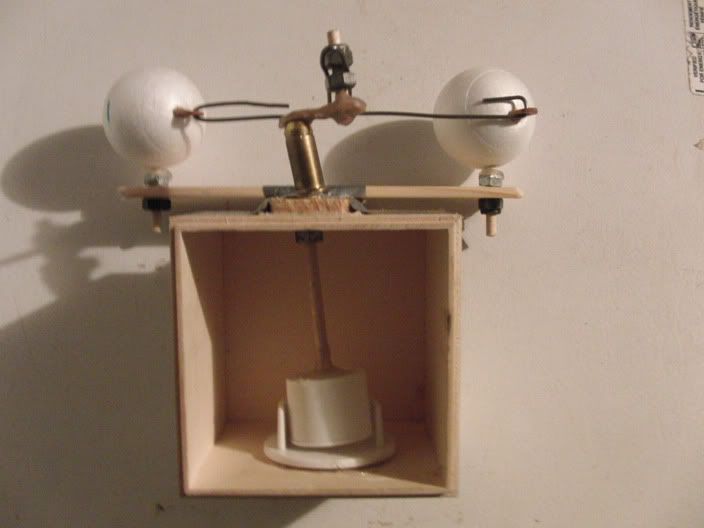
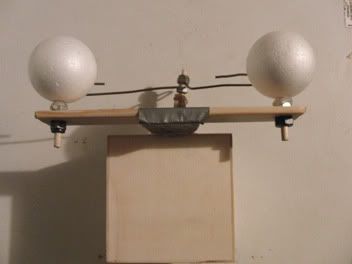
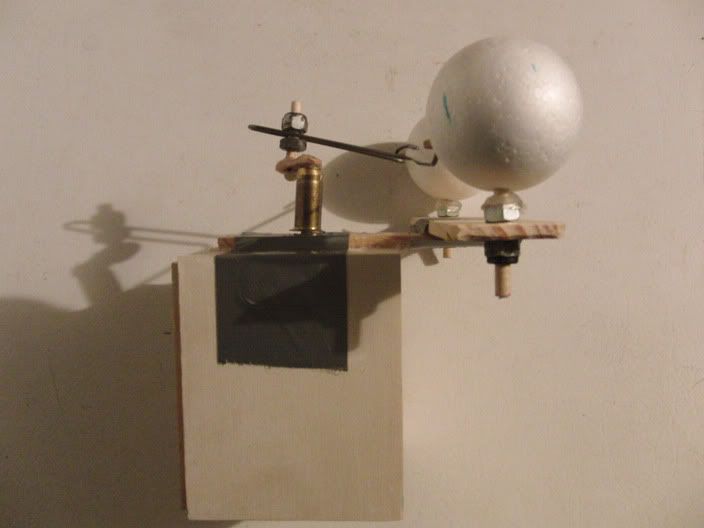
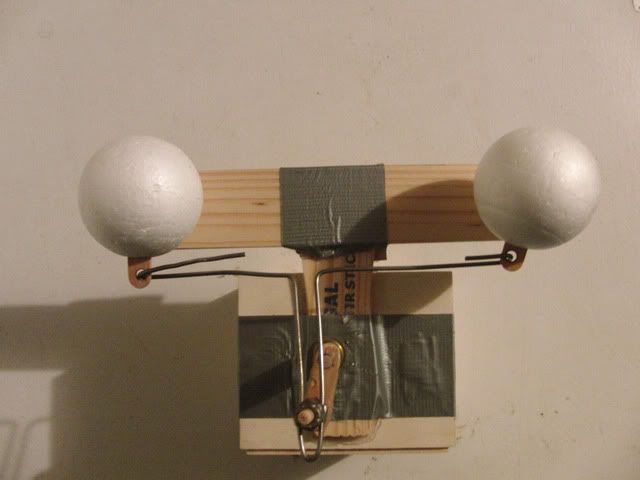
So I looked up tutorials on ventriloquist dummies to make the mechanics. Here are the eye controls I made.
I made it with a bunch of stuff I found in the craft part of walmart.
A wooden box, wooden sticks, hot glue, styrofoam craft balls, pumptoothpast cap,some kind of pole hanger, paint mixing stick, metal nuts, duct tape and a metal cloths hanger.


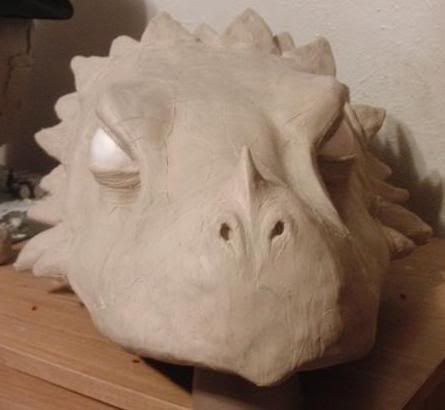
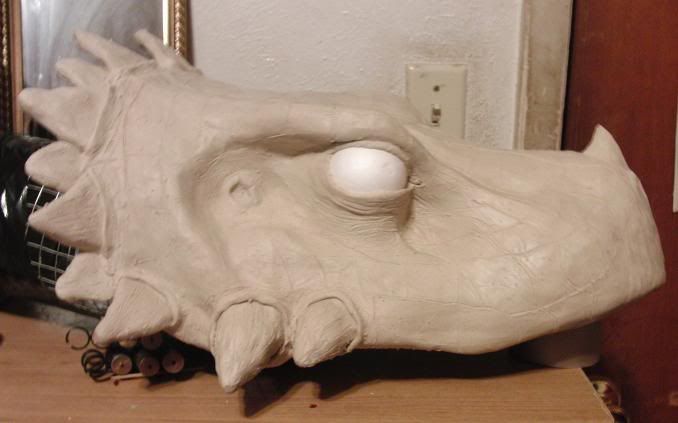
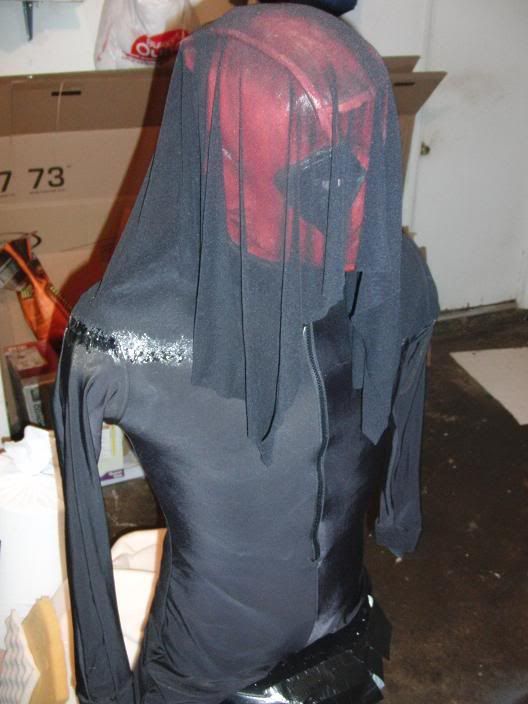
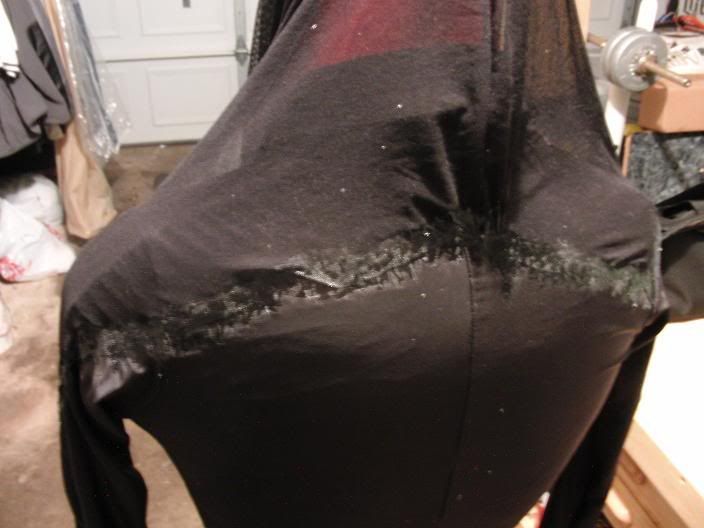
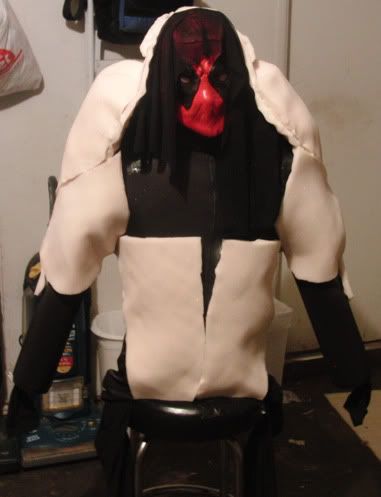
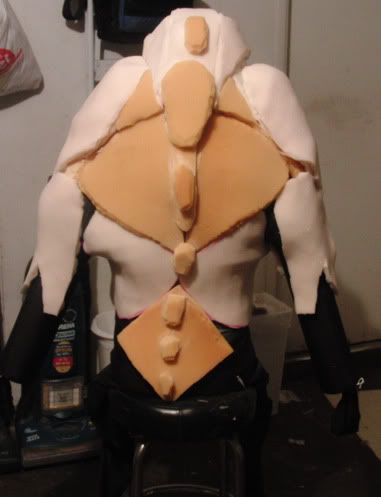
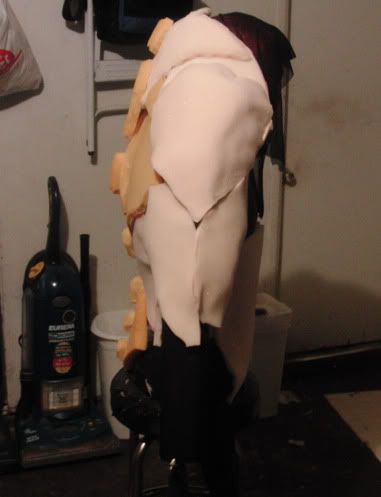
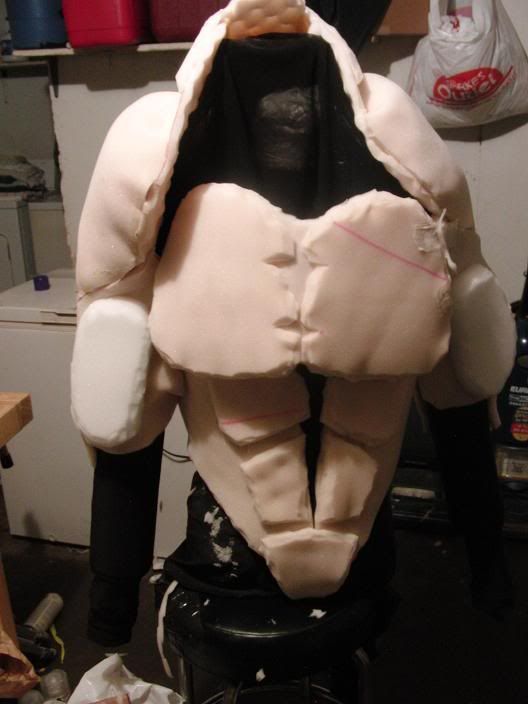
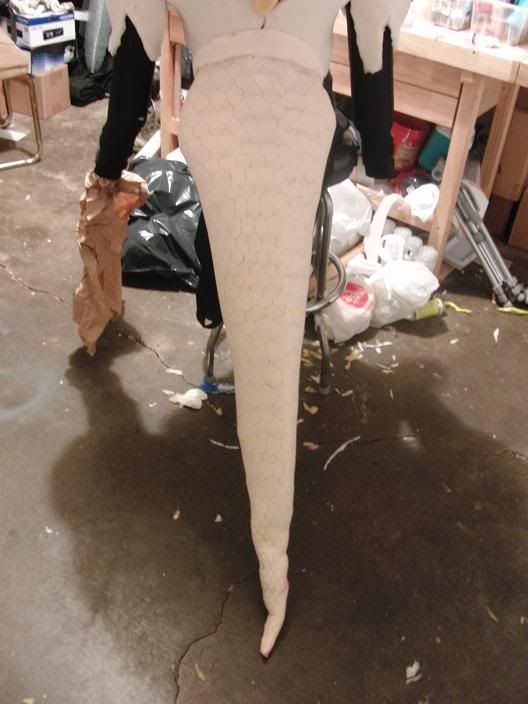
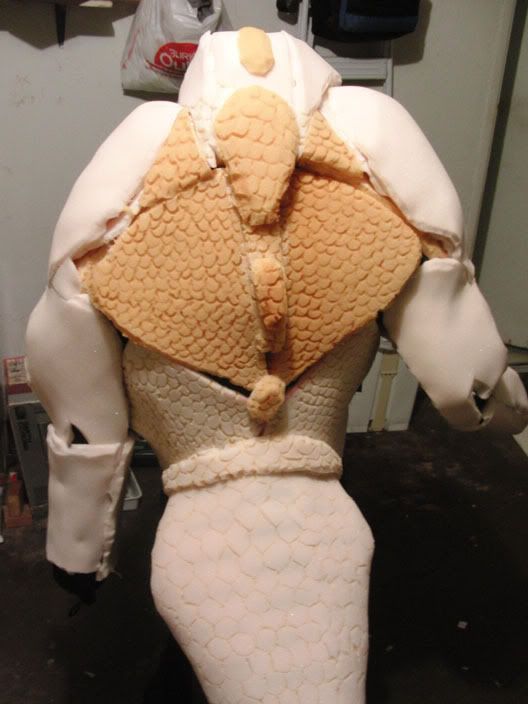
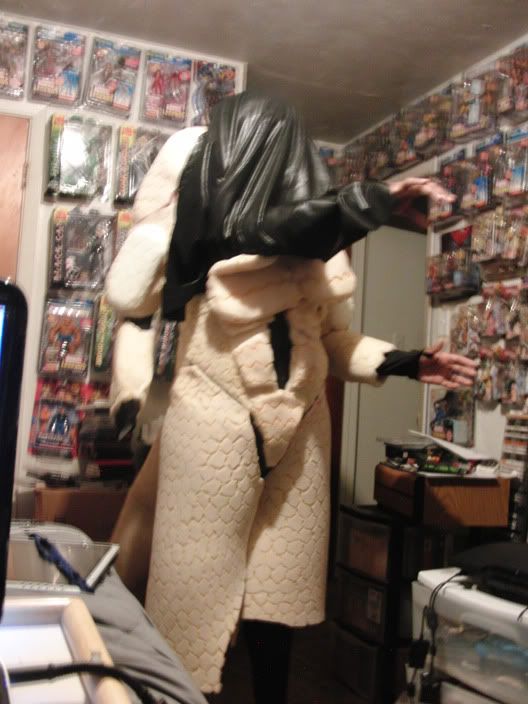
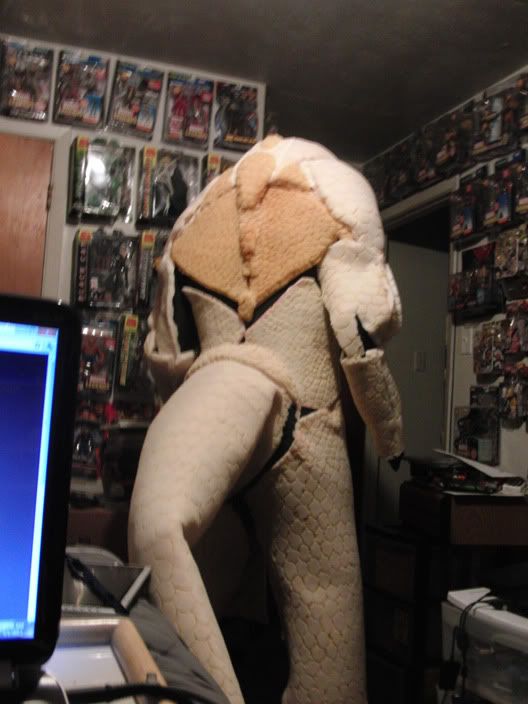
The Abs are a bit different than the original art in the game. I looked around the net and decided I wanted to give it abs like this.
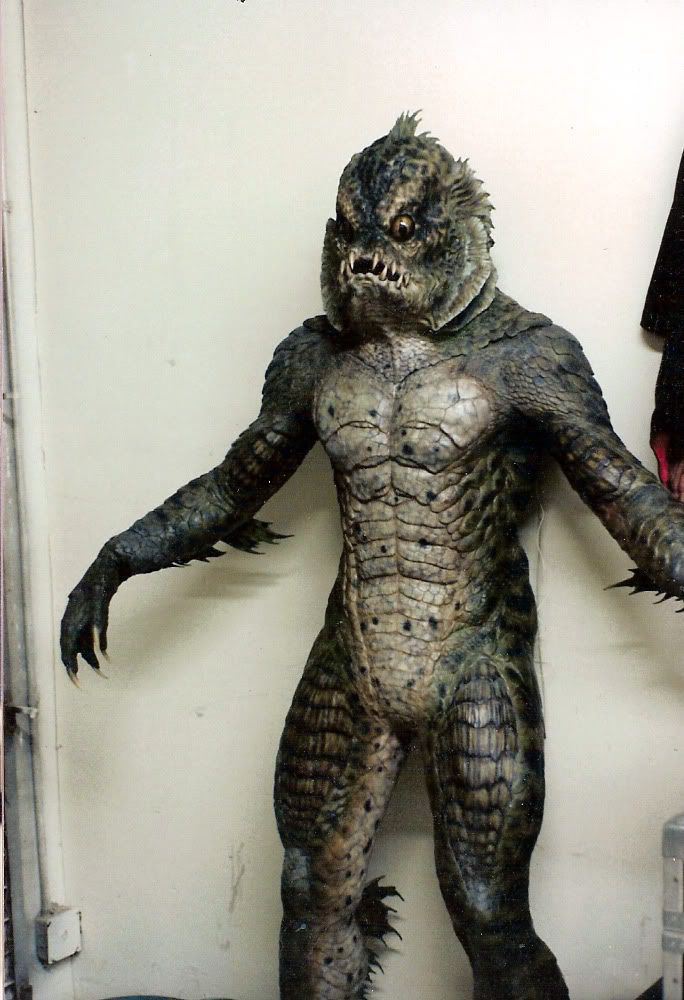
I also want to try a color scheme simular to the Gillman. While still trying to maintain that iguana look from the game.
The next stop for the body is covering it in latex.
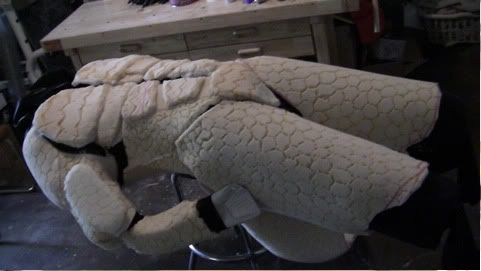
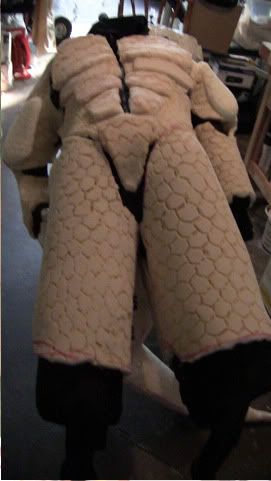
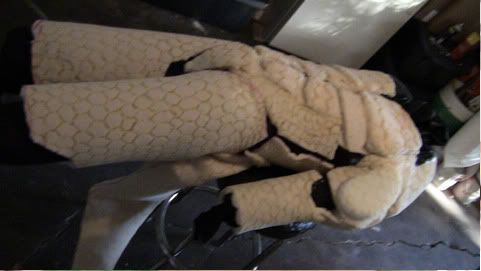
A gallon can of mold builder latex, and a gallon of monster maker latex.
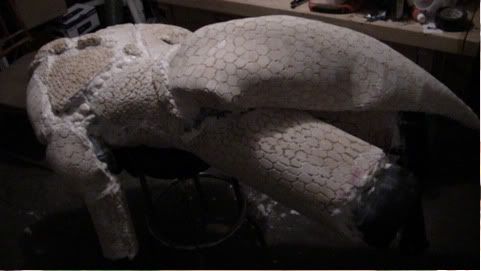
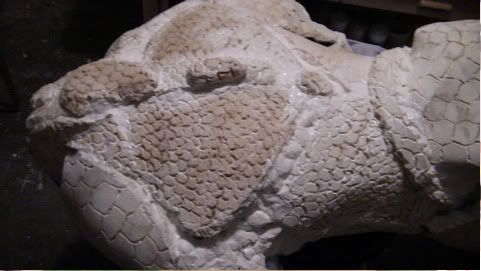
First test run.


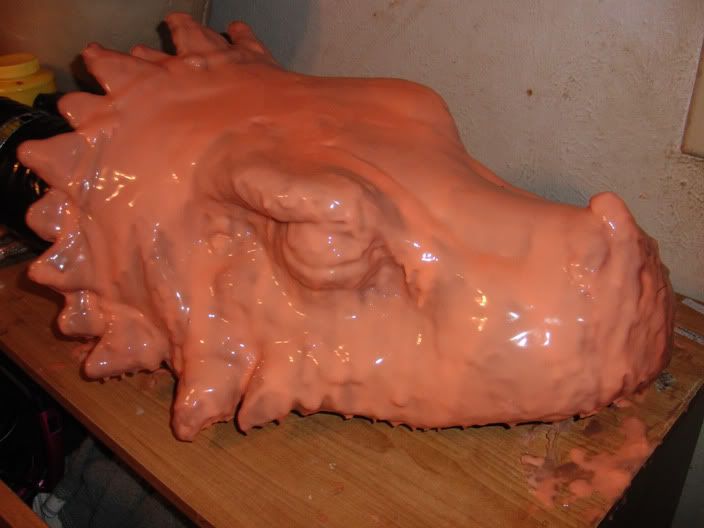
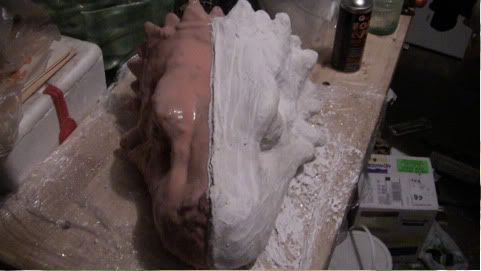
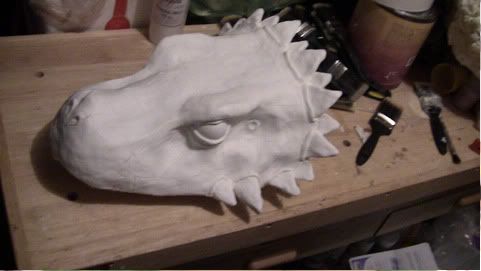
I made the bottom jaw out of EVA foam.
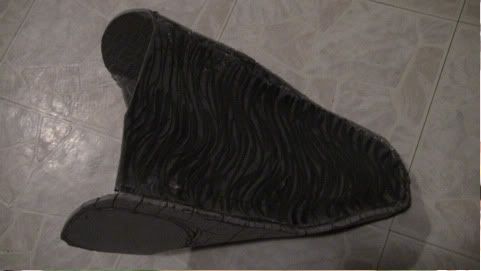
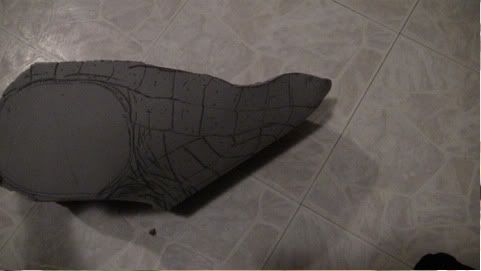
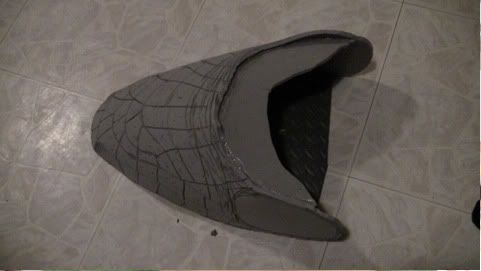
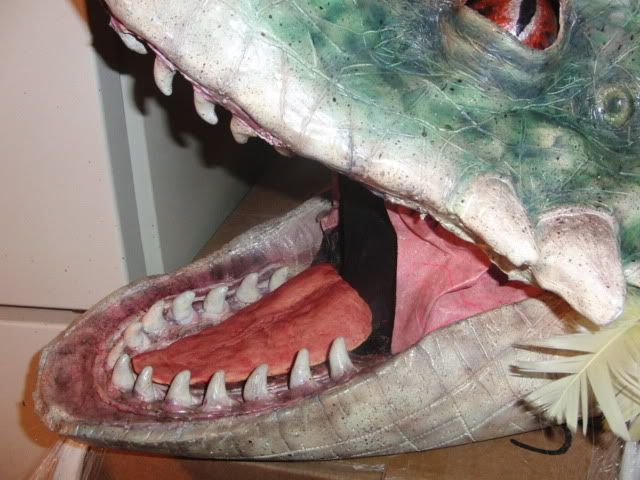
I sculpted some teeth out of sculpey clay, and a tung from a 2 part rubber mold compound.
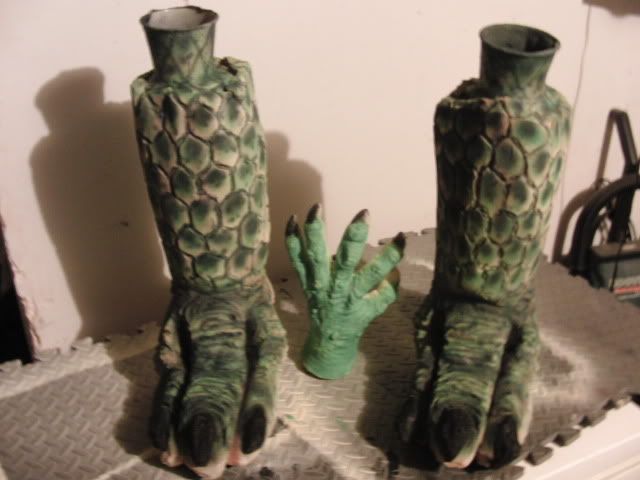
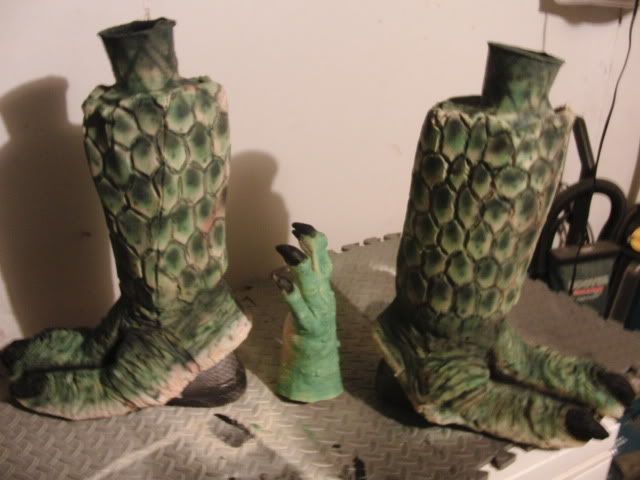
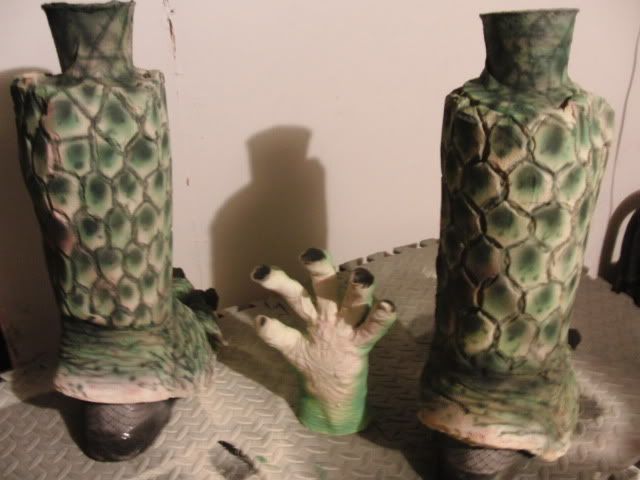
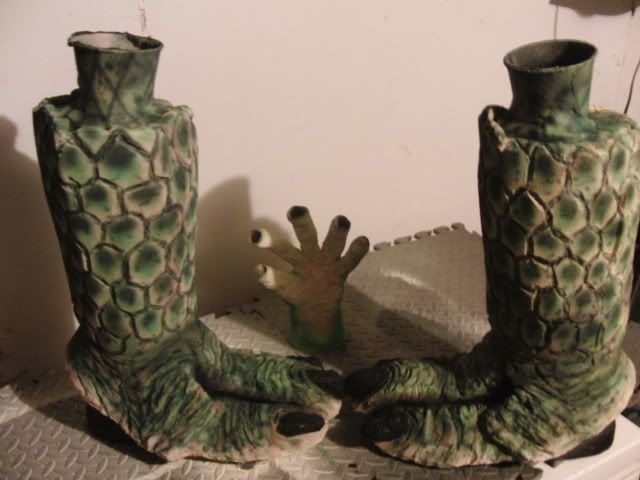
I started making the feet by wraping some boots in cling wrap/ platsic wrap.
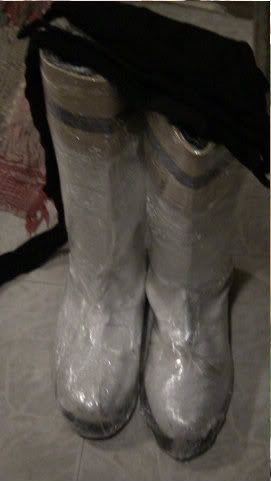
Then I pulled stockings over the boots and glued foam to the stocking.
The I used my burn tool, and scissors to sculpt the foam.

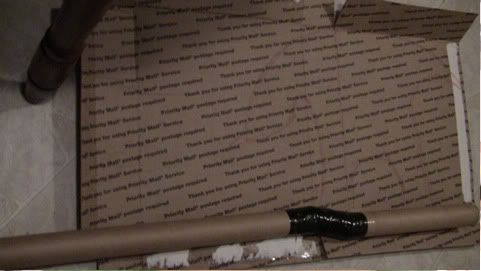
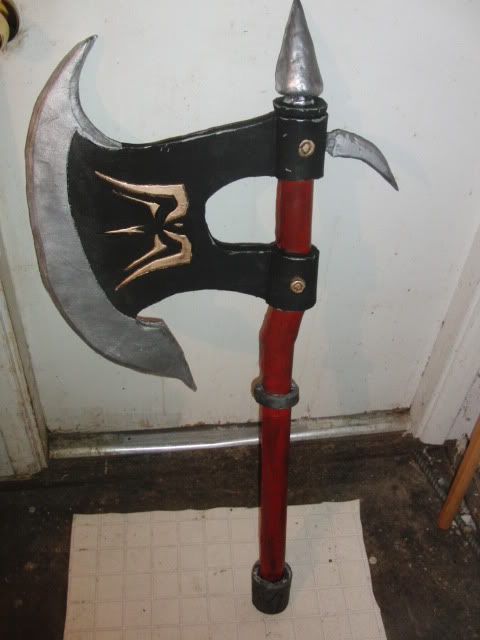
I started the ax. I cut a cardboard tube at 2 angles then put another card board inside to bridge the parts. Next I duct taped the card tubes and spread gap filler foam into the tube to make it dense. I wraped a thin foam over the cardboard handle. The blade was two sheets of EVA foam hot glued together. Next I sealed the foam, painting the ax, then clear coat the ax.


The teeth are made out of super sculpey clay. I burnt them when I backed them. So they are really a dark brown. They took paint well so it was an easy fix.

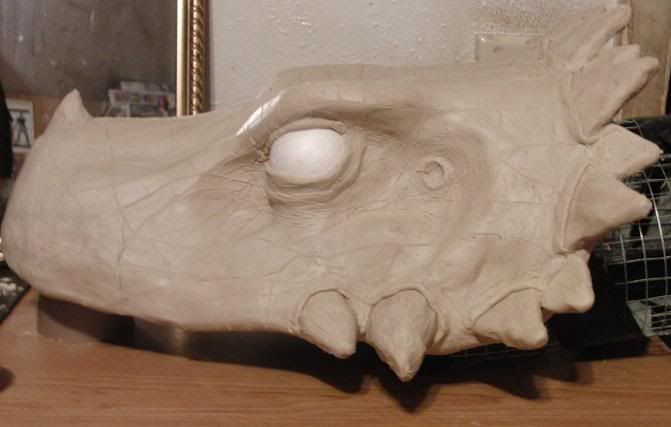
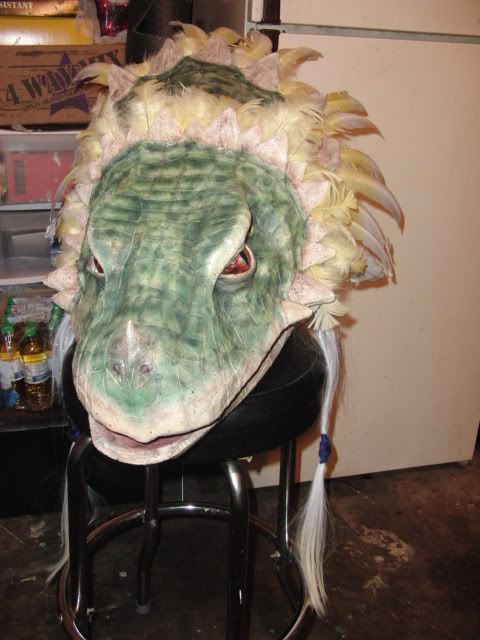
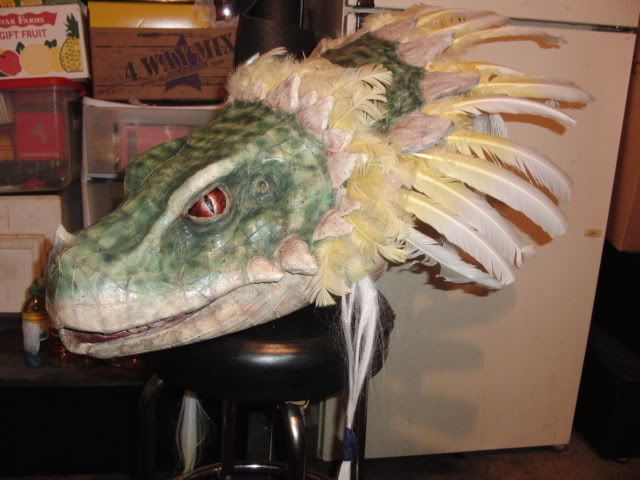
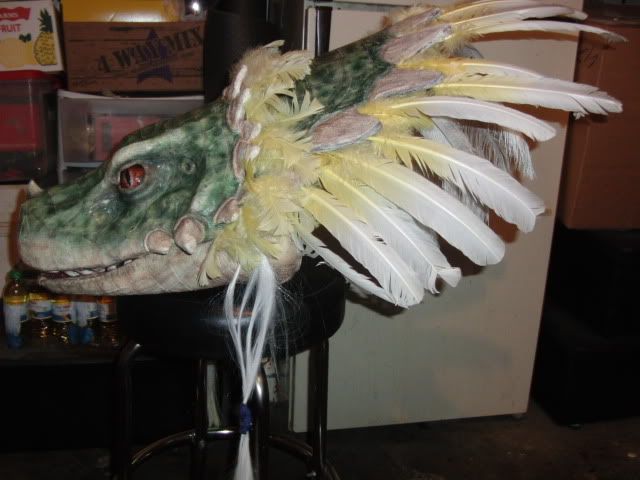
The head creast is EVA foam I sculpted with a dremil, wood burning tool, and scissors.

The cheeks are a thin white fabric I painted with acrylics, and added perma-wet too.
The neck skin is a fabric.


After tinkering around with the mechanics I put together head to where the eyes move.


Start of the armor.
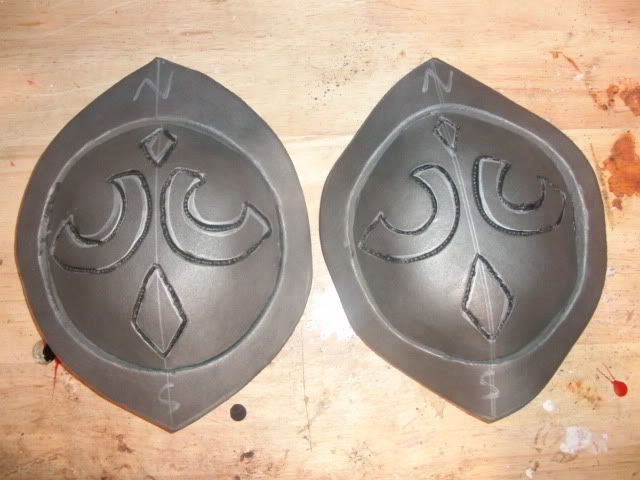
Left bicept gaurd.
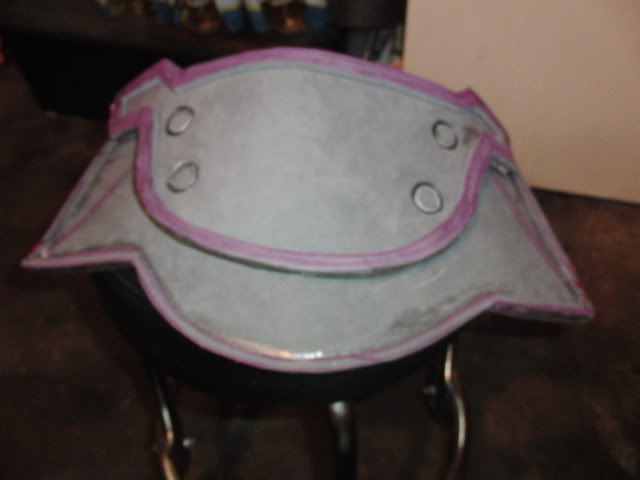
Right shoulder pad.
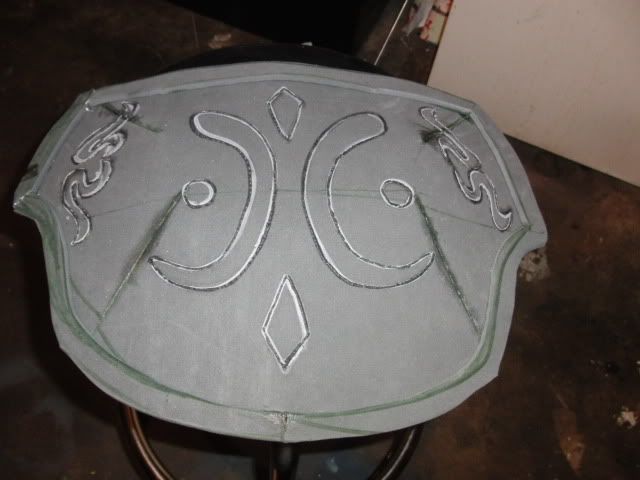
Finished body.
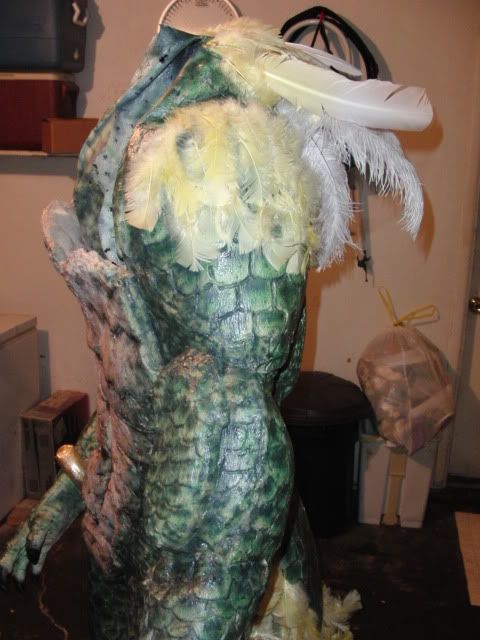
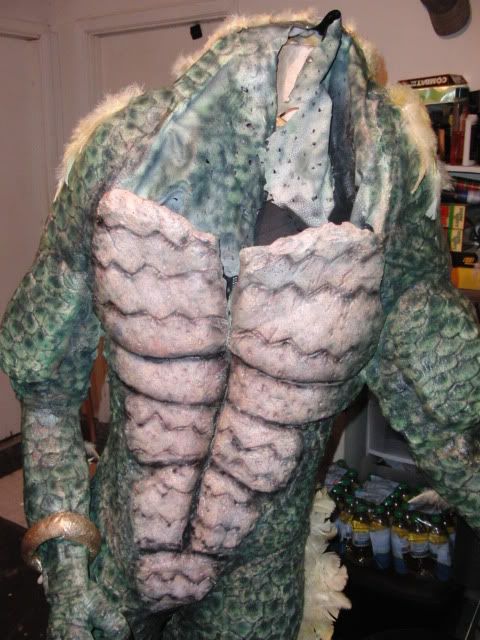
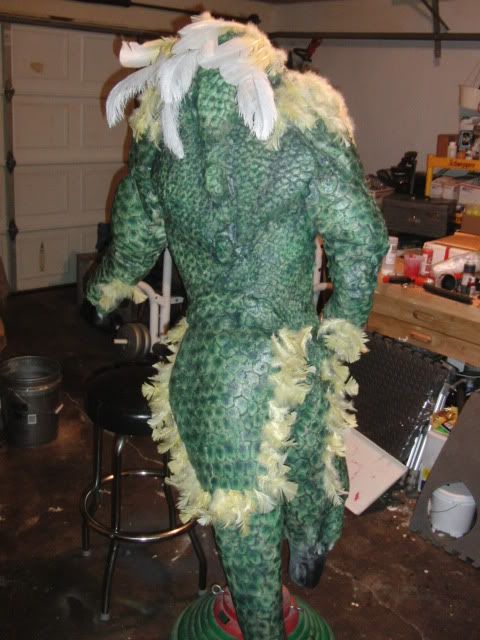
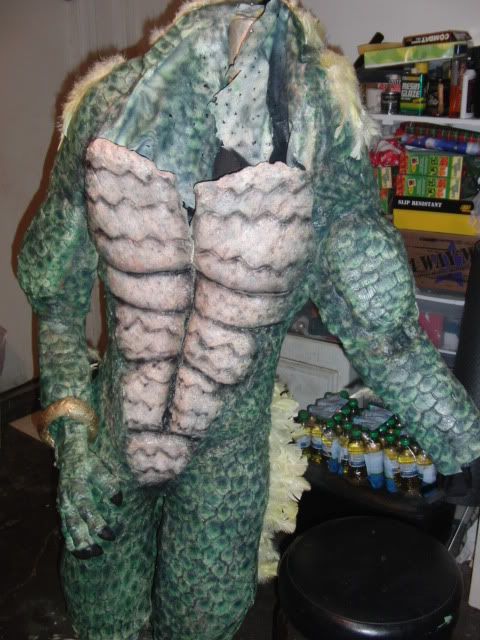
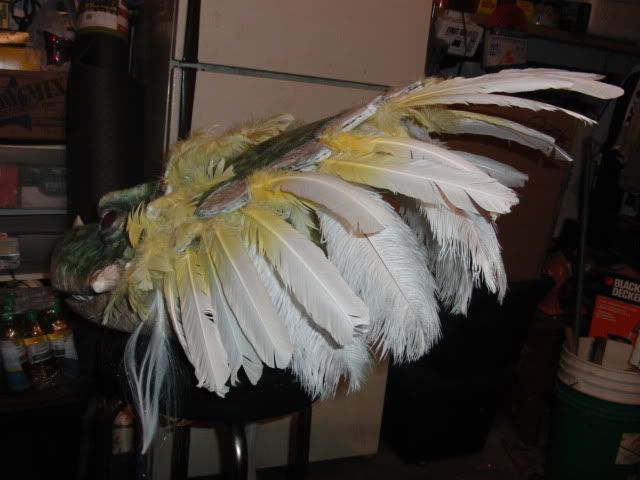
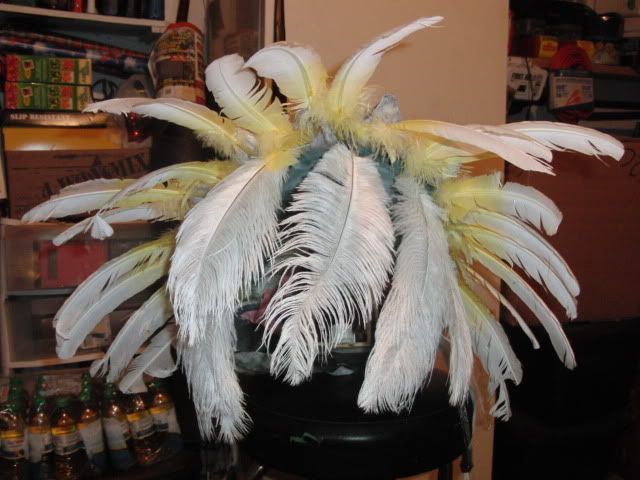
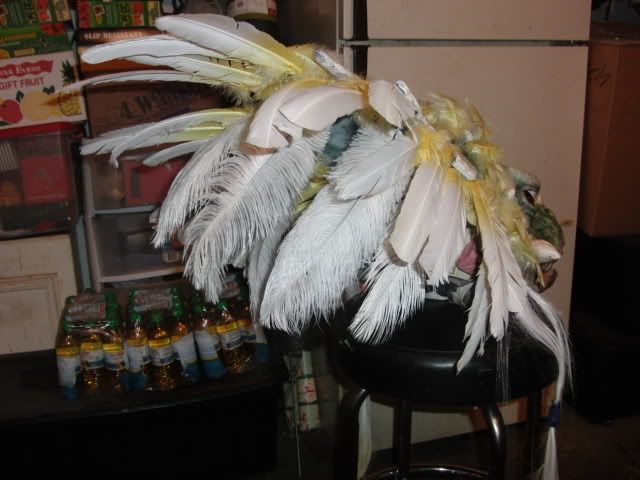
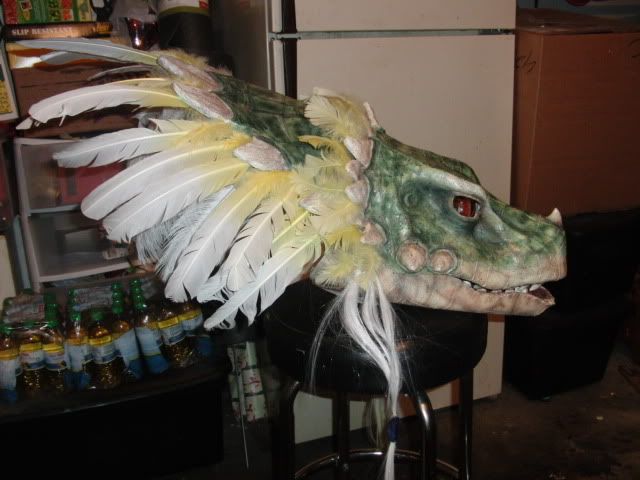
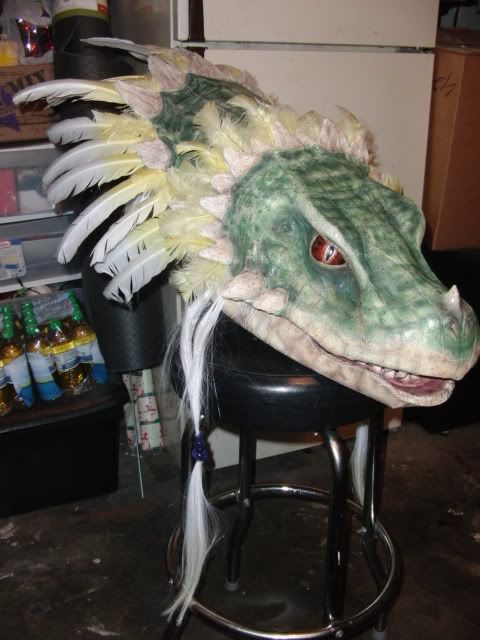
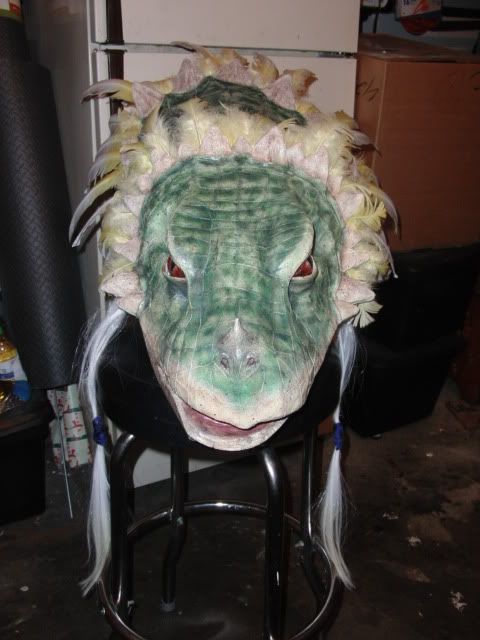
Finished Lizardman head with tounge and feathers.
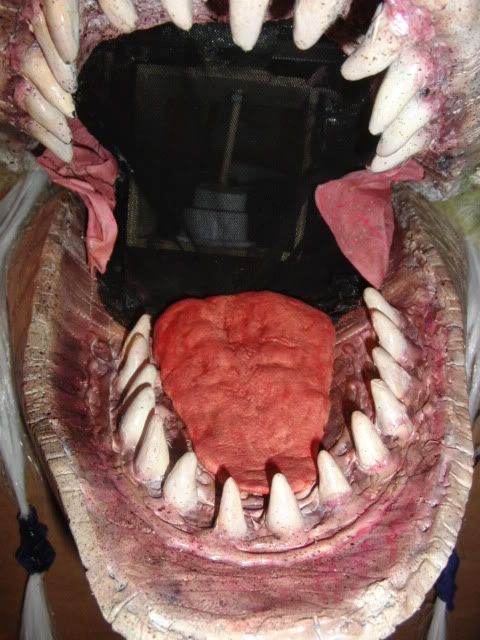
Finished
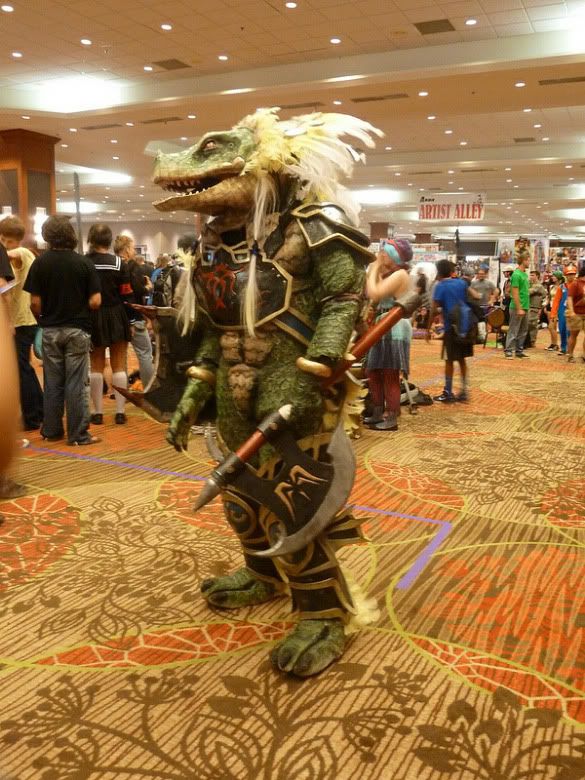
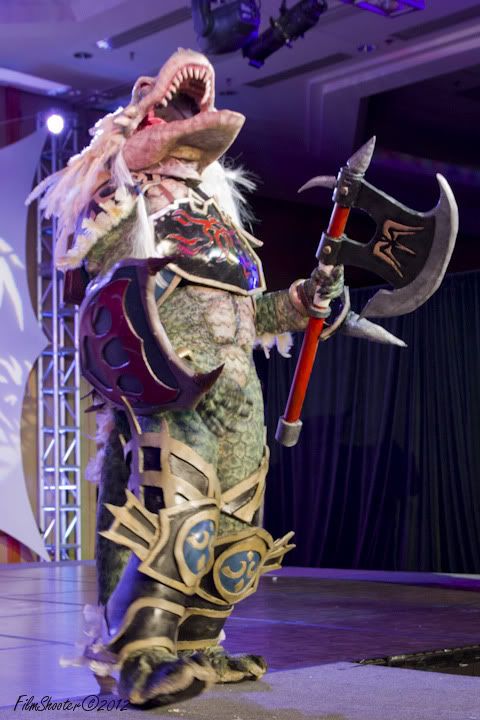
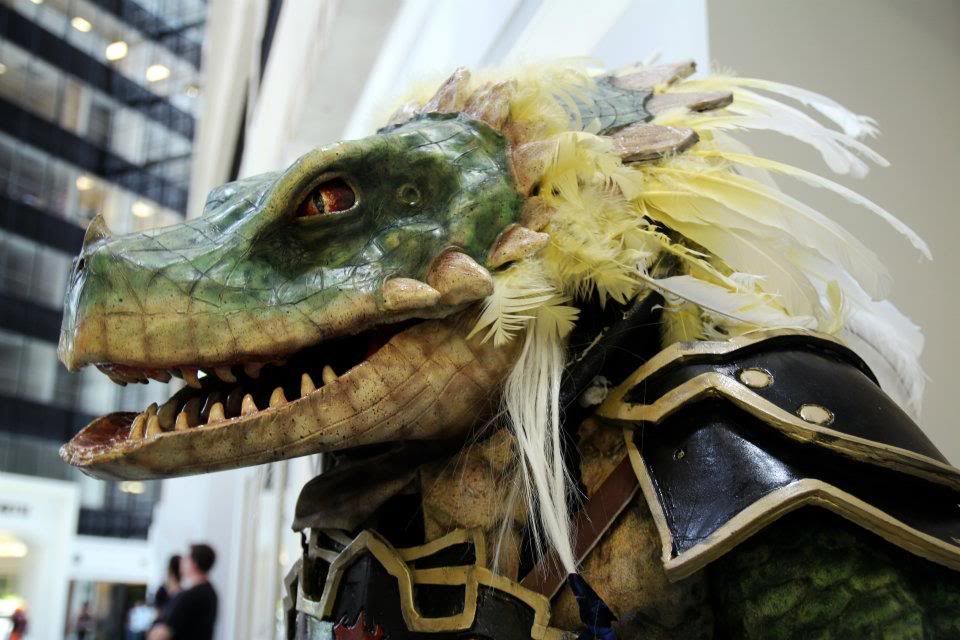
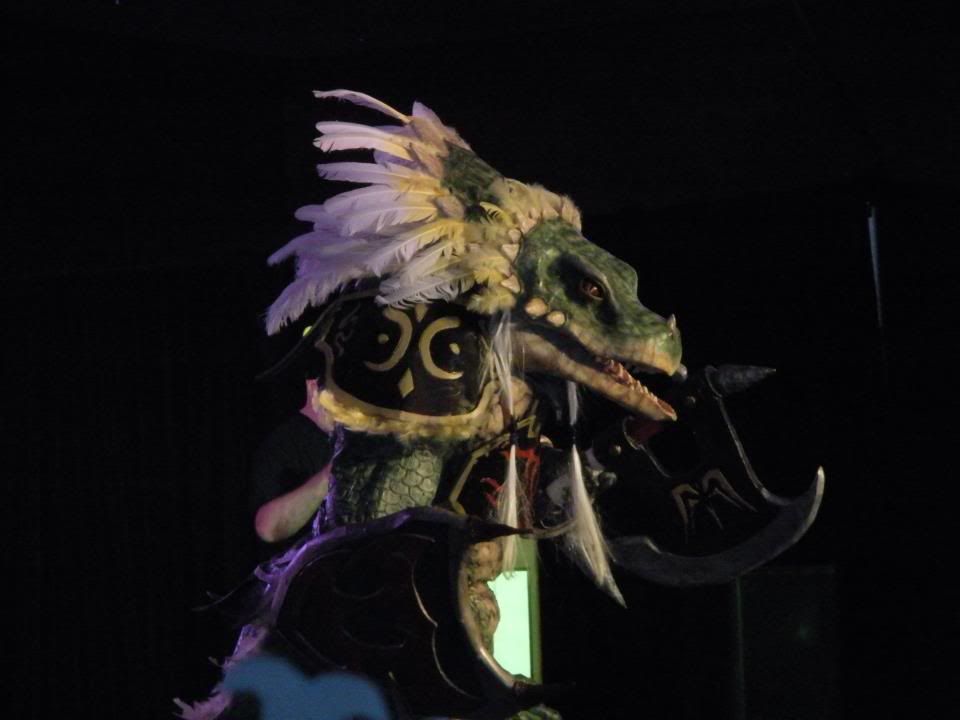
video
http://youtu.be/QNtPCRFyDNk?t=7m52s
http://youtu.be/pCcOX9oyLwk?t=4m17s
http://youtu.be/2gGrhklO2zU?t=28m12s
http://youtu.be/lv4SrhrLsDA?t=3m1s
http://youtu.be/ap1rQUSOV_k?t=7m16s
It is odd making this post with the finished post being up so long ago, but here is how I made this creature.


The right arm of the Lizard man was fake.
I puppeted the head with my right arm, and carry my axe in my left hand.
The armor and weapons I am made out of EVA foam. For the body I used a method used for making fan Predator costumes. I got a spandex skin suit then spray glued upholstery foam muscles to it. Then I burned textures in with a wood burning tool, added liquid latex, and airbrushed it.
Shield


I didn't want to try this build unless I could find out a way to get the eyes and mouth to move.
So I looked up tutorials on ventriloquist dummies to make the mechanics. Here are the eye controls I made.
I made it with a bunch of stuff I found in the craft part of walmart.
A wooden box, wooden sticks, hot glue, styrofoam craft balls, pumptoothpast cap,some kind of pole hanger, paint mixing stick, metal nuts, duct tape and a metal cloths hanger.


The Abs are a bit different than the original art in the game. I looked around the net and decided I wanted to give it abs like this.

I also want to try a color scheme simular to the Gillman. While still trying to maintain that iguana look from the game.
The next stop for the body is covering it in latex.


A gallon can of mold builder latex, and a gallon of monster maker latex.


First test run.


I made the bottom jaw out of EVA foam.


I sculpted some teeth out of sculpey clay, and a tung from a 2 part rubber mold compound.
I started making the feet by wraping some boots in cling wrap/ platsic wrap.

Then I pulled stockings over the boots and glued foam to the stocking.

The I used my burn tool, and scissors to sculpt the foam.


I started the ax. I cut a cardboard tube at 2 angles then put another card board inside to bridge the parts. Next I duct taped the card tubes and spread gap filler foam into the tube to make it dense. I wraped a thin foam over the cardboard handle. The blade was two sheets of EVA foam hot glued together. Next I sealed the foam, painting the ax, then clear coat the ax.


The teeth are made out of super sculpey clay. I burnt them when I backed them. So they are really a dark brown. They took paint well so it was an easy fix.

The head creast is EVA foam I sculpted with a dremil, wood burning tool, and scissors.

The cheeks are a thin white fabric I painted with acrylics, and added perma-wet too.
The neck skin is a fabric.


After tinkering around with the mechanics I put together head to where the eyes move.


Start of the armor.

Left bicept gaurd.

Right shoulder pad.

Finished body.


Finished Lizardman head with tounge and feathers.


Finished


video
http://youtu.be/QNtPCRFyDNk?t=7m52s
http://youtu.be/pCcOX9oyLwk?t=4m17s
http://youtu.be/2gGrhklO2zU?t=28m12s
http://youtu.be/lv4SrhrLsDA?t=3m1s
http://youtu.be/ap1rQUSOV_k?t=7m16s


