OmniWrench Replica Prop Build – Ratchet and Clank

I grew up playing the Ratchet and Clank games on the PlayStation and decided to build one of the weapons from the games. I’m already in the process of building Clank (the small robot you see below), so I decided to create Ratchet’s OmniWrench.
The OmniWrench is the blue/silver weapon Ratchet is holding on the right. The weapon changes every few games, so I decided to settle on the current iteration which is dubbed the ‘Millennium 12’ OmniWrench.


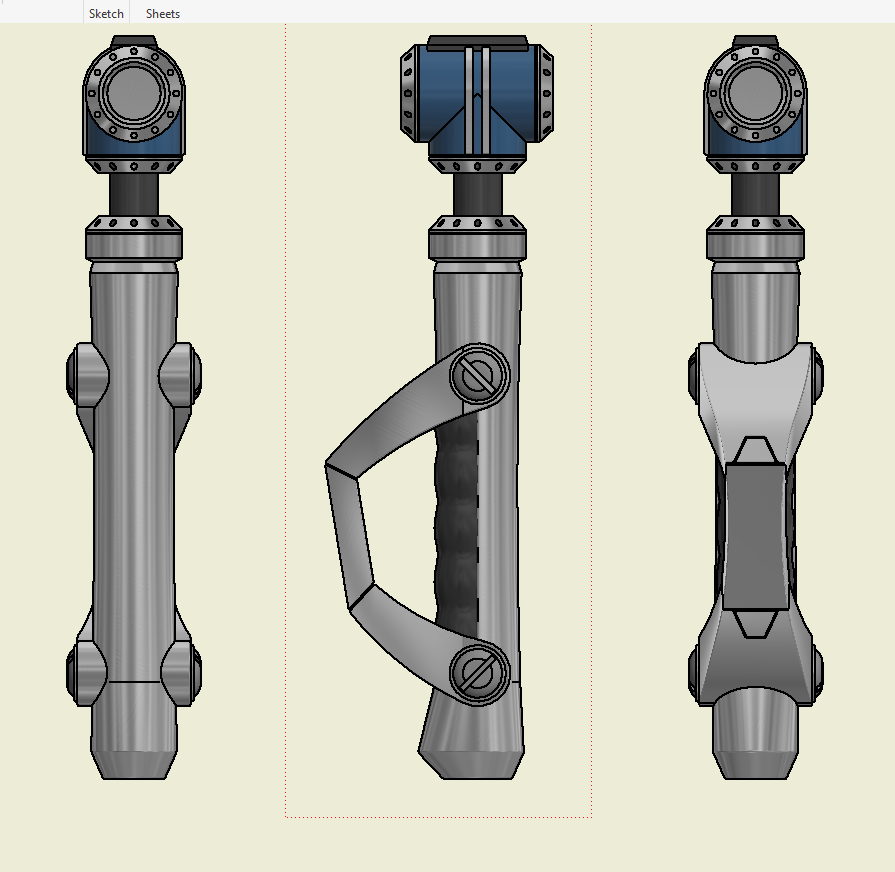
To build this prop replica I’m using reference photos from the game to create 3D models in Autodesk Inventor. The Ratchet and Clank games are known for oversized fun weapons and gadgets, so I’m scaling my wrench to fit that category. From that, my OmniWrench will total 600mm/23.5 inches in length.
Since it’ll be a considerable size, I’ve designed my files to incorporate metal piping and steel tubing internally. This serves the dual purpose of reinforcing the prop as well as providing me hollow internals that I can run electronics and LED’s through. To jumpstart the process I started with modelling the handle and grip sections.




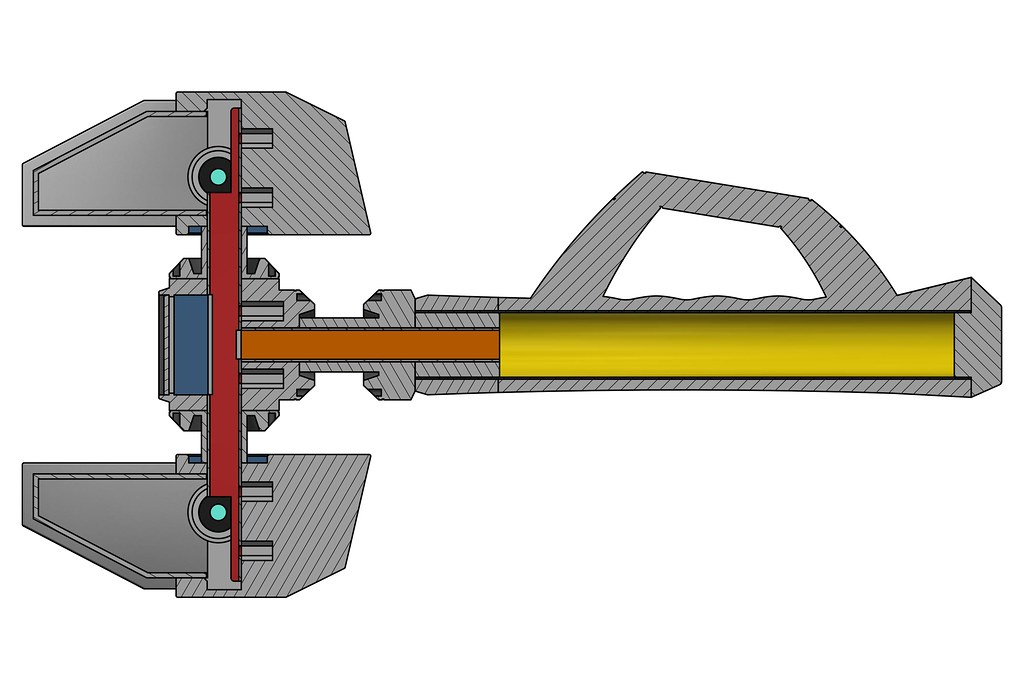
In the section view below you can the internals I’ve design to accommodate metal piping/tubing which I’ll run my electronics through.

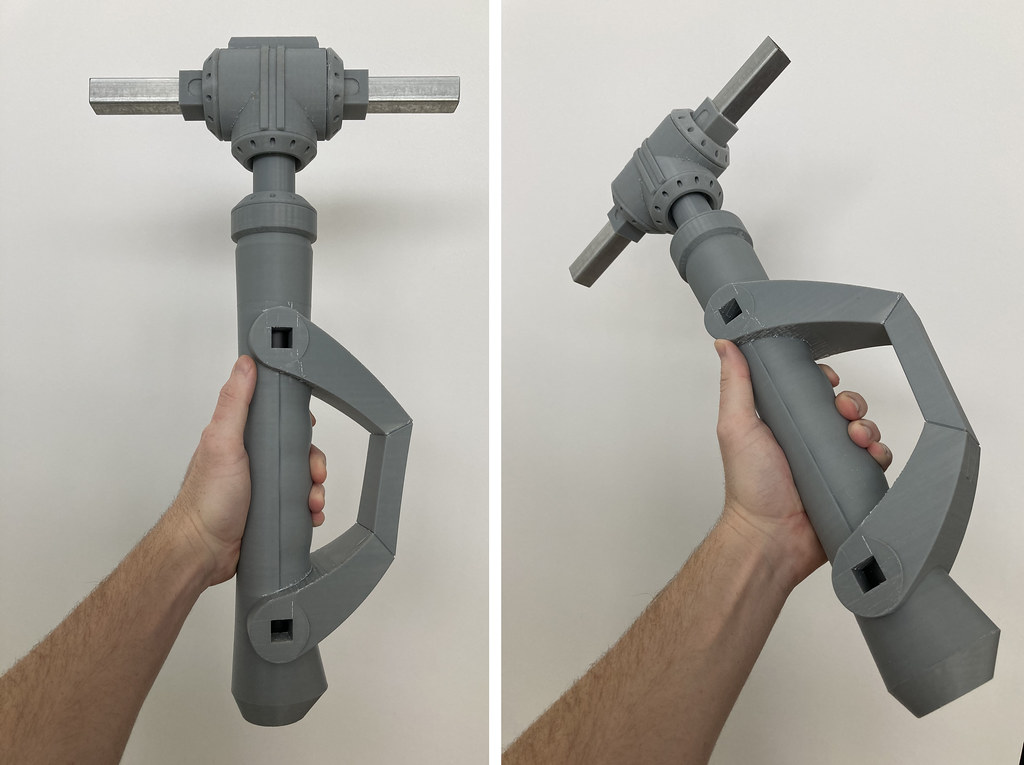
With the 3D model completed I was able to start 3D printing. I started with parts for the central junction area where that connects the handle to the wrench’s jaws.
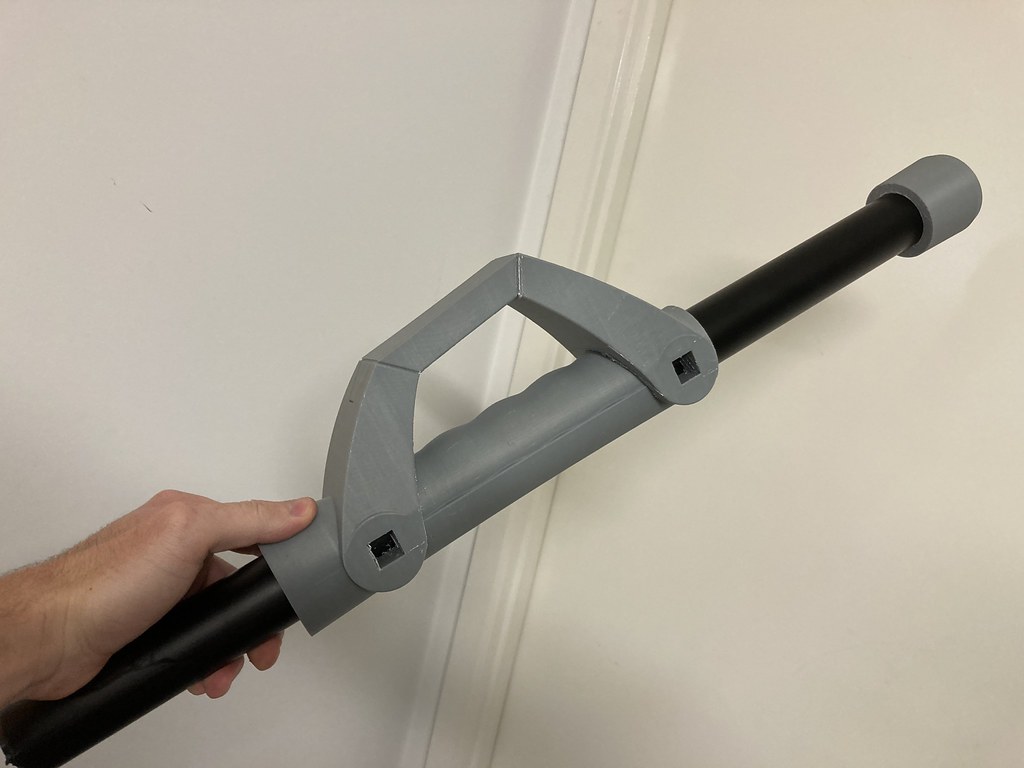
I designed the files so the parts resulted in a snug friction fit over the square steel piping. This way they’re on tight enough that they won’t come off by accident however I can still remove parts for sanding or painting individually prior to final assembly.

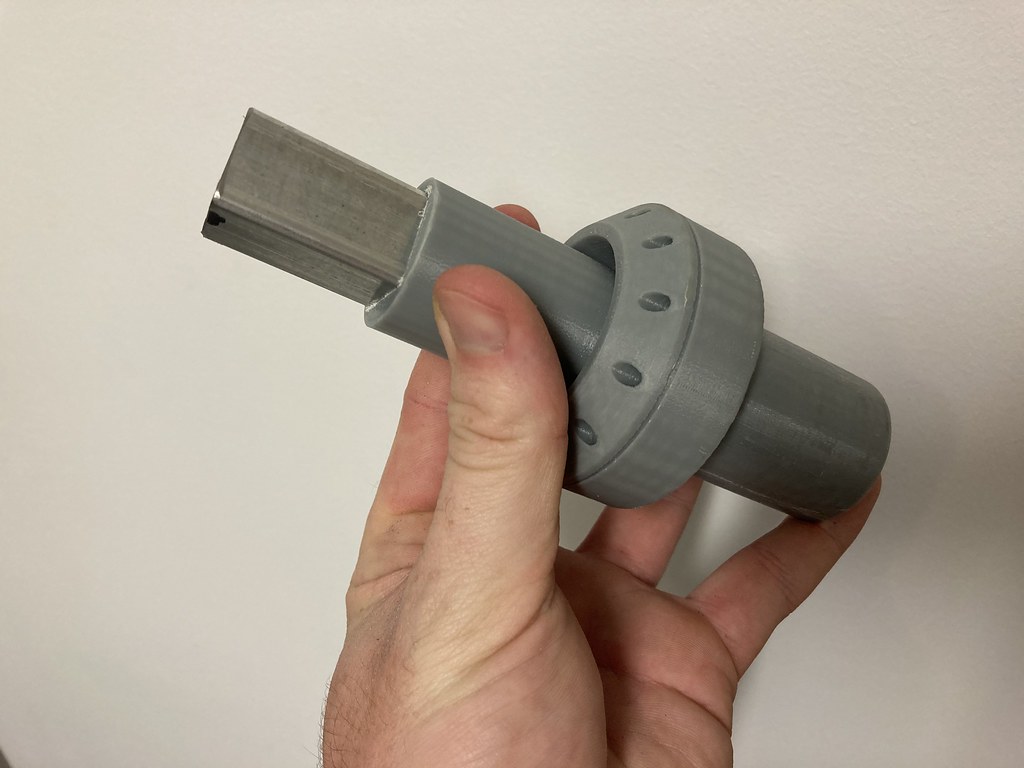
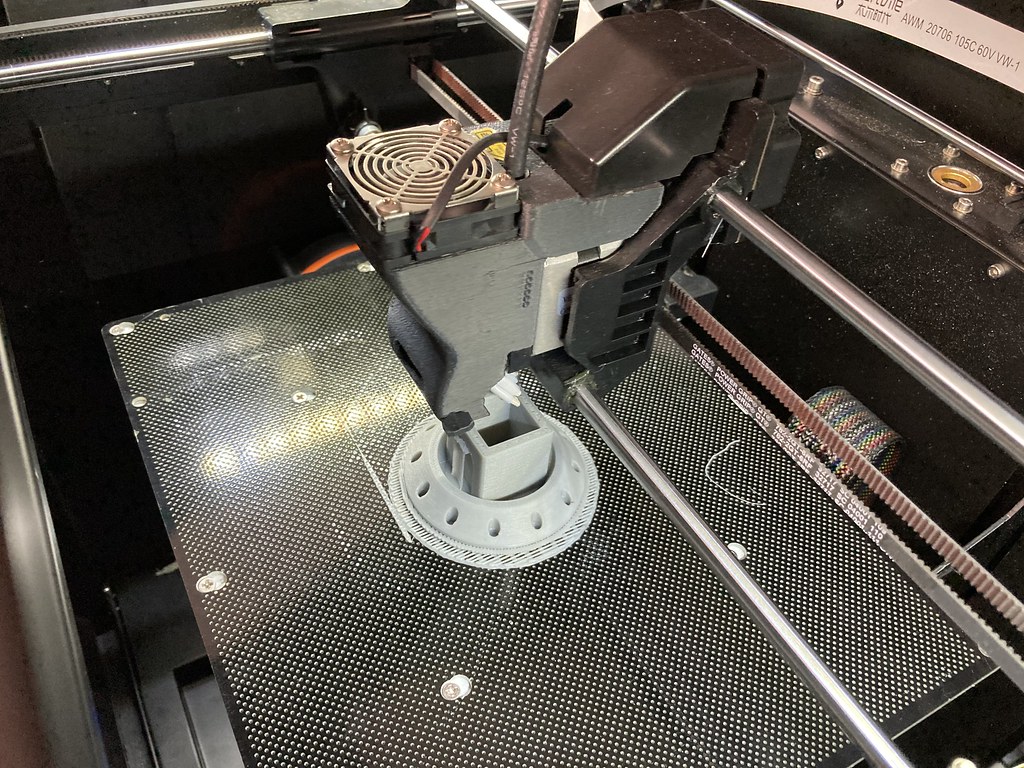


With the top junction area finished it was time to start printing the main handle/grip section. Once the handle was printed, I was able to sleeve it onto the metal pipe I’d be using to house the bulk of the electronics.
I also needed to fit a x4 AAA battery holder inside as my power source. I was able to find a metal table leg at Bunnings that was the perfect diameter to accommodate the battery holder whilst fitting inside the printed parts.
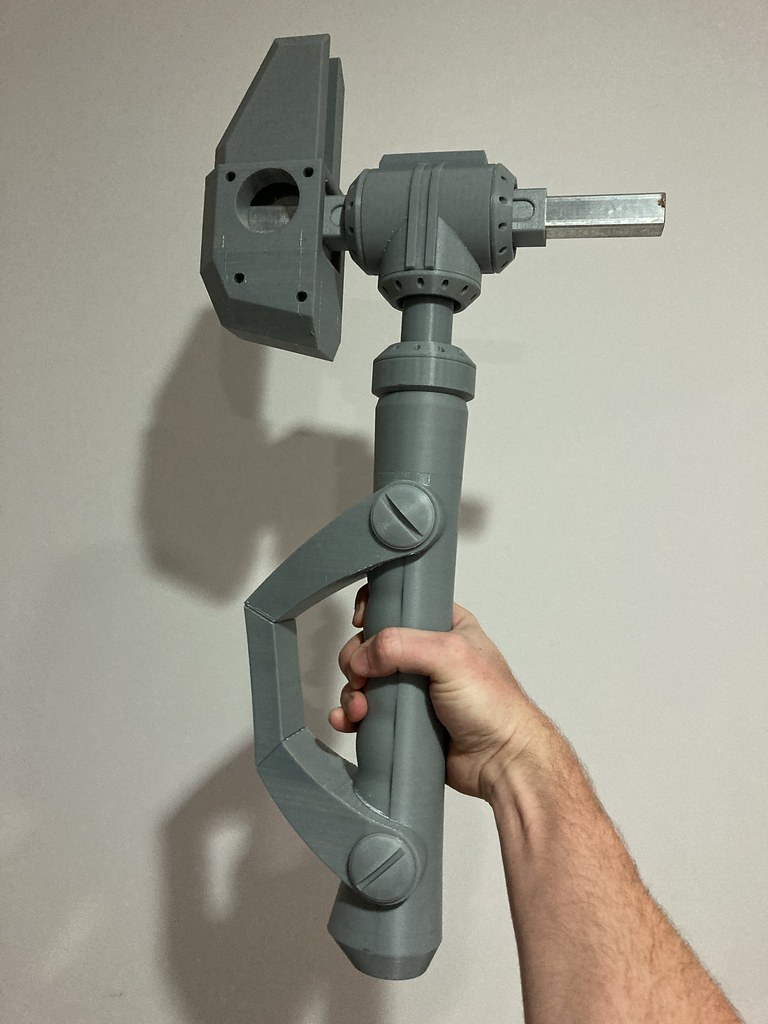


With nearly all the parts printed I was able to begin prototyping a solution for lighting the jaws of the wrench. Initially I was looking at LED strips, however the uneven distribution of the lighting wasn’t ideal.
After research into alternatives, I settled on Electroluminescent Tape. The Electroluminescent Tape is great since it provides a nice consistent lighting source. It’s also flexible and I can bend it up to 90 degrees, the only downside is it isn’t as bright as LED strips.

To mount it the LED strip in the jaw area I printed a thin profile that’s a nice friction fit. I then used strong double-sided tape attach the Electroluminescent tape.


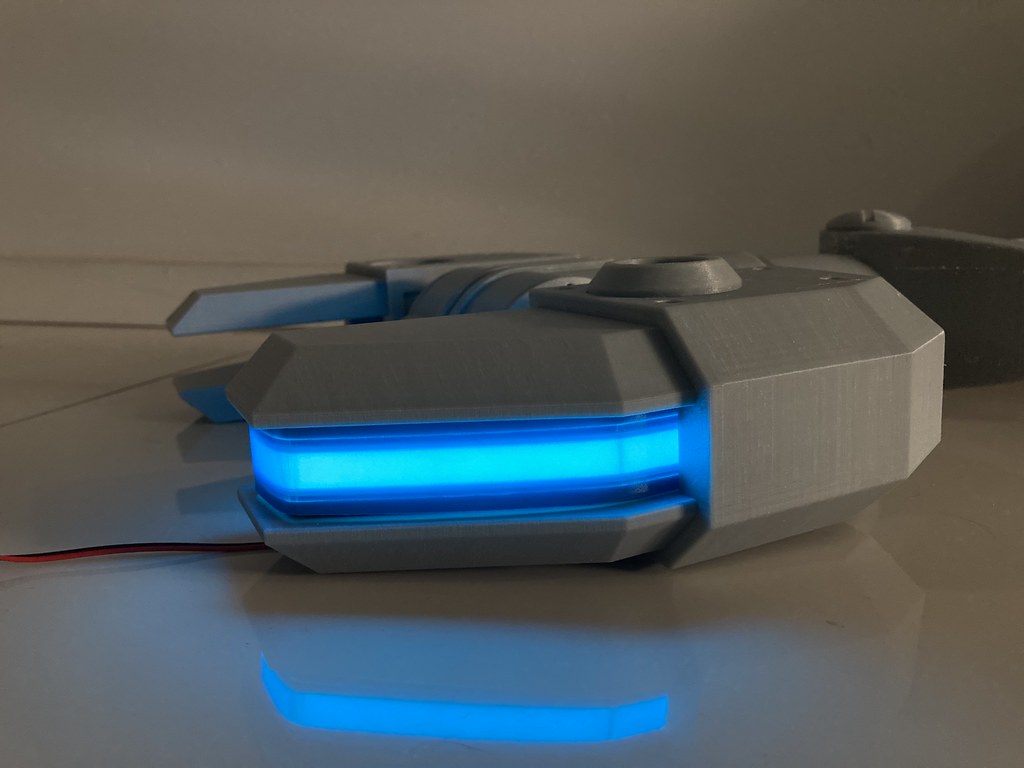

With the Electronics prototype sorted I needed to make the steel piece that connects the two jaws to the handle.


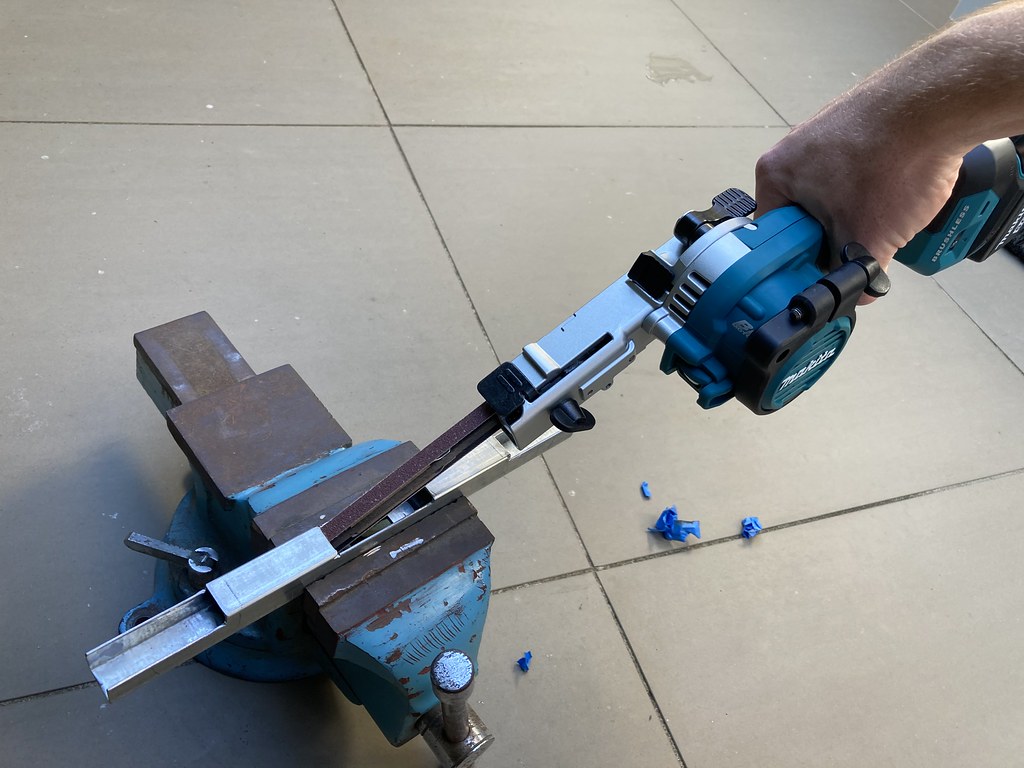

With the steel piece completed it was time to prep the jaws with threaded inserts.
I drilled holes in the steel that line up with threaded inserts inside the jaws. Then when I sleeve the jaw onto the steel, I can thread a bolt through securing the two parts together. This allows for a solid assembly that I can still disassemble for working on maintenance on electronics or for painting.
When I 3D modelled the jaws, I designed cavities for M6 coupling nuts. The tolerances were designed such that I needed to hammer them into the hole resulting in a very secure fit. I also made sure to increase the infill of the 3D print to make sure that nothing buckled when hammering the nuts into place.


Comments
-
Awesome work and great writeup Jonah! Looking forward to seeing the finished prop.
/Chris1 -
Thanks so much Chris, really appreciate it
 0
0 -
Last week I was able to make a huge amount of progress and pretty well knocked off all the of the electronics.My setup consisted of 3 strips of Electroluminescent Tape, one for each jaw and then the light panel on the center junction piece. The Electroluminescent tape is powered by x4 AA batteries, which runs into an inverter which then illuminates the Electroluminescent tape.Also branching off from the wires before the inverter are my wires for the 4 blue 10mm LEDs. These 4 LEDs are used to light the circular light panels on the sides of the jaws. Each LED is also wired to have a resistor, so the battery voltage doesn't blow the LED.

 After an afternoon of soldering and problem solving I had my finalised set up completed! I've since added the other two bits of EL Tape and removed any excess wire to help it hit nicer inside of the wrench.I'm not super experienced with electronics so I'm super stoked with how this came out. As for the switch to turn the lights on, I've got a latching switch that's recessed into the base of the pommel. This way it doesn't stick out like a sore thumb!
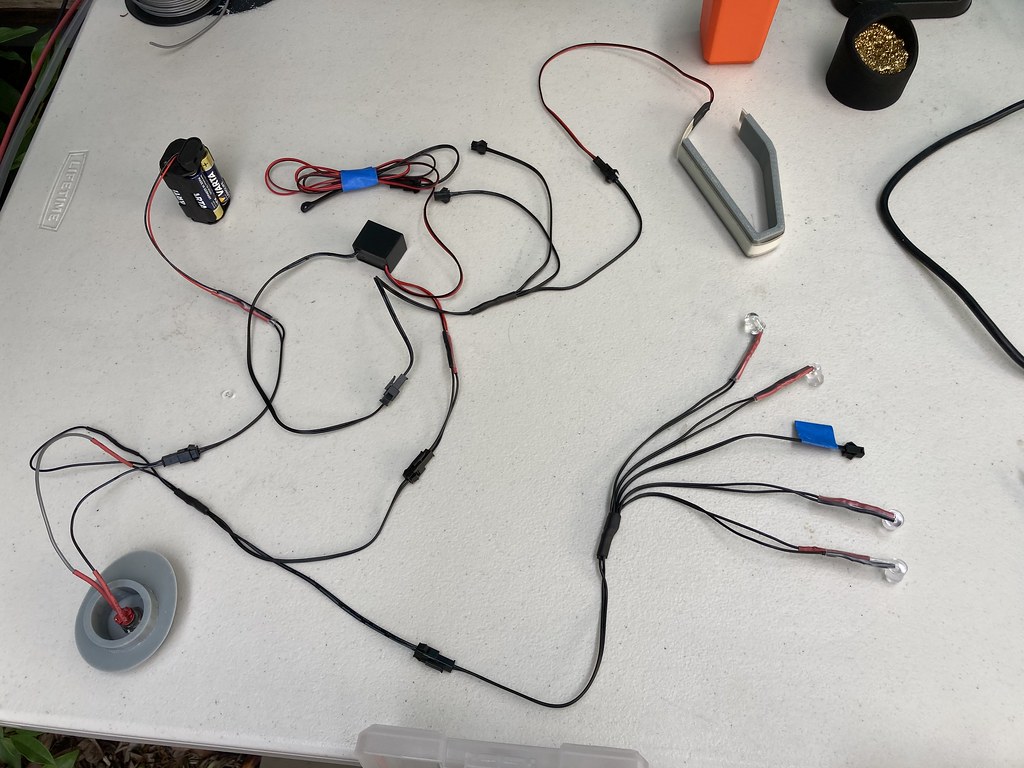 With the electronics all sorted I needed to create another jaw lighting rig and this time I remembered to take proper photos.It starts with a 3D printed profile which I then run a strip of Tesa double sided tape along. After peeling the protective film I carefully stuck the EL Tape down along the centre line.The profile was designed so it was thin enough that it could flex, which was very helpful for fit it into the jaw as the printed part is a nice snug fiction fit. This way I can insert the lighting setup into the jaw and then move the sides of the profile up flush to the jaw to eliminate any gaps that spoil the look of the EL tape.
 With all the electronics soldered and assembled I was just about ready for the first full assembly.First however, I needed to glue the two halves together. For this I'm using Z Poxy, which is a two part epoxy adhesive that goes off in 5 minutes.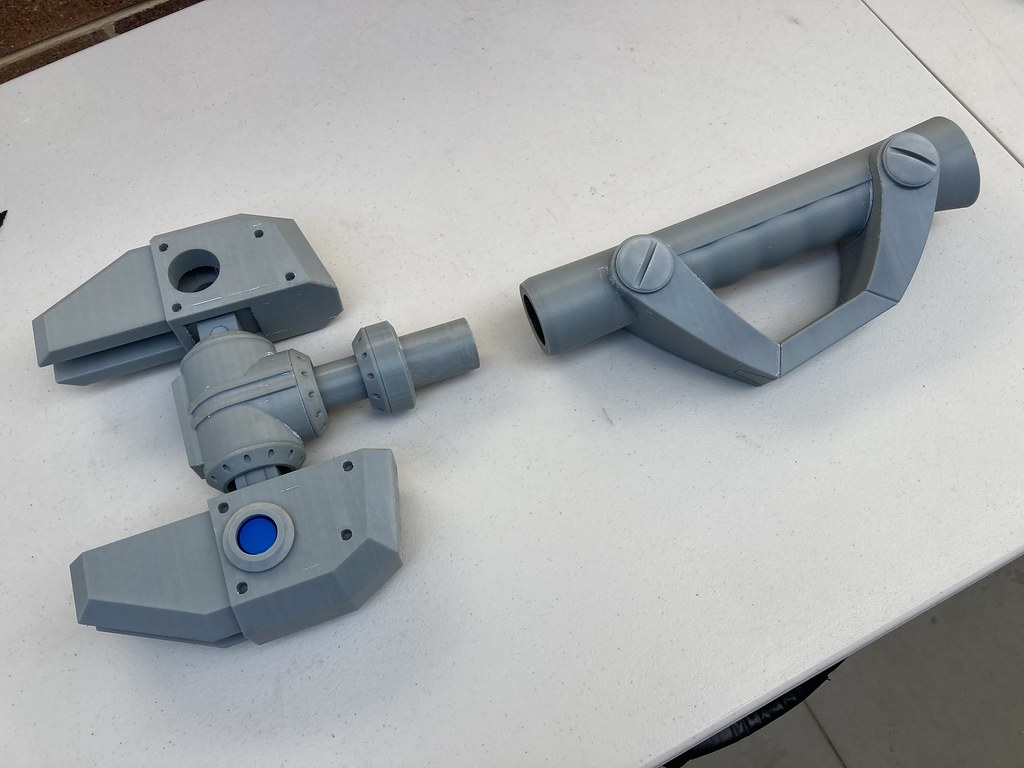
I used my grinder to quickly cut some channels/grooves into the 3D print. These grooves allow the glue to seep inside and help increase the reliability of the bond between the two parts as the Z Poxy as it has more to grip onto.
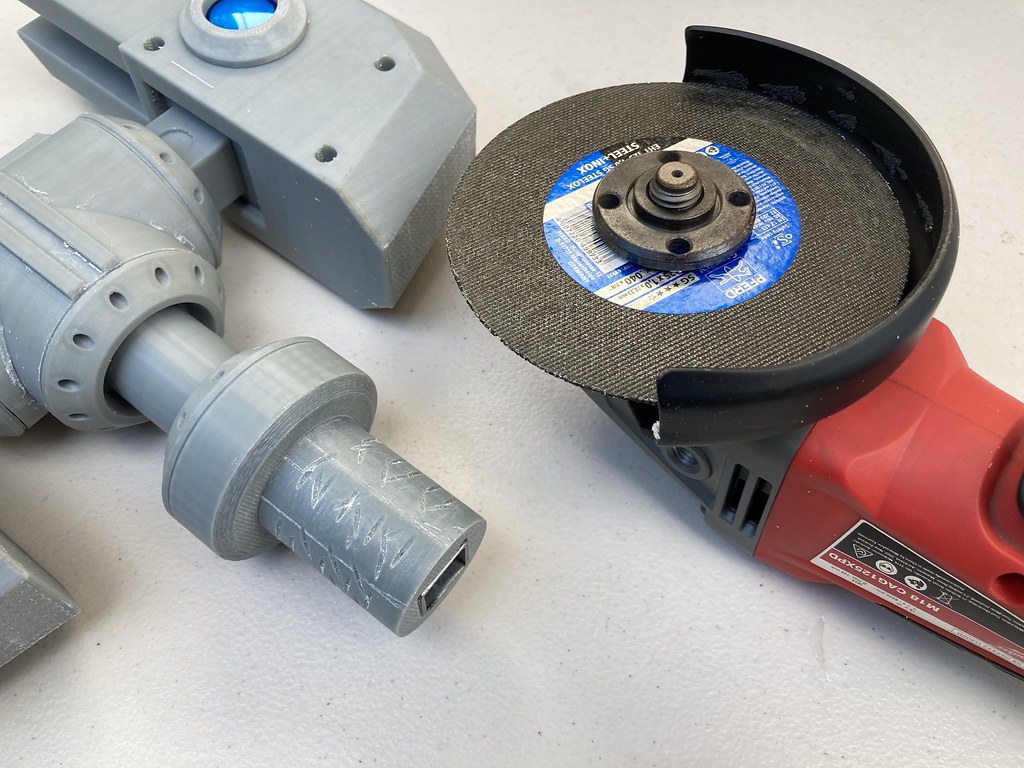 I then taped up the areas that would be affected by excess Z Poxy oozing out when the two parts are glued and fitted.
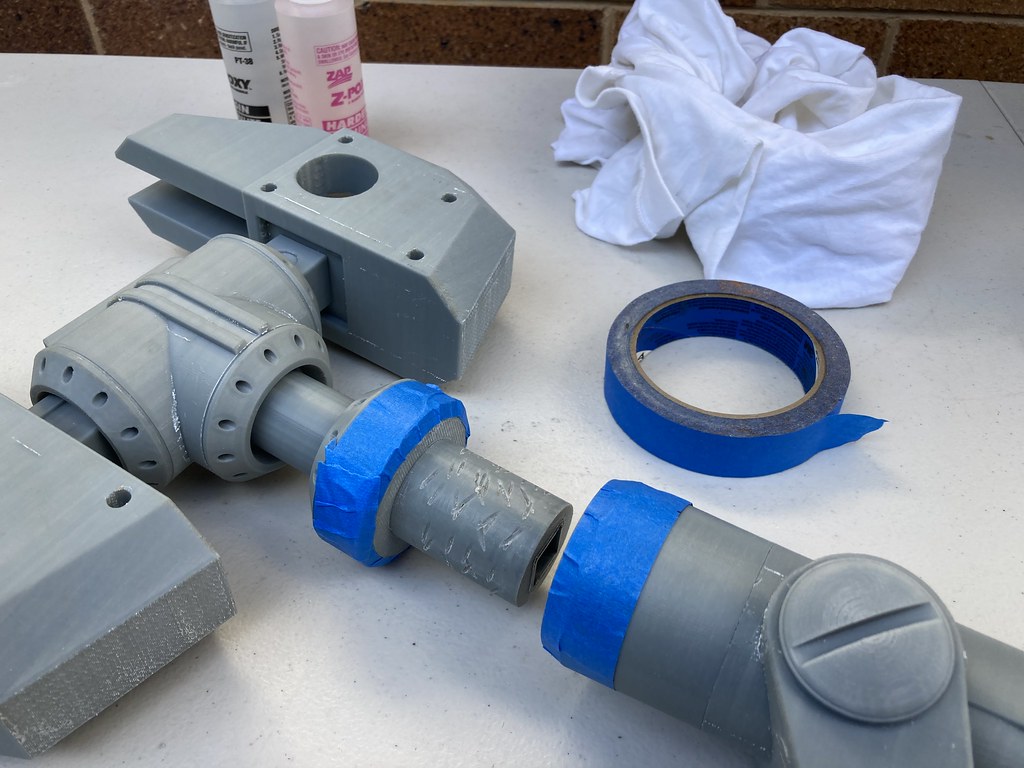 I then mixed and applied the Z Poxy to each piece. Following which I pressed them together, and once the excess glue stopped oozing from the join I wiped excess with a rag. Then after a minute of letting it settle I peeled the tape off while the Z Poxy was still green so could get a clean join.
With the two halves glued together, it was time to start the process of creating my electronics setup.
First, I ran the wires fort through the central junction at the top, down through the prop to the batteries.From there I was able to thread the LEDs and EL tape through the steel pipes into their respective jaws and neatly tuck everything inside.I'll have some more WIP photos soon with the LEDs all going!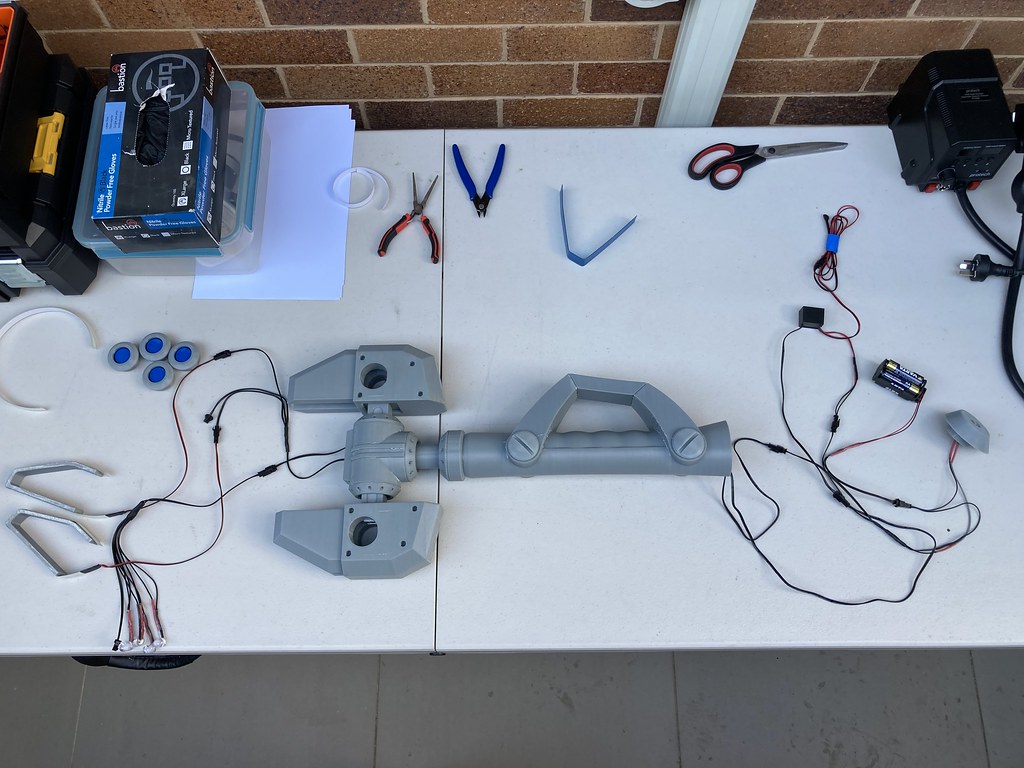

 0
0 -
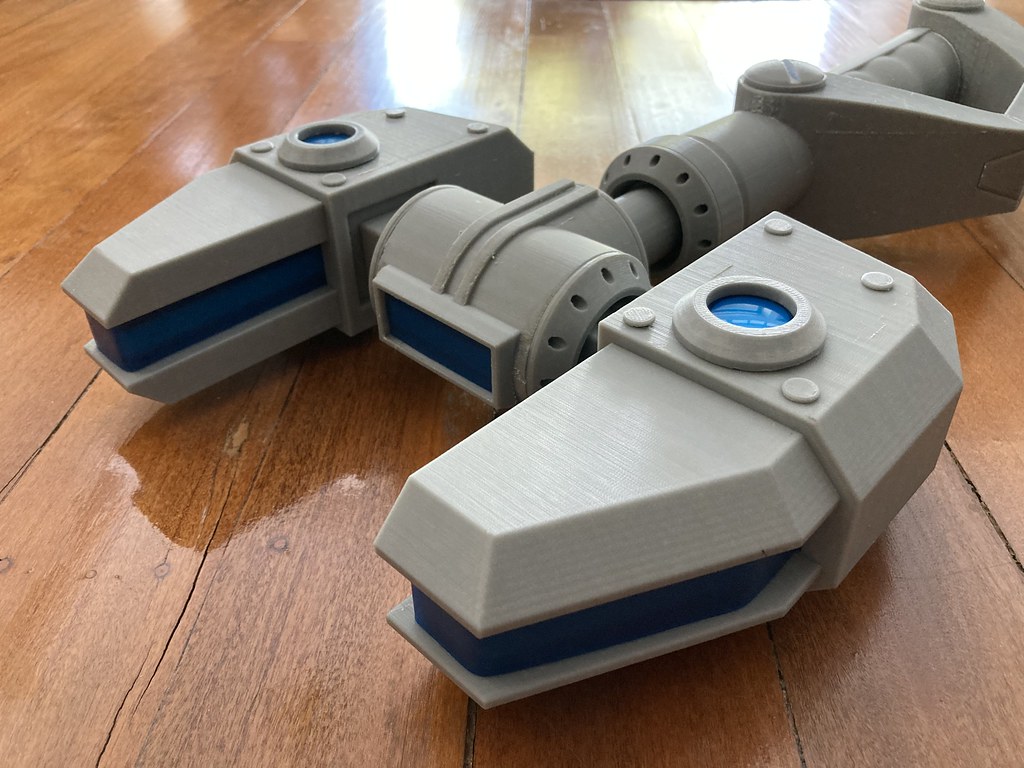
To light the circular windows, I’m using 10mm blue LEDs that are friction fit into the opening in the rear of the bezel. This sub assembly can then be inserted into the side of the jaw with, yet another friction fit.
The blue lens seen inside the bezel are cheap Arcade style buttons that I gutted for the lens and diffuser.
I also printed out the fake bolt/rivet heads that are seen on the prop in the game. I designed these so that I could fit them after the fact to help make the sanding and painting process easier.


I also needed to install the EL Tape in the top window that sits between the two jaws.
The central junction piece on the prop has a lip that I incorporated into the design that helps fit another little 3D printed mounting plate that has the EL Tape. The plate is inserted into the gap and the lip prevents the plate from going too far.
Once the 3D print plate and EL tape were in place, I was able to insert the blue diffuser.

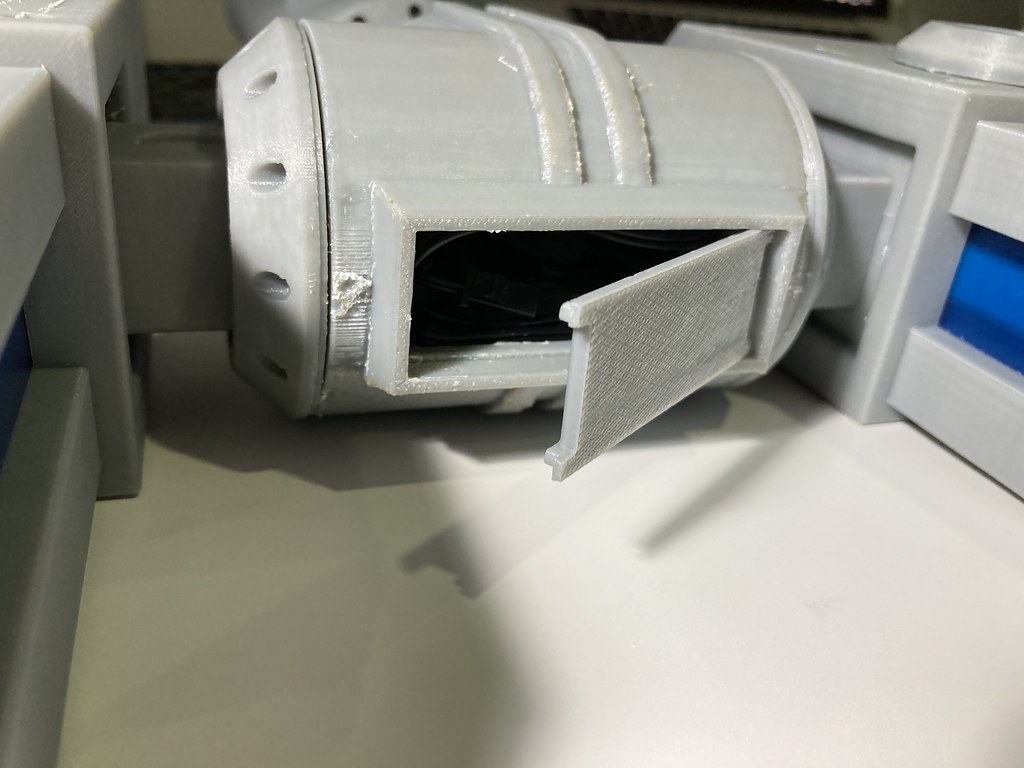 Again I used Tesa tape to mount the EL tape.

 Once the 3D printed plate and EL tape were in place I was able to insert the blue diffuser.
 And then the final part I needed were the fake bolt/rivet heads that are seen on the prop in the game.I designed these so that I could fit them after the fact to help make the sanding and painting process easier.
 0
0 -
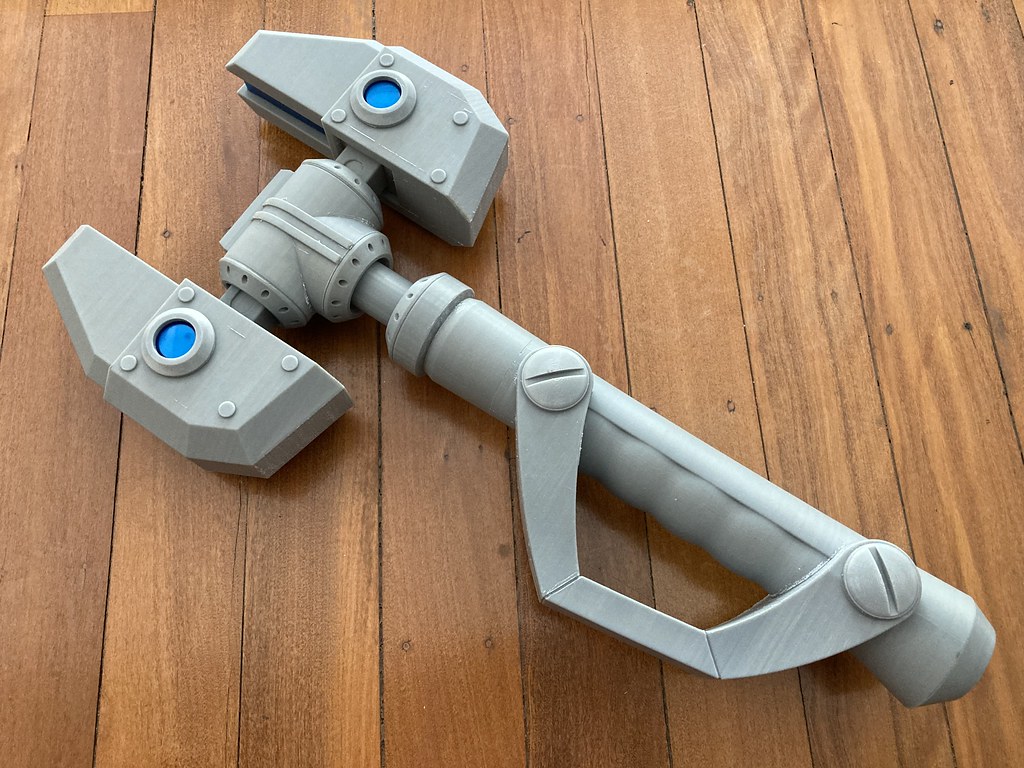
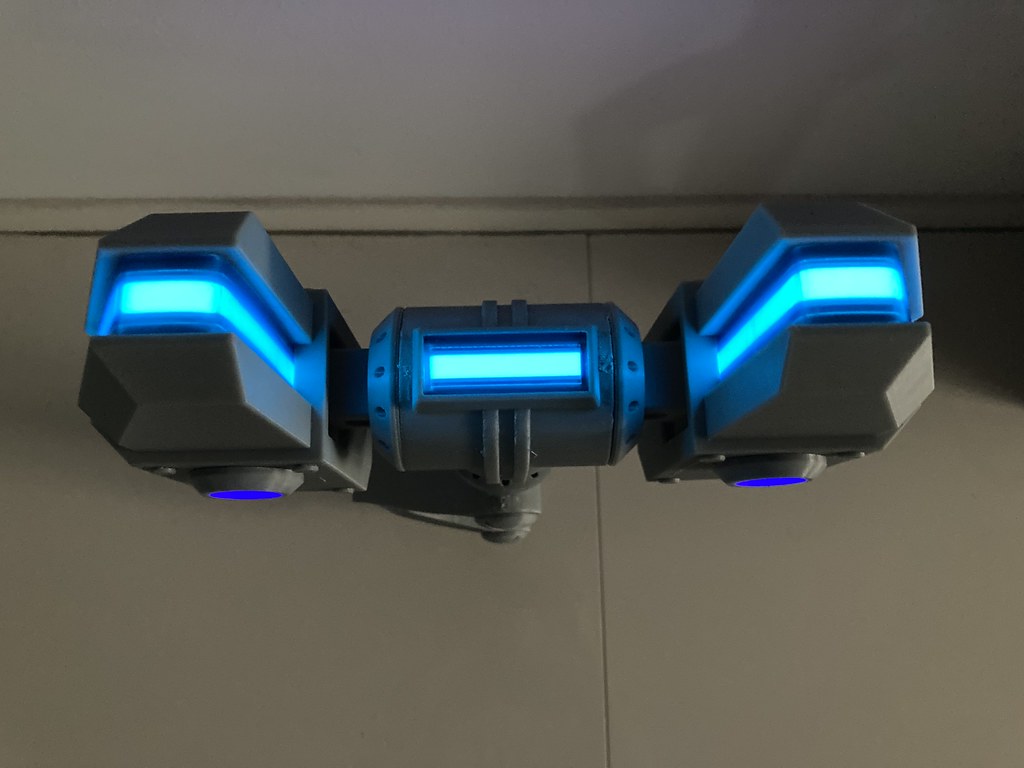
And here it is! The prop has all the parts assembled and the electronics are all working as they should
 I'm seriously stoked with how this has come out and it's beyond satisfying seeing it light up properly for the first time.Obviously there's still more to do with plenty of sanding, filling and painting however, I can't really do painting in the town house we're at so that will have to wait for another day.I also plan to get some different diffusers for the side mounted round LED's to try bring the shade of blue more in line with the EL Tape lighting.Speaking of the Omni-Wrench prop, I've already 3D modelled another version seen in one of the other games. So I'll be sure to document the 3D modelling and build progress here.




 0
0 -
Looks amazing when lit! Can't wait to see how the paint turns out. Happy sanding!
/Chris1 -
With the test fit completed I was able to start the process of preparing the parts for paint.The most time-consuming aspect was sanding, filling, and applying a coat of primer to all the 3D printed parts. This process is one that is repeated multiple times for each part with the goal of sanding/smoothing out all the 3D print lines to produce a consistently smooth surface.To help with this I used ‘filler primer,’ which is spray paint primer that has a filler additive mixed in. This quick drying filler primer helps with applying consistent coats to sand.Here's some photos I took during the priming process.


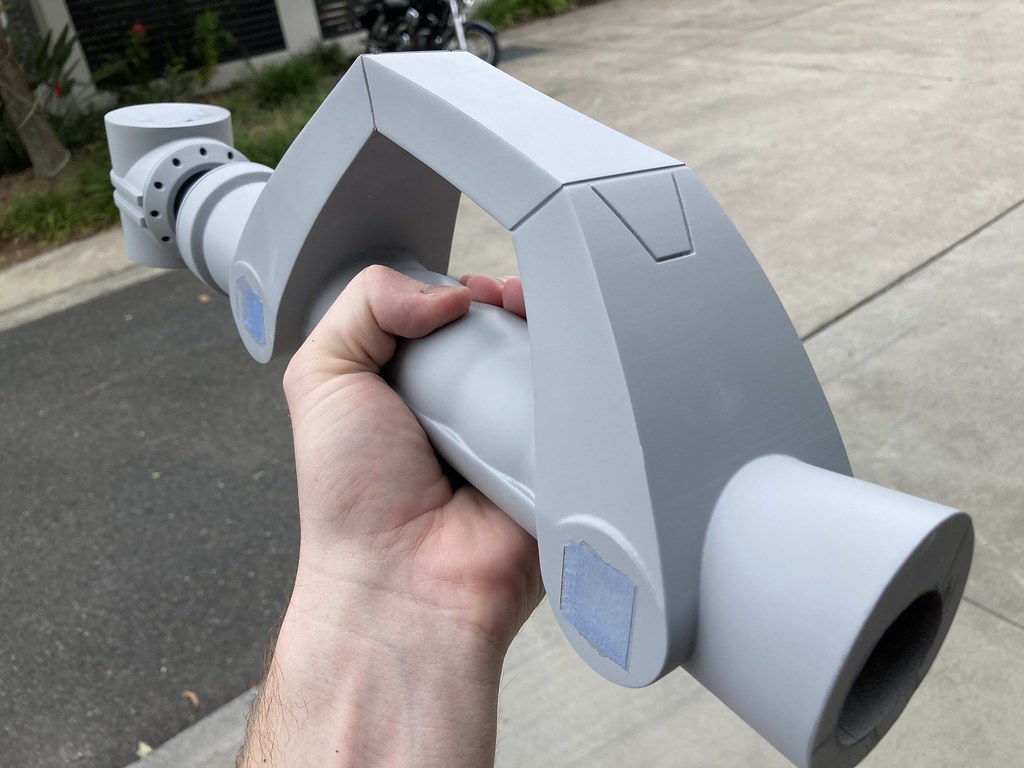 I also knocked off the bolt plant ons that go on the sides of the handle.These were nice and easy to do quickly with filler primer.

 With the parts sanded and primed I could commence with applying the topcoats using acrylic based spray paints from Montana. These are paints typical used by graffiti artists however, they provide nice finishes considering they’re still spray paint. As I’m building this as a personal project in my home workshop, this is the only method of painting I have access to.With the larger multicoloured pieces I applied a base coat of the main colour (for example the silver seen here) and once dry I masked up the bits which remain silver so I could apply the blue coats. You can also see how my plant on fake rivets can be inserted after the blue has been applied.


 I also designed my prop to be able to break down into smaller pieces to make the snading, priming and painting process simpler. Here you can see some examples of that in action.

 The final part requiring paint was the central handle/body of the prop. Painting occurred in a separate stages to help accommodate the three separate colours required.First the dark grey base was applied for the grip and rim of the top central window. This was followed by masking off the grey and applying the dark blue seen on the top junction area.


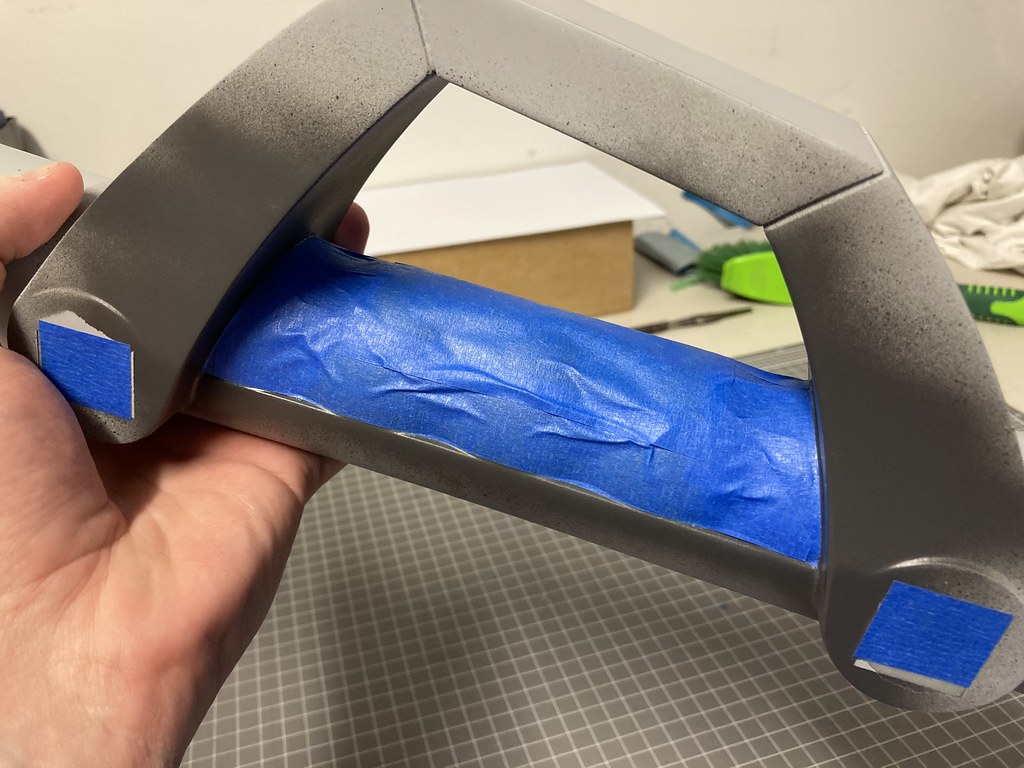 Finally, the blue and grey areas were masked up and the final coat of the matte silver was applied. Once a consistent coating was applied the part was left to dry, after which the masking tape was removed.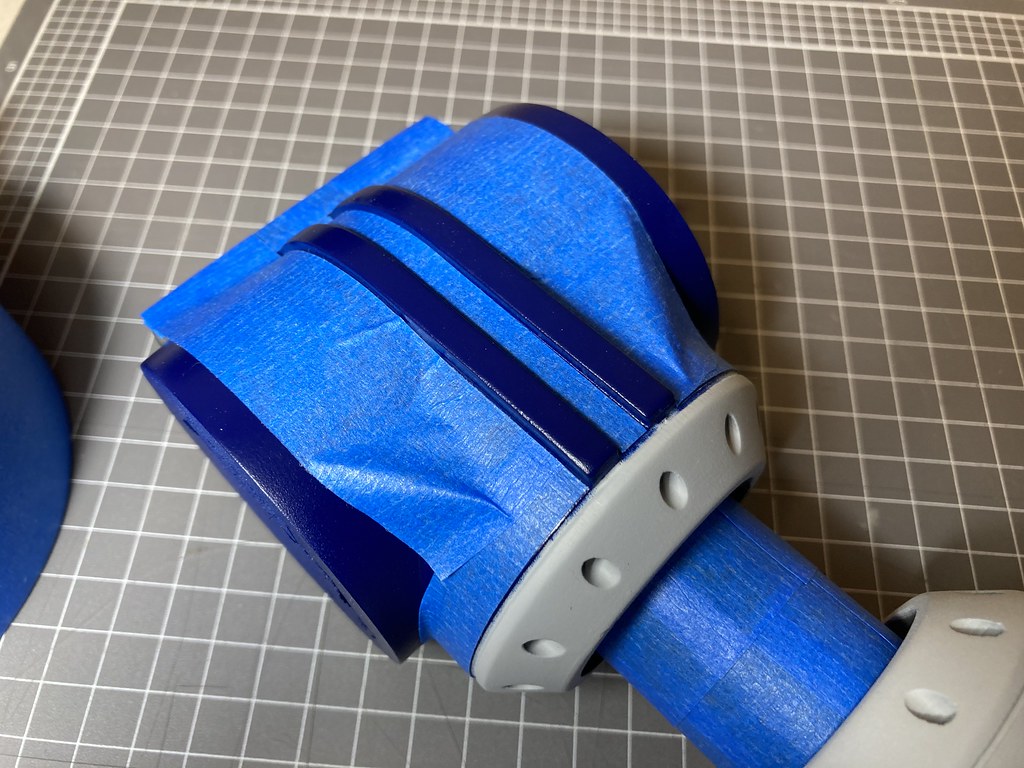


0 -
Wow!!! Just Wow!..
This as a real work of art both in design and execution. Please - show us some pictures of it being used.1 -
Looking good! Sanding really is the hardest part when dealing with FDM prints, and there are not many shortcuts. 3M makes some great spot fillers that help in addition to the filling primer. For stuff like this, I try and make small details with a lot of hard to sand nooks via resin printing so less post-process is needed. But there's no escape from hours and hours of sanding!
/Chris1 -
That's very kind of you, thank you David! I'll have some photos of the finished assembled prop posted up shortly!0
-
Truer words have never been spoken Chris, sanding FDM prints is a real pain. And yes I forgot to mention I have some of the 3M filler and I used it on this. I found out about it work and it's seriously brilliant for stuff like this!Once I'm able to move to a different place with better ventilation a resin printer is absolutely on the shopping list!0
-
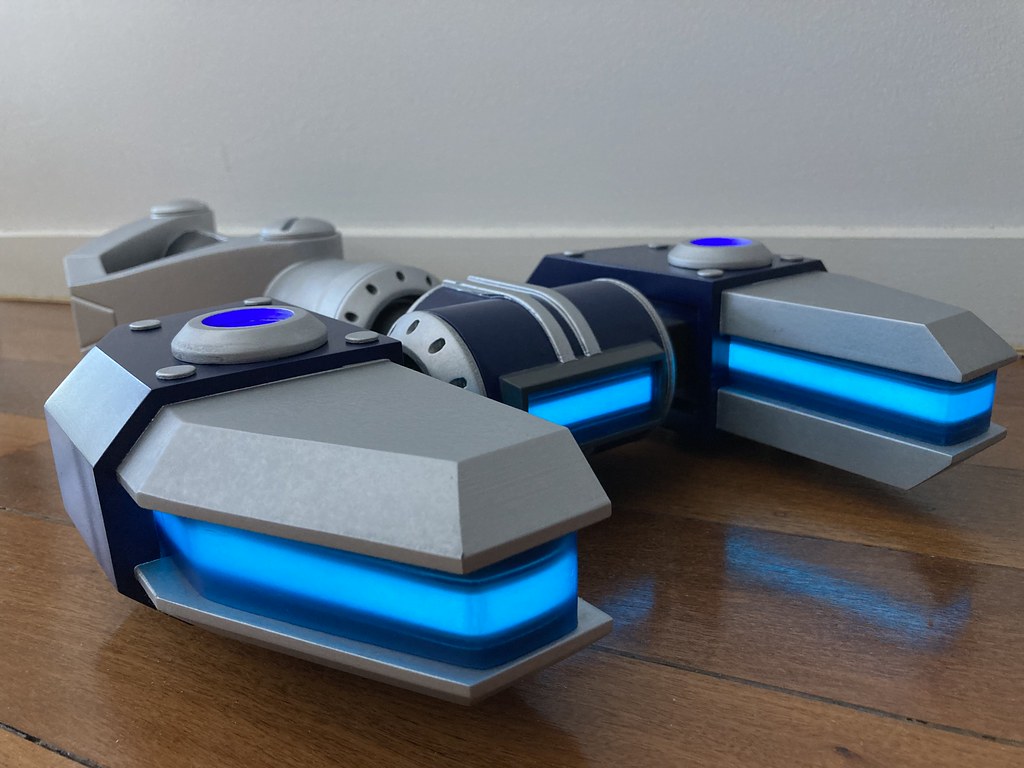
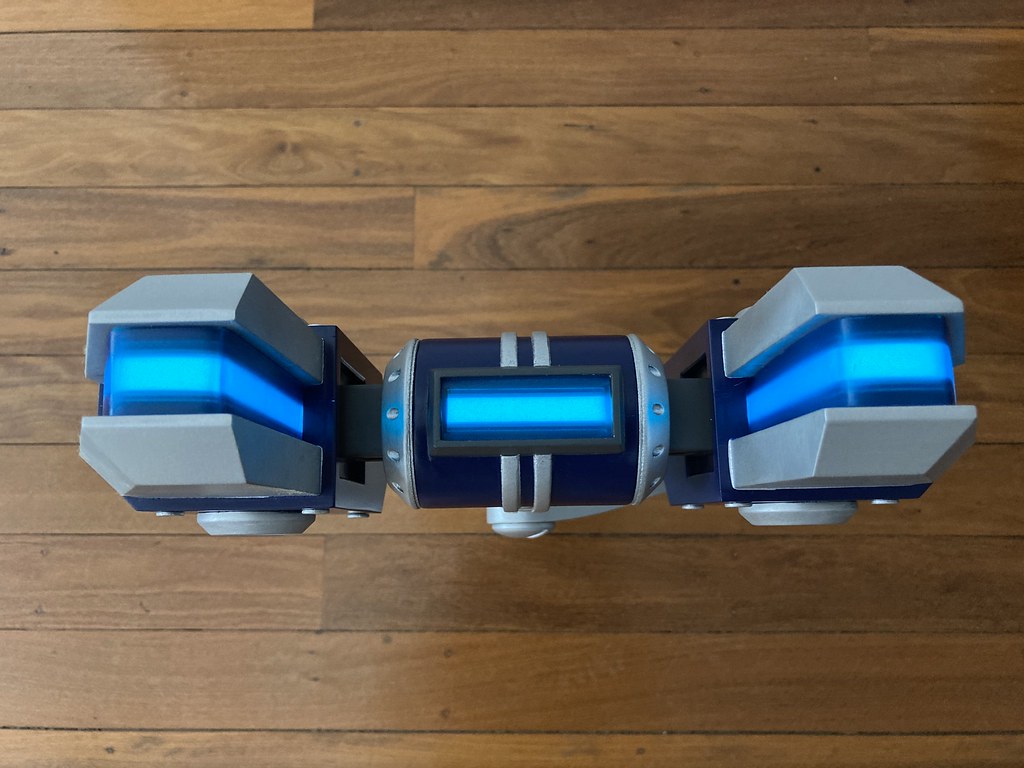
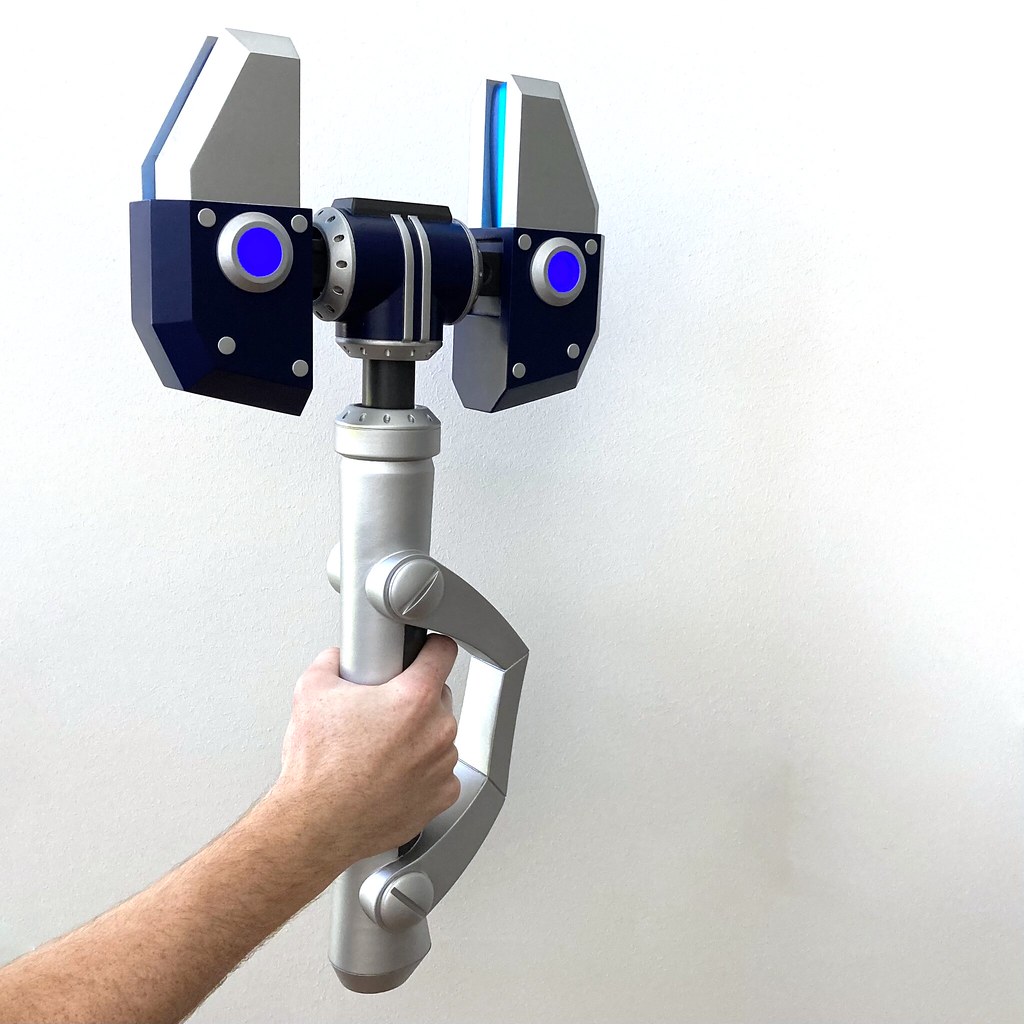
And here it is, the completed prop! To say I’m happy with the result would be an understatement
This was my first time working with electroluminescent materials which was a fantastic excuse to teach myself a new aspect of electronics.This was the most complex painting project I’ve undertaken thus far, so this was a worthy challenge in trying to improve my painting skills.




 0
0 -
Turned out awesome, super clean!
/Chris0 -
Thanks Chris! Much appreciated 0
-
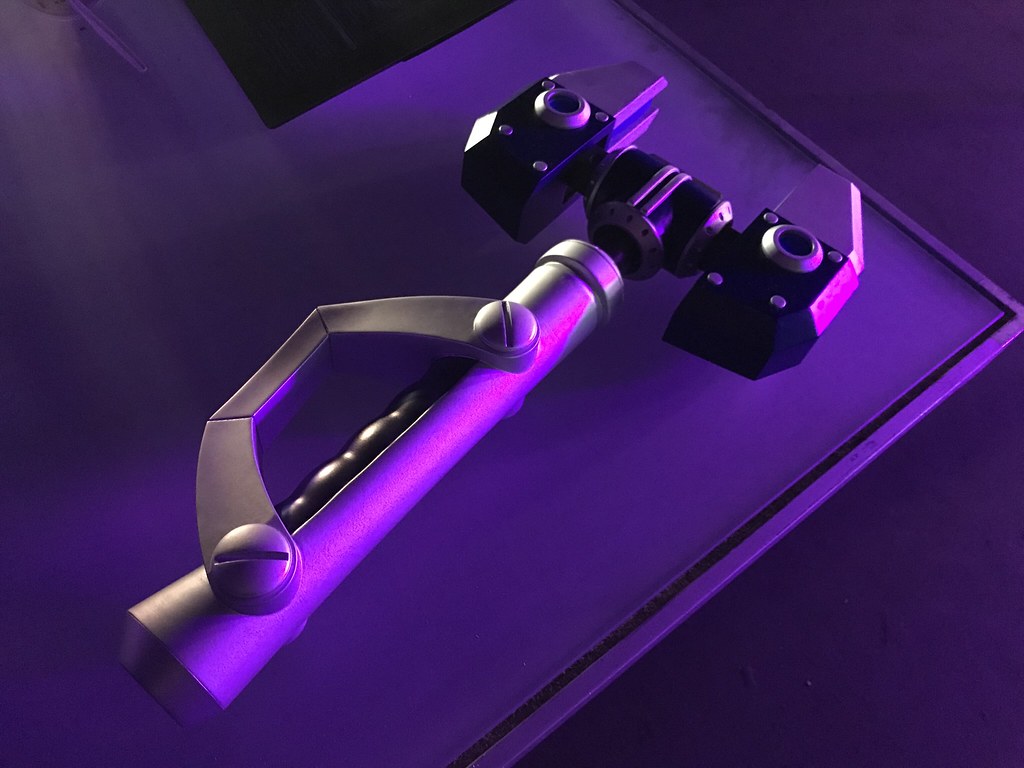
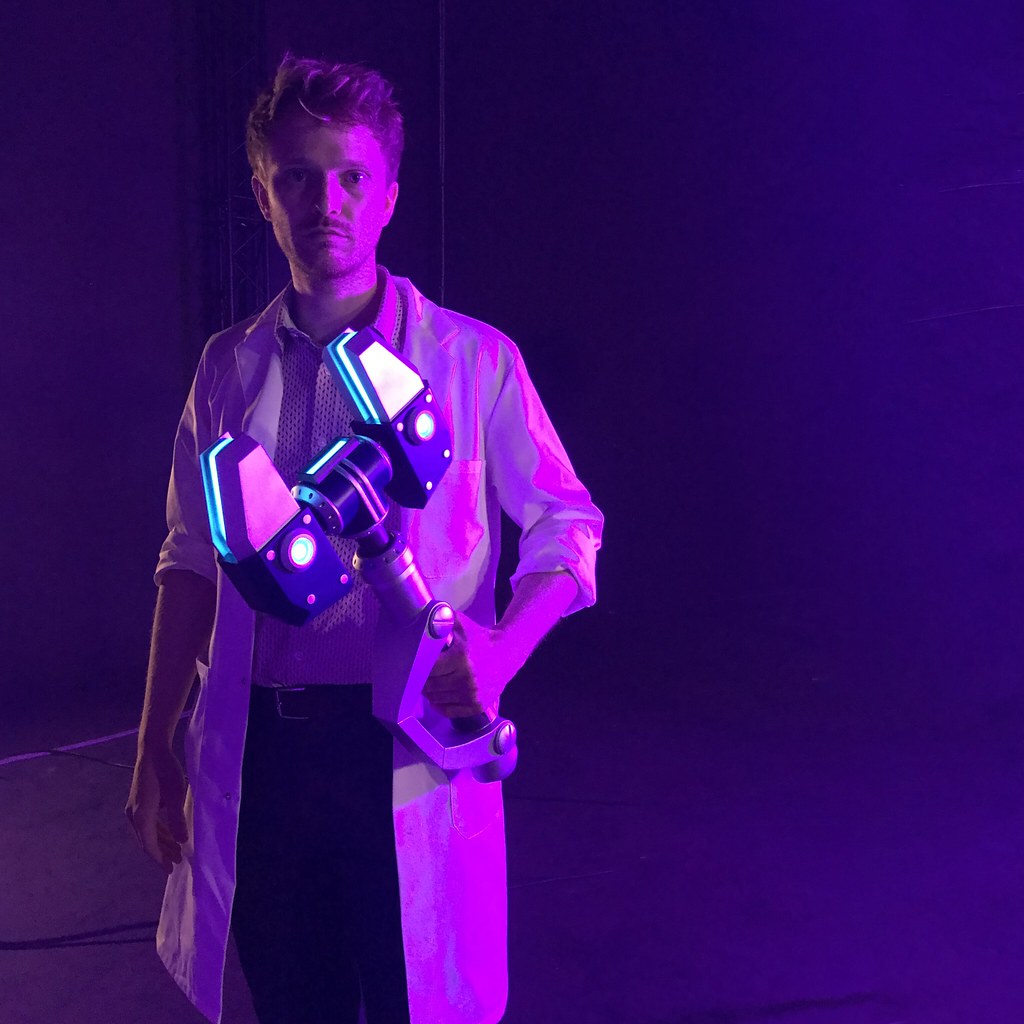
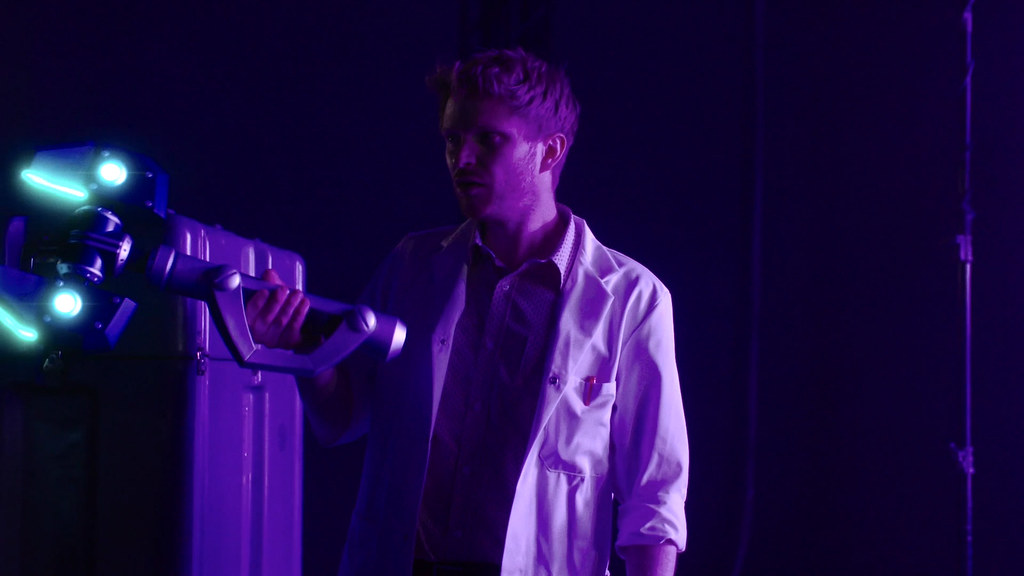
I'm also very excited to share that recently my OmniWrench was used in an official Sony PlayStation commercial! I’m humbled to have contributed to this brilliant commercial that is promoting the new Ratchet and Clank game coming to PlayStation 5.The crew in London were also kind enough to send me some cool photos of the prop on set and behind the scenes during filming for commercial and I've posted those below.Here's the commercial:
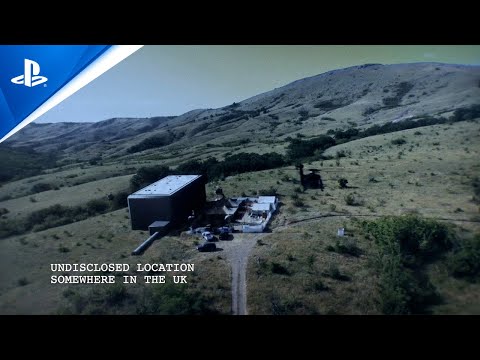 https://www.youtube.com/watch?v=USmZ4ultnDg
And then here's some behind the scenes photos and close ups: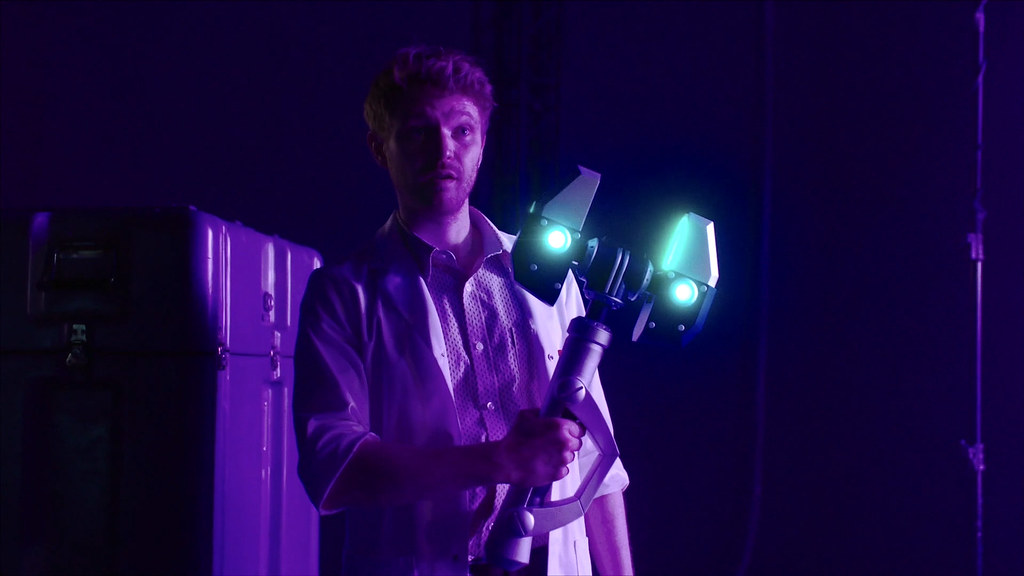


 0
0 -
Awesome, congrats!
Great commercial too!
/Chris0


Categories
- All Categories
- 97 CURRENT CONTEST
- 97 2025 Halloween Costume Contest
- 1.3K COMMUNITY
- 1K General
- 62 Tutorial Reviews
- 98 Suggestions and FAQ
- 82 Job Listings
- 40 Artists for Hire
- 1.8K CHARACTER CREATION
- 165 Costumes & Cosplay
- 148 Lab work
- 95 Props
- 152 Puppets
- 36 Stop Motion
- 18 VFX
- 39 Student Projects
- 478 Sculpture
- 159 Fabrication
- 160 Animatronics
- 177 Makeup Effects
- 130 Painting
- 29 Traditional/Digital Design
- 8.1K PAST CONTESTS
- 244 Creature Making Contest 2025
- 100 2024 Halloween Costume Contest
- 198 Character Making Contest 2024
- 343 Creature Making Contest 2024
- 131 2023 Halloween Costume Contest
- 168 Monster Making Contest 2023
- 239 Creature Making Contest 2023
- 117 2022 Halloween Costume Contest
- 309 Character Sculpting Contest 2022
- 133 Character Makeup Contest 2022
- 170 2021 Halloween Costume Contest
- 261 Creature Sculpting Contest 2021
- 209 Character Makeup Contest 2021
- 354 Creature Making Contest
- 200 2020 Halloween Costume Contest
- 203 Monster Makeup Contest
- 372 Creature Painting Contest
- 244 Horror Character Contest
- 182 2019 Halloween Costume Contest
- 260 Character Makeup Contest 2019
- 351 Character Sculpting Contest
- 279 2018 Halloween Costume Contest
- 292 Alien Art Contest 2018
- 251 Character Makeup Contest
- 389 Monster Making Contest
- 167 2017 Halloween Costume Contest
- 153 Heroes & Villains Contest
- 221 Cosplay Contest
- 215 Creature Sculpting Contest
- 107 Puppet Contest
- 161 Alien Art Contest
- 98 Halloween Costume Contest
- 149 Robot Art Contest
- 269 Dino Art Contest
- 592 Creature Contest
- 5 ALUMNI
- 275 ON DEMAND WEBCOURSES
- 1 Hand Puppet Detail and Finishing Techniques
- 24 Animation for Animatronics
- 9 How To Make a Mask - Wearable Dynamic Art
- 11 3-Axis Robotic Mechanisms
- 5 Neck Mechanisms
- 24 How To Make a Monster Suit with Bill Bryan & Ted Haines
- 19 Character Animatronics
- 5 How to Sculpt a Dinosaur
- 5 How To Build An Animatronic Head
- 5 Creature Costume Basics
- 4 Puppet Mechanism Basics
- 1 Tattoo Makeup - Cover, Create, & Apply
- 2 How To Make Horror Props
- 1 The Fine Art of Horror Painting
- 1 Fantasy Maquette Sculpting In CX5(S)
- 14 The Business of Making Monsters
- Production Design - The Process Of Creating A World For Film
- 4 Character Makeup - Multi-Piece Prosthetic Application
- 3 Prosthetic Makeup Basics - Gelatin Facial Appliances
- 5 Stop Motion Animation with the Chiodo Bros.
- 11 Blood, Gore and Makeup Effects
- 7 How to Punch Hair - Hairwork for Silicone Characters
- 3 Bodycasting on a Budget with Ted Haines
- 2 Portrait Illustration with Terry Wolfinger
- 5 Mastering Marionettes - Design, Construction & Performance with Scott Land
- 1 Creature Makeup - Multi-piece silicone prosthetic application
- 12 Muscle Suit Fabrication
- 11 Wig & Hair Basics
- 4 Silicone Prosthetic Transfer Appliances
- 3 Building Miniatures: Small-Scale Model Making - Part 5
- 9 Toy Design & Sculpture for Action Figures & Collectibles
- 1 Building Miniatures: Small-Scale Model Making - Part 4
- 2 Human Head Anatomy & Sculpture
- 1 How to Make a Foam Puppet - Part 3
- 1 Building Miniatures: Small-Scale Model Making - Part 3
- 5 How to Make a Foam Puppet - Part 2
- 3 How To Make a Foam Puppet - Part 1
- 1 Building Miniatures: Small-Scale Model Making - Part 2
- 14 Animatronic Control Systems - Arduino Programming Basics with David Covarrubias
- 3 Building Miniatures: Small-Scale Model Making - Part 1
- 3 Advanced Creature Teeth: Prosthetic Dental Appliances - Part 2
- 1 3D Pumpkin Carving - How to Carve a Pumpkin from the Outside In
- 5 How To Make A Latex Rubber Mask Part 3
- 3 Advanced Creature Teeth - Part 1
- 11 How To Make A Latex Rubber Mask Part 2
- 6 How To Make A Latex Rubber Mask Part 1
- 294 PAST LIVE WEBCOURSES
- 11 Monster Sculpting
- 8 Platinum Silicone Mask Painting
- 5 Feather Work: Puppets, Costumes, Hair & Makeup
- 9 How To Make Eyes For Puppets, Masks, & Makeups
- Working with Wigs - Wig & Hair Basics with Connie Grayson Criswell
- 14 Muscle Suit Fabrication with Ted Haines
- 7 Homework - Muscle Suit Fabrication with Ted Haines
- 13 Toy Design & Sculpture for Action Figures & Collectibles with Sandy Collora
- 10 Homework - Toy Design & Sculpture for Action Figures & Collectibles with Sandy Collora
- 13 Human Head Anatomy & Sculpture with Jordu Schell
- 11 Homework - Human Head Anatomy & Sculpture with Jordu Schell
- 18 Mastering Marionettes - Design, Construction & Performance with Scott Land
- 13 Homework - Mastering Marionettes - Design, Construction & Performance with Scott Land
- 16 Puppet Mechanism Basics - Eyes, Brows & Ears with BJ Guyer - Watch & Chat
- 11 Homework - Puppet Mechanism Basics - Eyes, Brows & Ears with BJ Guyer
- 12 Advanced Creature Teeth -- with John Cherevka
- 3 On Camera Hand Puppet Performance
- 9 Silicone Prosthetic Transfer Appliances - Age Makeup with Neill Gorton
- 3 Practical Magic: The Art of In-Camera Visual Effects with Joey Shanks
- 9 Buisness of Making Monsters with Shannon Shea
- 11 Stop Motion Animation with the Chiodo Bros
- 5 Foam Carving Puppets with BJ Guyer
- 3 3D Pumpkin Carving with Andy Bergholtz
- 4 Prosthetic Makeup Basics with Rob Burman
- 13 How to Make a Latex Mask with Tim Martin
- 2 Character Illustration with Terry Wolfinger
- 3 Halloween Costumes - Fabric Effects with Dawn Dininger and Amy Whetsel
- 9 Blood, Makeup & Gore FX with Gary J. Tunnicliffe
- 13 Hand Puppet Design and Fabrication with BJ Guyer
- 3 How to Sculpt a Dinosaur with Christopher Darga
- 2 Airbrush FX: Beginning to Advanced with Craig Fraser
- 1 Female Figure Sculpting in Cx5 wtih Adam Beane
- 3 Creature Design: Maquette Sculpting with Casey Love
- 3 How to Make a Sci Fi Helmet with Fon Davis
- 2 Hyper Realistic Silicone Painting with Tim Gore
- 2 Josh Herman Zbrush Creature Sculpting
- 13 Textures and Forms with Don Lanning Oct 26, 2013
- 9 Character Rendering in Photoshop with Dan LuVisi
- 2 Creature Maquette Painting with Jordu Schell
- 24 Textures and Forms with Don Lanning May 04, 2013
- 3 Tattoo Makeup A-to-Z: Cover, Create, and Apply with Christien Tinsley
- 11 Creature Design w/ Casey Love - Sculpting
- 7 Creature Design With Casey Love - Translucent Creature Painting
- 3 Creature Maquette Sculpting with Jordu Schell