Ryu the Argonian

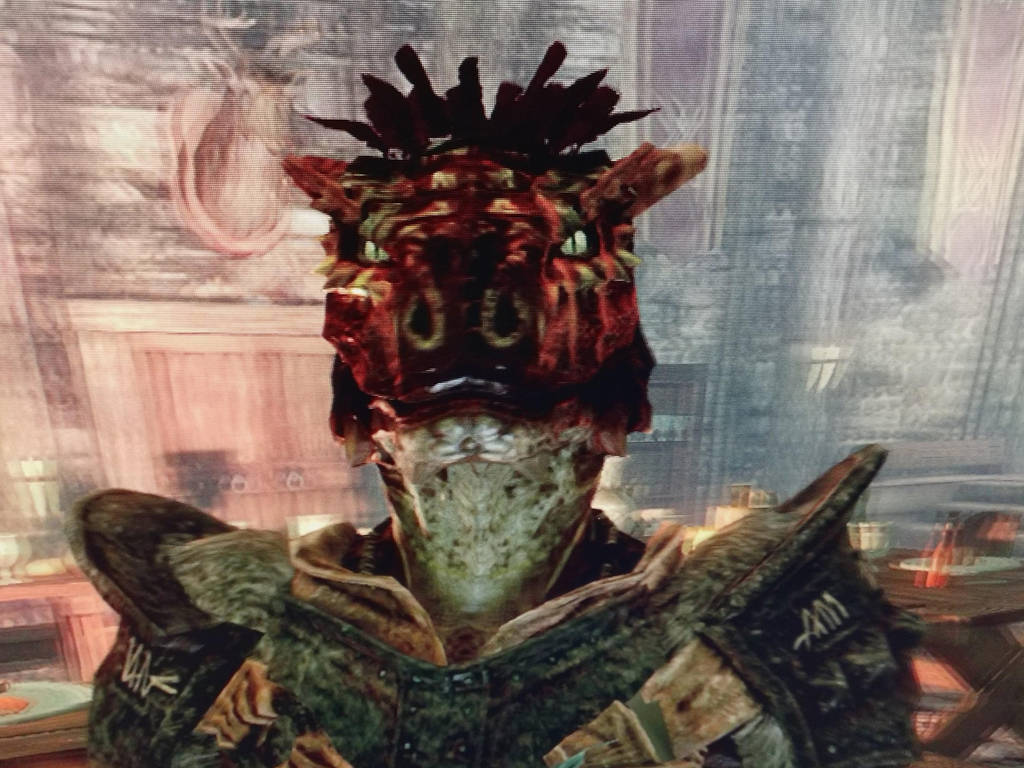
Ryu the Argonian is my avatar from the Elder Scrolls V: Skyrim. I wanted something that said "Skyrim Argonian" yet "original character."
Approximately 800 hours of work and $500 worth of materials went into creating this character. He was started in August 2017 and finished in July 2018. The outfit features an articulated jaw, blinking eyes, approximately 7" stilts, articulated tail, lizard hands, "follow-me" eyes, and a variety of natural props (animal skulls, feet, horns, and herbs/spices). This was my first time attempting anything this large, and despite the outfit being a bit toasty and uncomfortable, I am very happy with the outcome. Accomplishing this creature creation makes me eager to produce more extravagant characters in the future.

I am new to cosplay, having only started with my first "real" outfit in July 2017. I was able to make articulating wings for Lucifer from "The Devil is a Part-Timer," and after seeing that I could accomplish a large prop in a month, I wanted to see what I could do in a year. It was then that Ryu the Argonian was created.
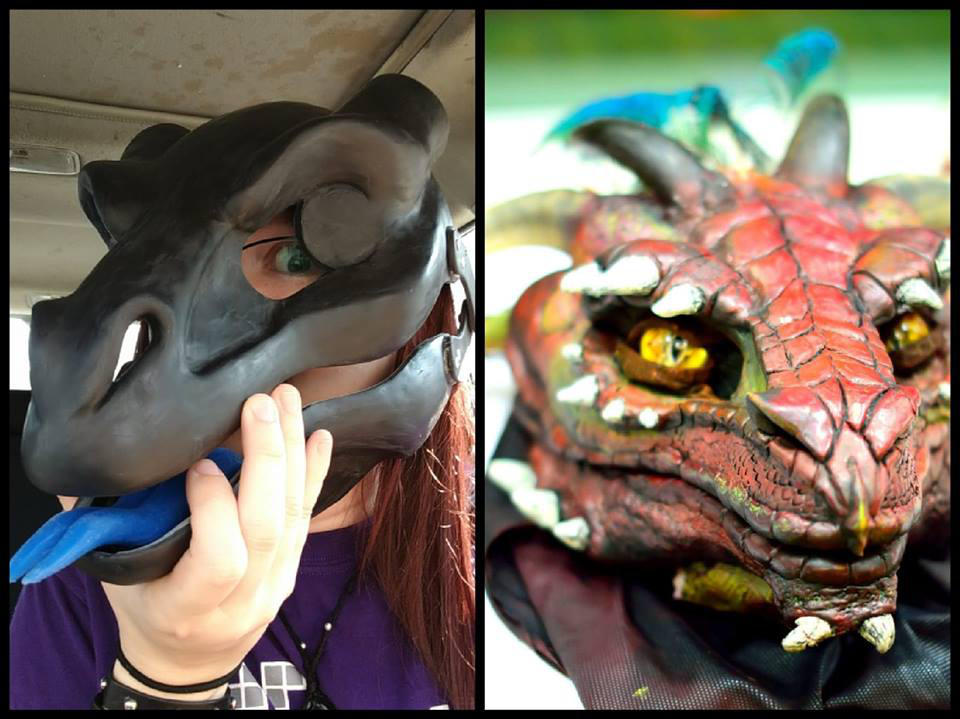
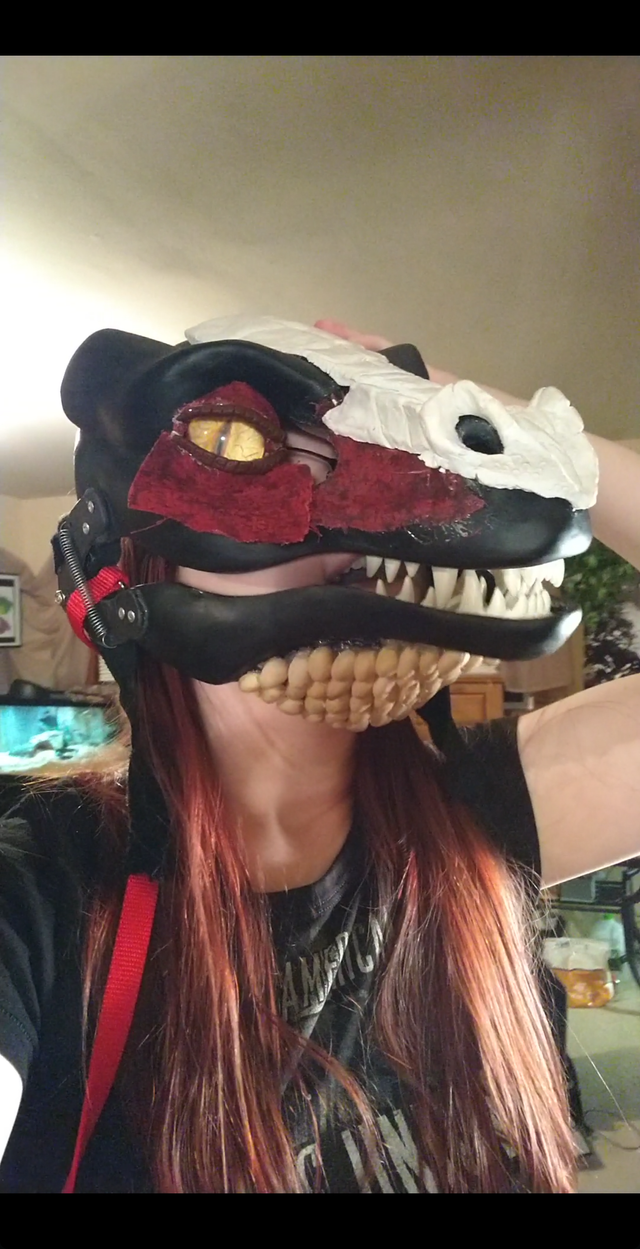
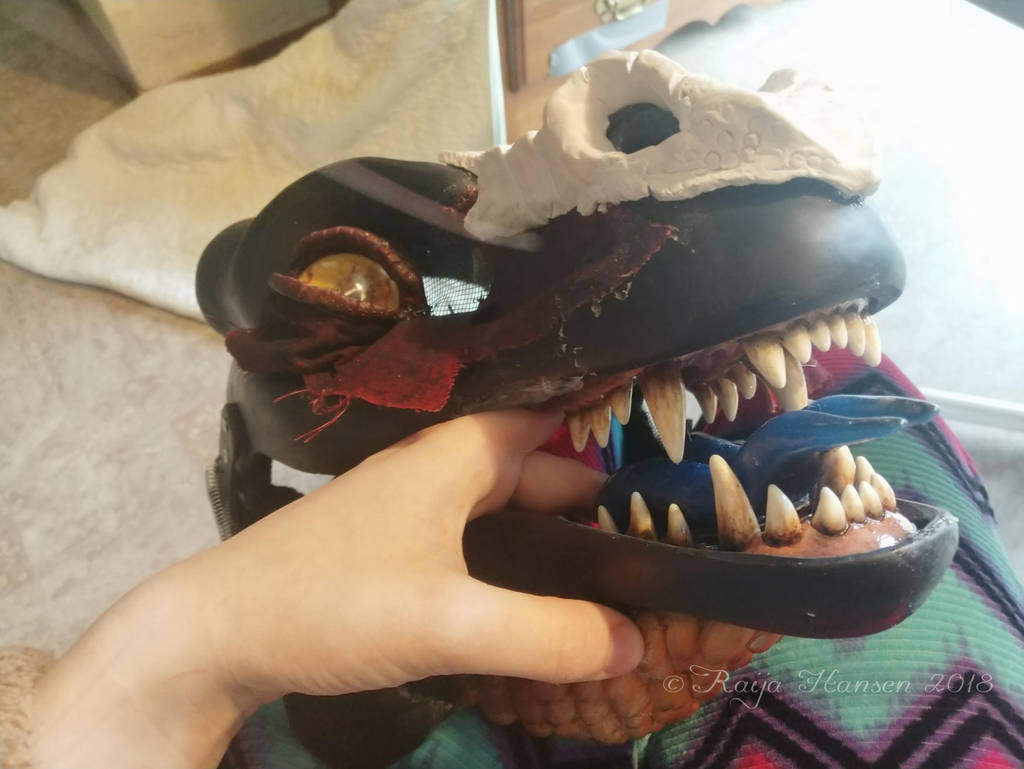
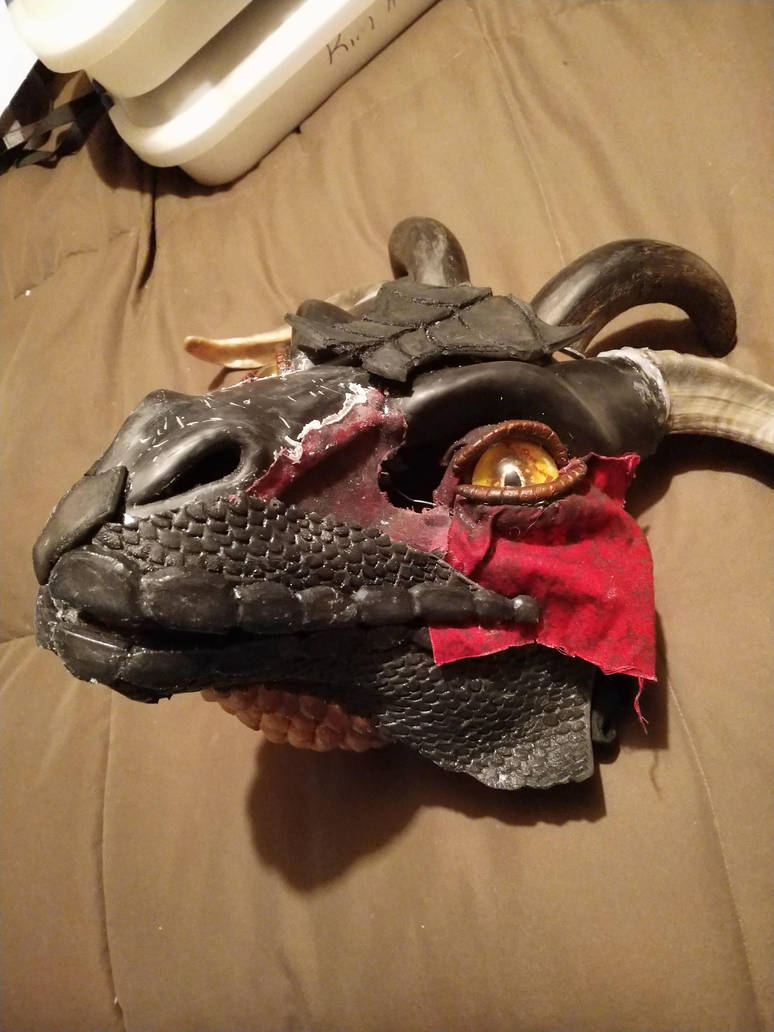
A variety of materials were used for this cosplay. The base of the head is from DreamVisonCreations. EVA foam, craft foam, and Crayola Model Magic were all used to sculpt the head. The jawset and tongue are also from DVC, but both are hand-painted/airbrushed with acrylic. Both the head base and jawset are resin. The tongue is silicone with added silicone that I sculpted onto it.
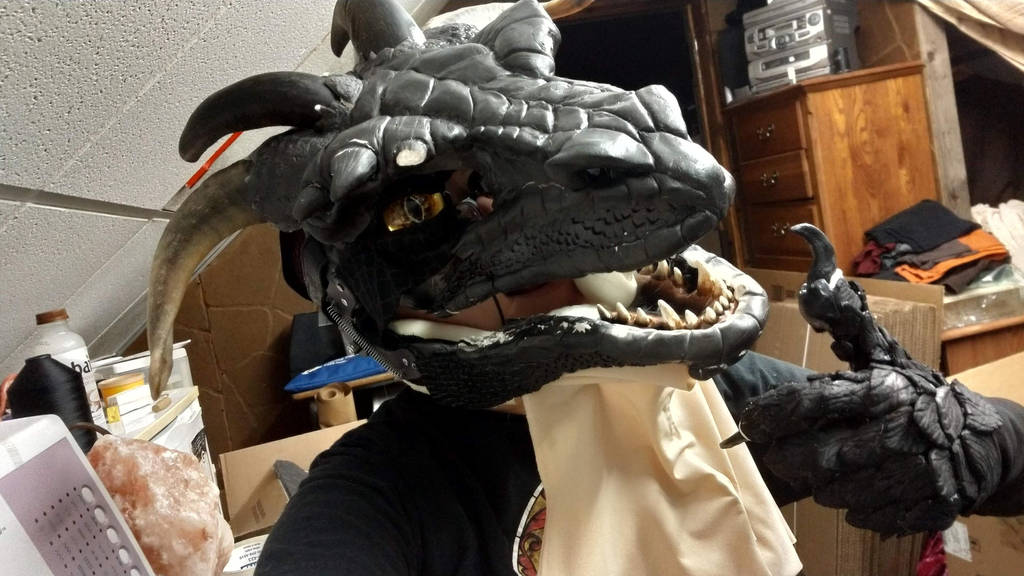
The hands are EVA foam and craft foam on a spandex base sewn by myself. Each scale was individually cut out, shaped, sanded with a dremel, then detailed with a wood-burning iron. The claws on both the hands and feet are made out of Wonderflex. The mesh backing was removed from the rest of the material, heated with a heat gun, then shaped like clay.

The tail base was created by Art by Neffertity. I tried to create my own articulating tail, but after much trial and error, I could not figure out how to work my hand riveter and I was running low on time to accomplish this cosplay. I added all the scales/spikes using hot glue. The spikes are made out of craft foam and shaped/detailed with a sandpaper-bit dremel. The rest of the scales are puffy shirt paint, hot glue, and textured pleather.
The outfit was also designed by me, altered significantly from a McCalls Star Wars tunic pattern. It consists of pleather and cotton lined with binding. The messenger bag was completely designed by scratch, also crafted from pleather. A laptop bag was used as inspiration for this. I have my mom to thank for helping me with this piece of the outfit as she guided me through the process of creating a pattern.
The feet are designed as stilts. They were cut out of pine wood and shaped accordingly to a pattern by Gryphern. Old tennis shoes were screwed to the wood so I may wear the stilts like enormous shoes. Metal supports were attached to the sides of each shoe, joined by a half-cut PVC tube at the top, with added bungee cords on the back to act as tendons. This kept the stilt at my shin and allowed me better ease of movement. They were then covered with microfleece using hot glue. The claws were crafted the same way as the ones on the hands.

Everything (head, hands, feet, and tail) was primed with Plastidip, base painted with spray paint, then either hand painted or airbrushed with acrylic. I have a good friend of mine who taught me how to use my airbrush properly, so I have her to thank for teaching me her knowledge.
The staff consists of a bamboo, leather, rabbit fur, deer antlers, colored sea glass, and moss. There are also a variety of bones about the outfit, all of which were either harvested by myself or given to me. The bird skulls in particular were identified as common starlings (Sturnus vulgaris), all of which were harvested and cleaned by myself. They were found in my garage while we were moving homes during this project. The bird feet were harvested from my brother's Thanksgiving turkey. I wanted a pair of them to have the toes sprawled out, so I set them accordingly and taped them to a wall until they fully dried.
My character is a scavenger, alchemist, and sorcerer, and so I wanted his outfit to reflect that, hence why I went with all natural materials. The horns and feathers atop his head are all natural as well. The horns came from a pet store as dog treats; the feathers are from a craft store.

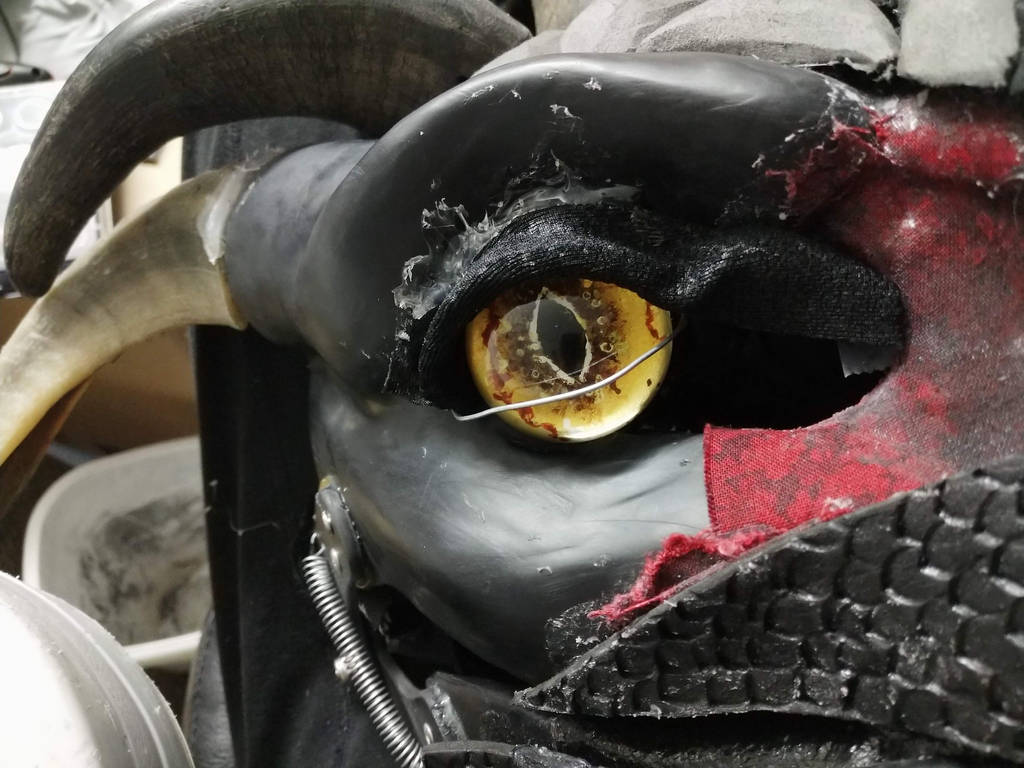
Blinking eyes were one of the most difficult parts of this outfit. Yes, I was able to make it work manually, but the mechanics that made the eyes move needed to be sacrificed if I wanted the head to be comfortable. Silts were another challenge for me. Those, too, are very uncomfortable and I ran into more problems than not with those. They were heavy and difficult to walk in and definitely needed practice. I aspire to learn animatronics and better fabrication so that I may create more life-like and believable creatures.

Overall, to sum up my character, I wanted something that said "Skyrim Argonian" yet "original character." I did not like how Skyrim Argonians were a lizard skin on a human model, so I tried to incorporate my own design into the character.
If you would like to see more progress photos and learn more about Ryu the Argonian, you can find me as GameDweeber on Facebook, deviantART, and YouTube, or gamedweeber_cosplay on Instagram.
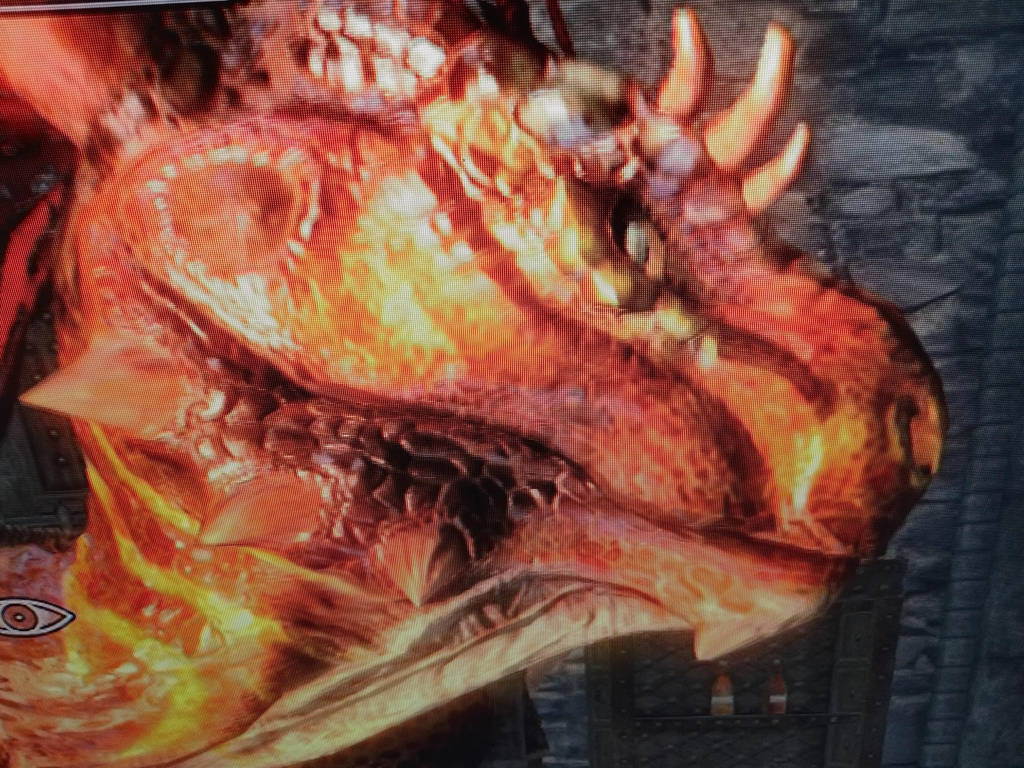
These are a few in-game references of my Argonian avatar in Skyrim:
Here are some in-progress photos:
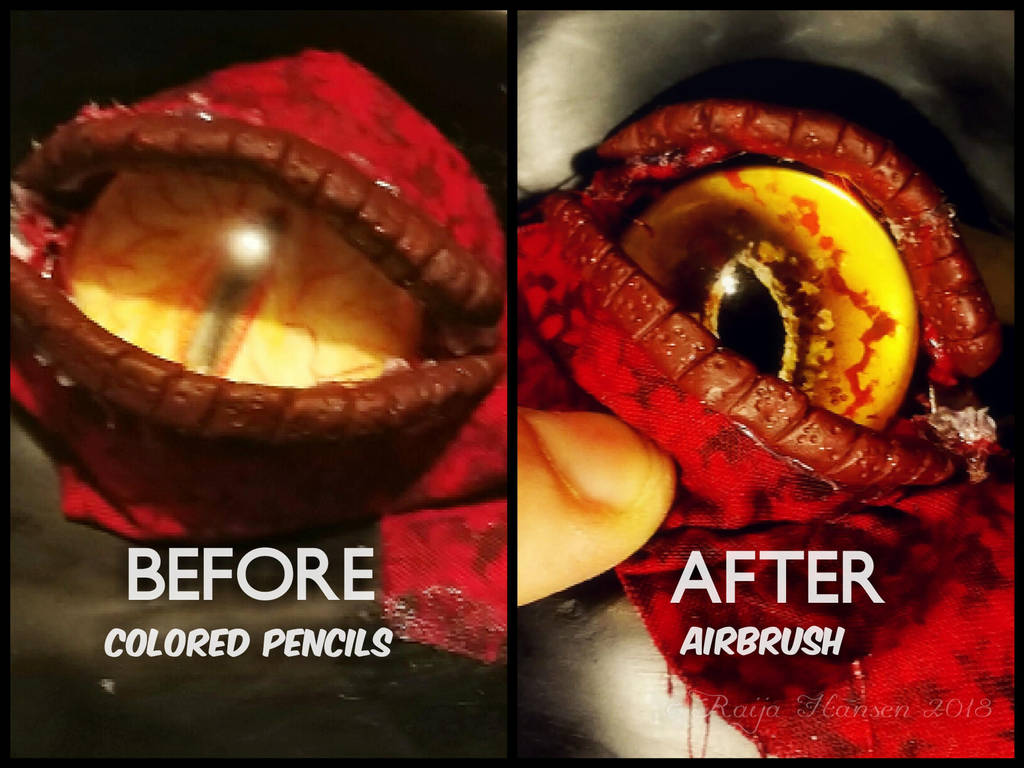
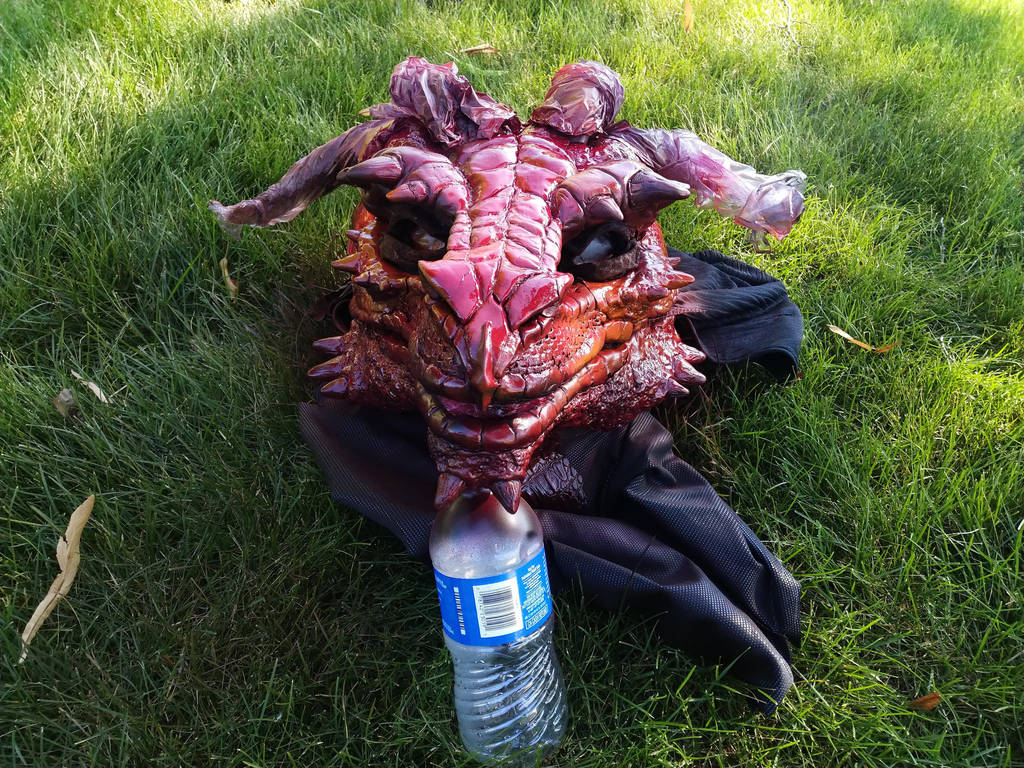
I first used colored pencils to create the eyes. A friend mentioned that they could look much better, so the old design was scrapped, and an iguana eye was heavily used as a reference. After my friend showed me some airbrushing techniques, we created an eye that looked far better than the last design.
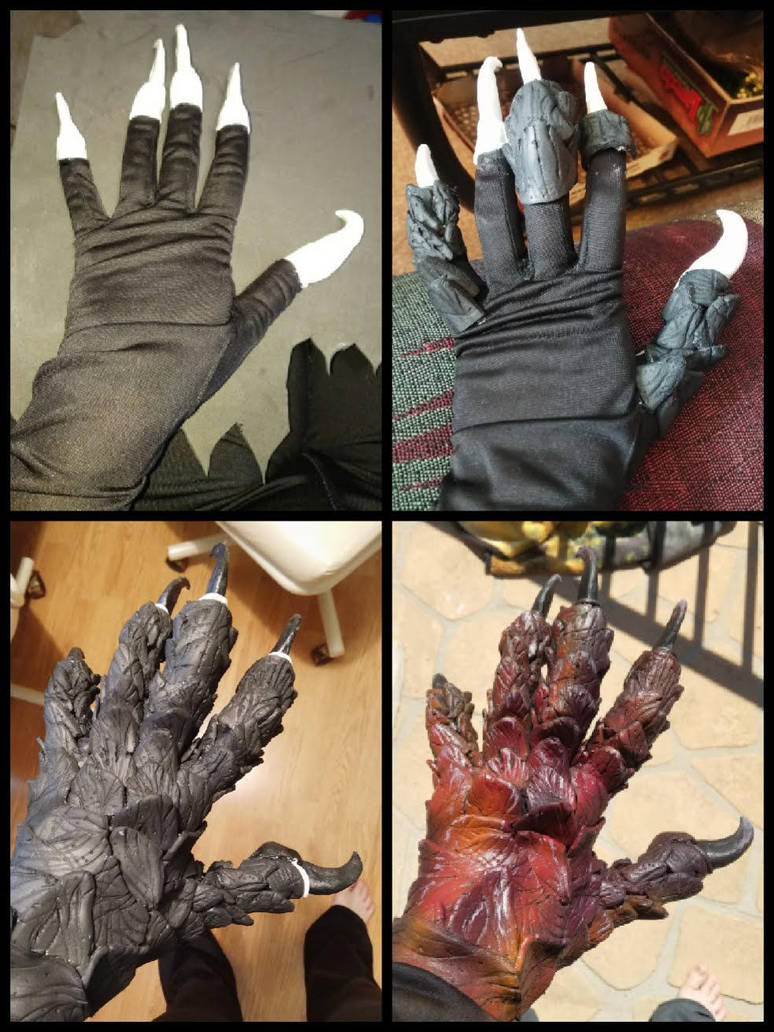
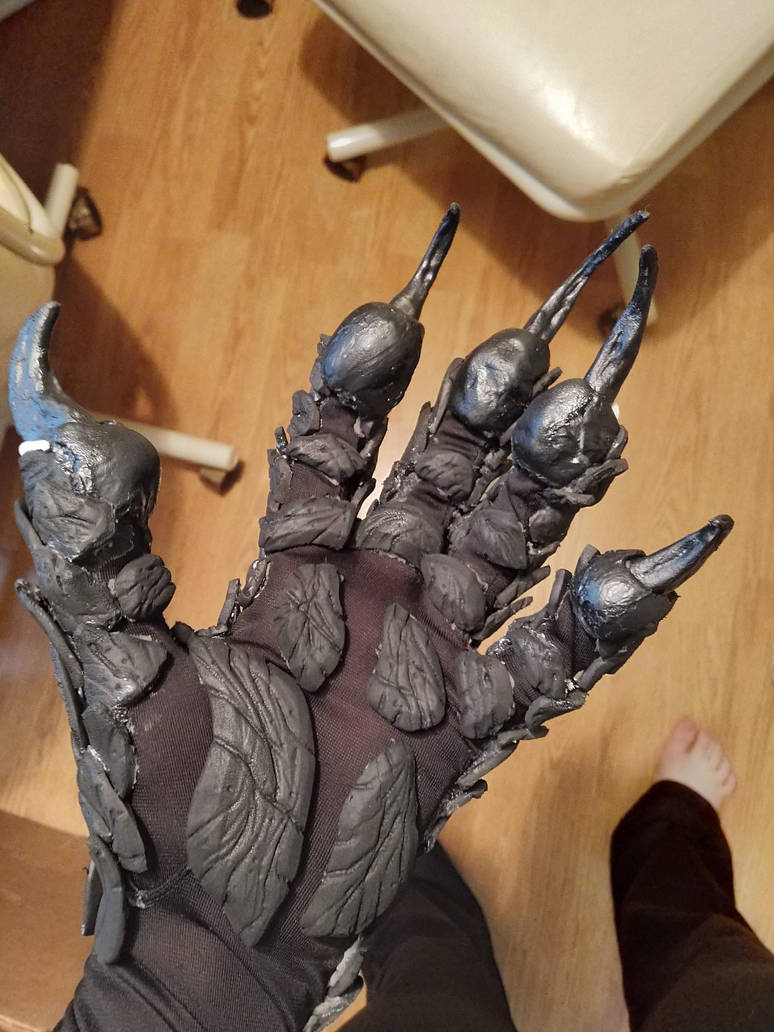
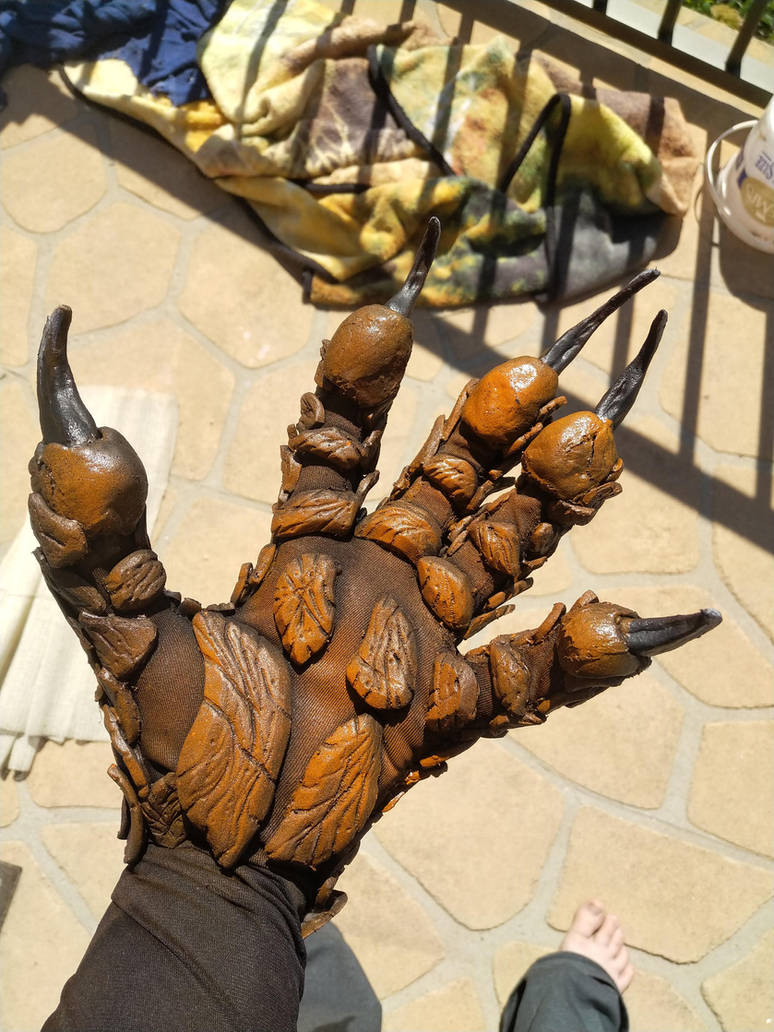
Ryu's hands consist of a spandex base with scales crafted from craft foam. The claws are Wonderflex. I added Crayola Model Magic on the tips of the fingers. It was then primed with Plastidip, base painted with spray paint, and details added by hand with acrylics.
Here are some in-progress photos:
I first used colored pencils to create the eyes. A friend mentioned that they could look much better, so the old design was scrapped, and an iguana eye was heavily used as a reference. After my friend showed me some airbrushing techniques, we created an eye that looked far better than the last design.
Ryu's hands consist of a spandex base with scales crafted from craft foam. The claws are Wonderflex. I added Crayola Model Magic on the tips of the fingers. It was then primed with Plastidip, base painted with spray paint, and details added by hand with acrylics.
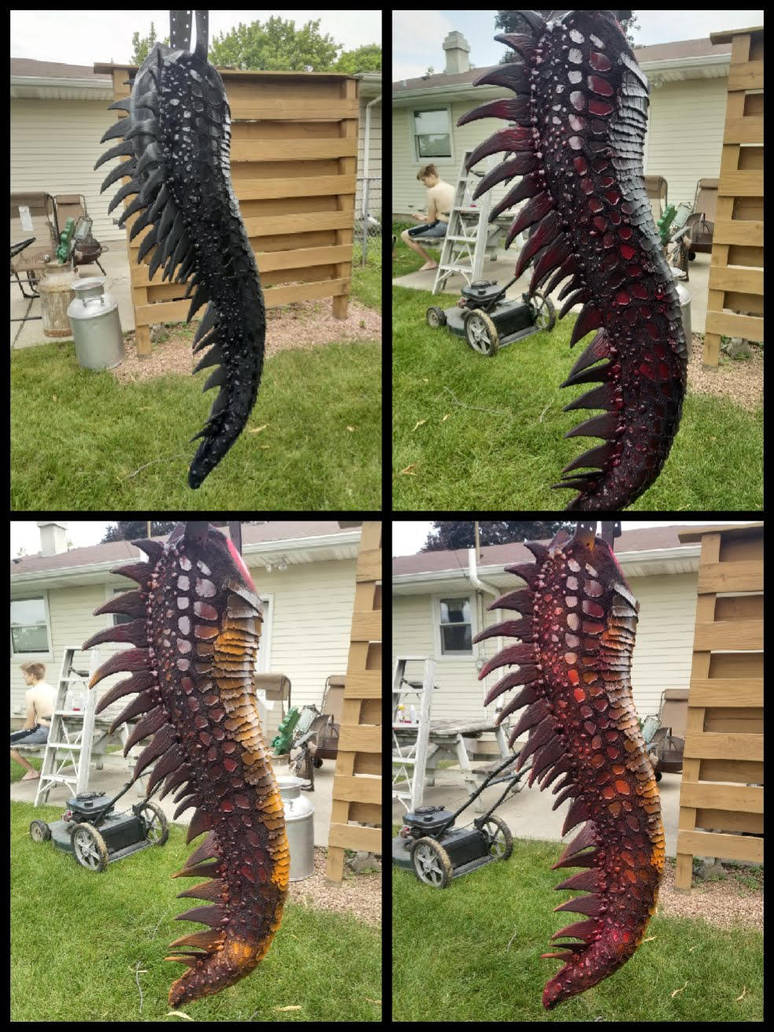
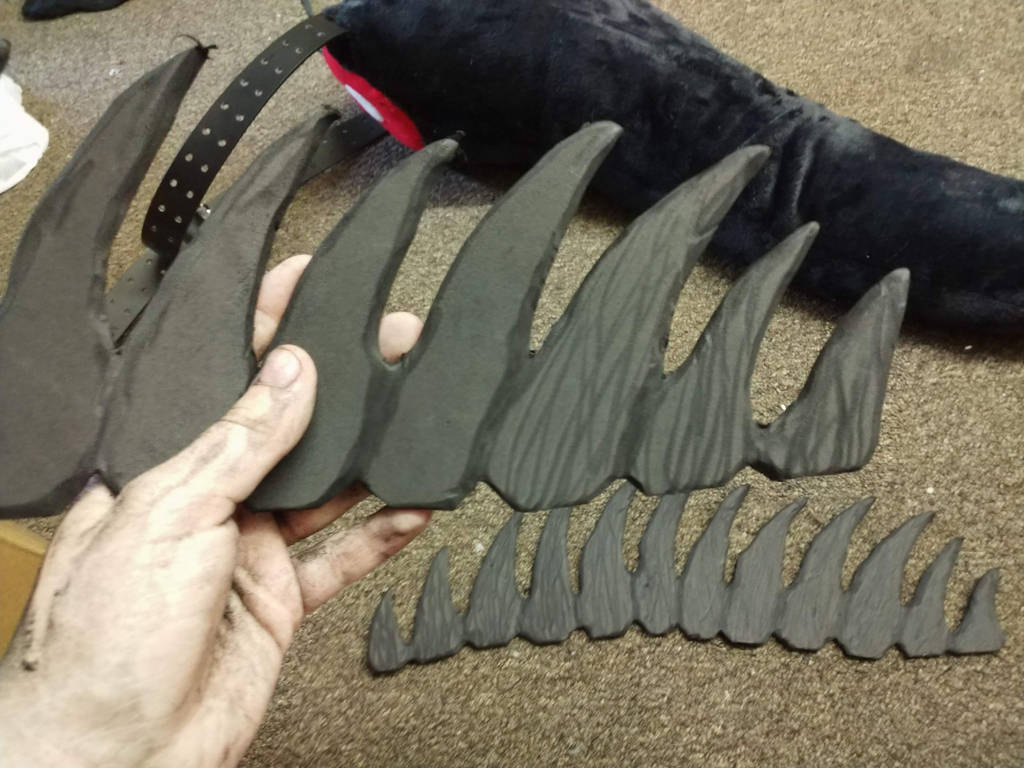
The tail base was purchased after I was unsuccessful in creating a tail skeleton of my own. You can see the original tail base on the floor in the second photo. I crafted the spines out of craft foam and detailed them with a dremel, then hot glued them to the tail base. Scales were then added accordingly with puffy shirt paint, hot glue, and textured pleather.
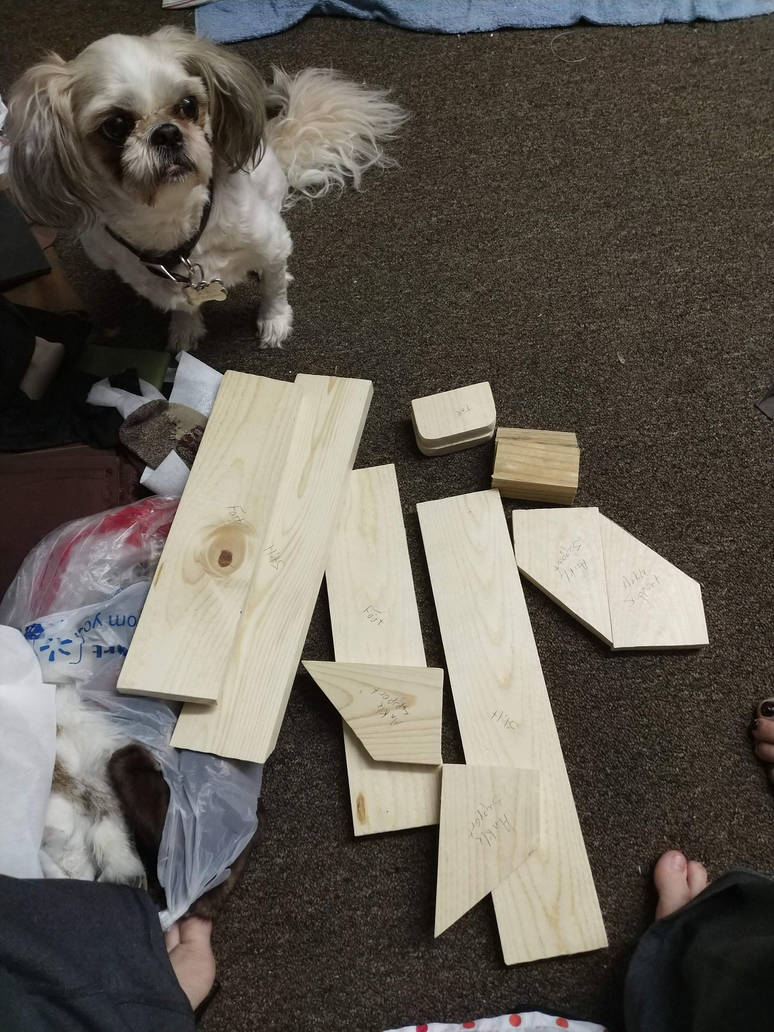
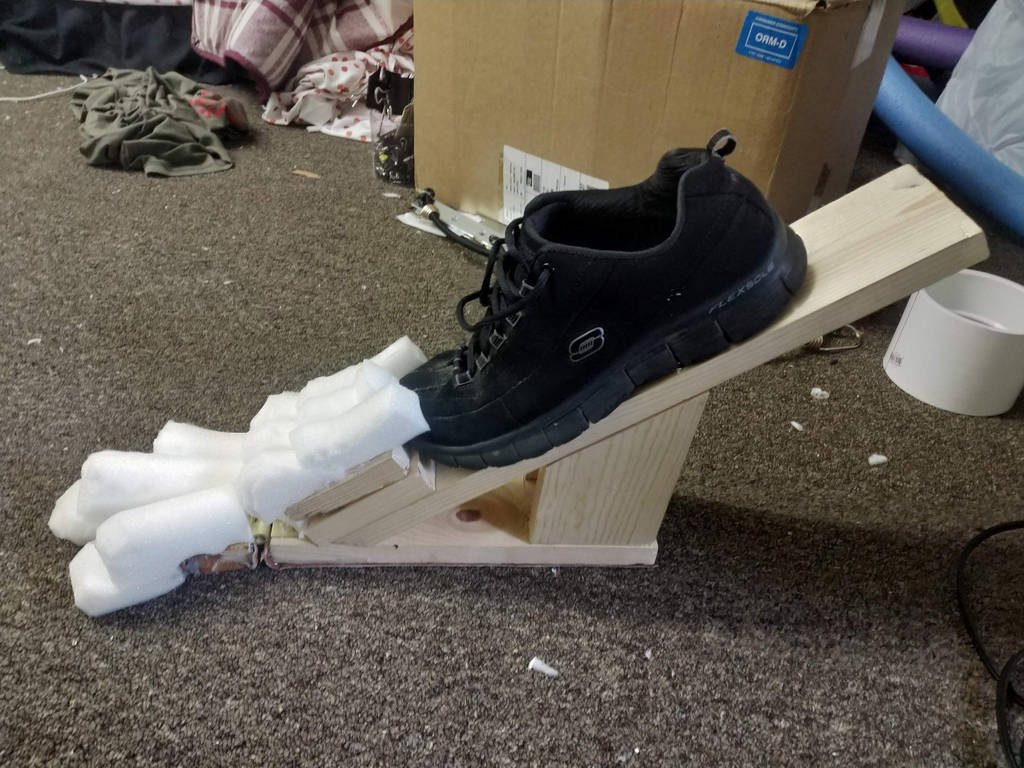 This is an early stage of the stilts designed to be Ryu's feet. Metal supports and a PVC brace were eventually added on the sides of the shoe along with bungees attached to the hock of the leg. This allowed for better movement within the stilts and ultimately kept me from falling over. More upholstery foam was eventually added, cut, and shaped. Claws were hot glued to the toes, then microfleece was wrapped around the entire stilt to cover it.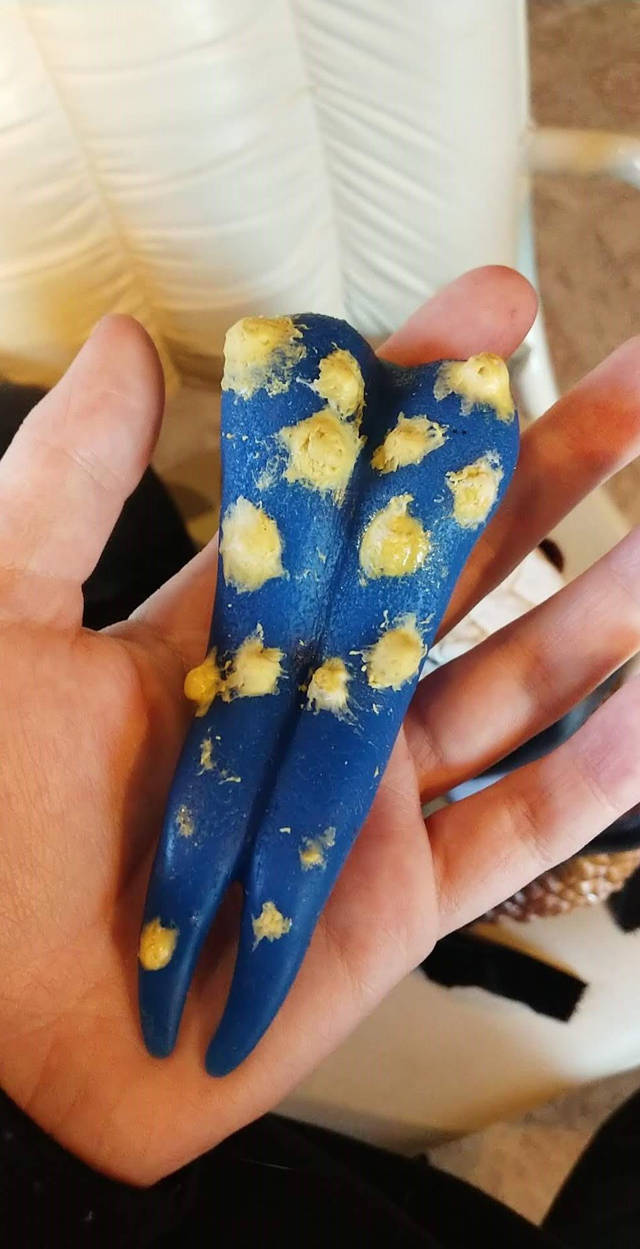
The base of the tongue was ordered from DVC. I used a two-part silicone mix to make "warts" on the tongue. At first, I used acrylics on the tongue; this paint easily flaked off. A friend informed me that you must use silicone paint on silicone in order to make the color stick.
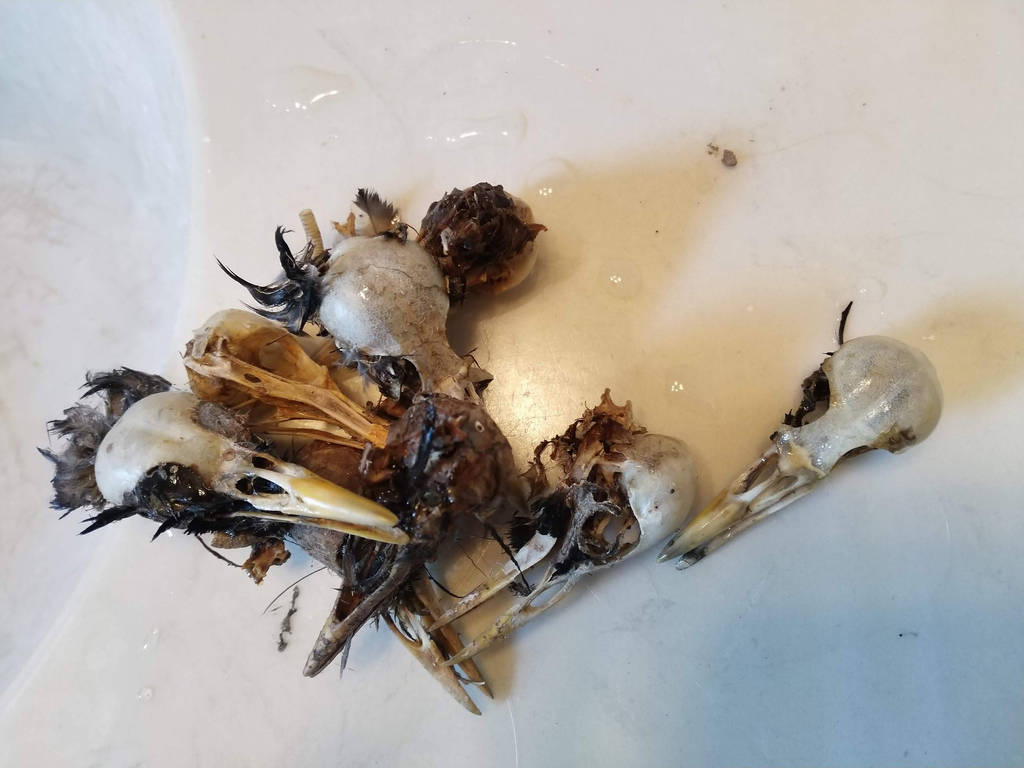
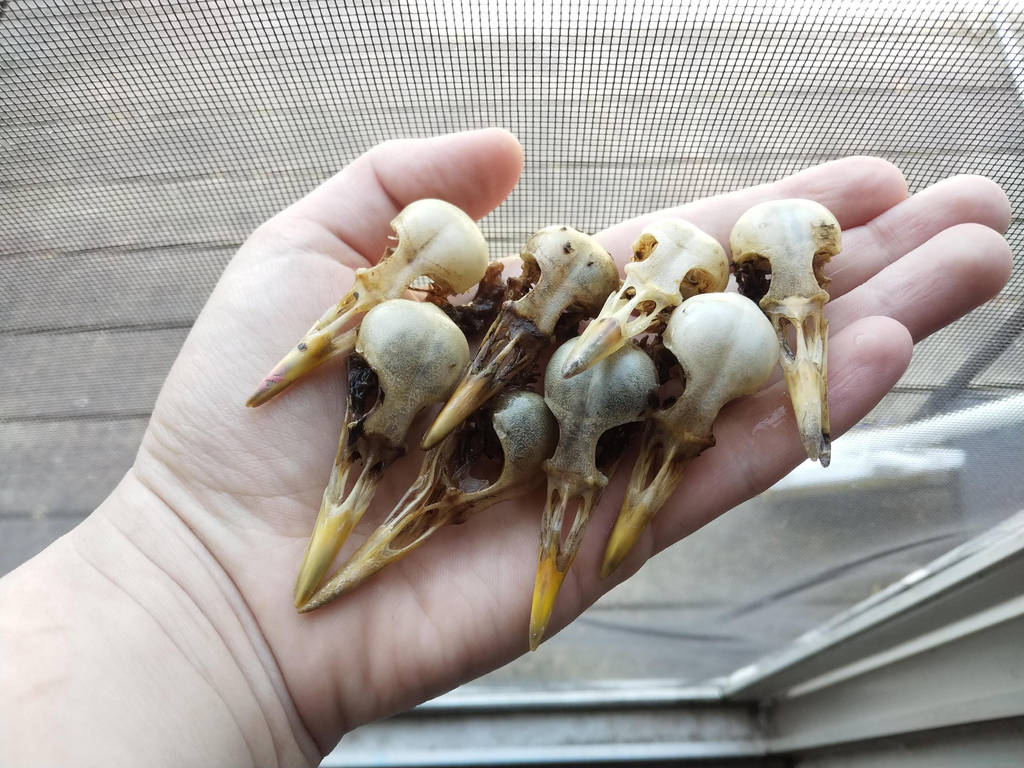
During the move, I found a number of dead birds in our garage. After identifying that these are common starlings, I was informed that they are legal to keep because they are an invasive species. The skulls were thoroughly cleaned by me, then strung on a rope necklace using a needle and thread.
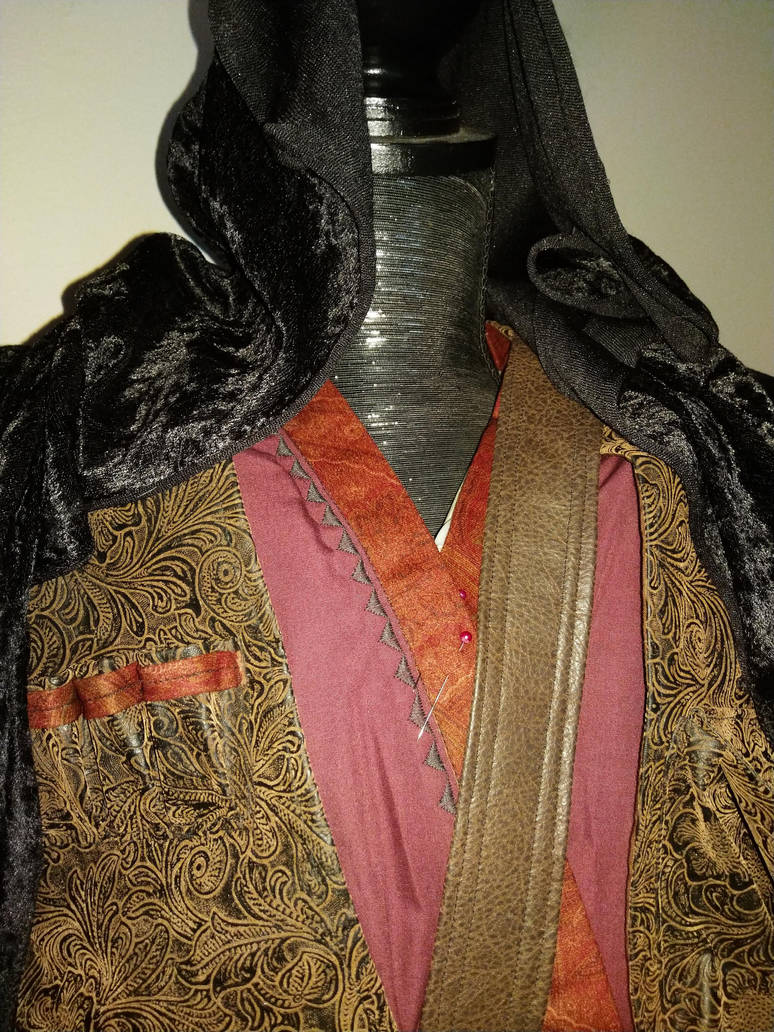
Ryu's outfit consists of cotton and pleather. The design was modified significantly from a McCalls Star Wars tunic pattern. Various vial-pouches and pockets were added so I could keep Ryu's various elixirs and alchemic crafting materials near at all times.
20
Comments
-
This is absolutely incredibly amazing!! I have seen this and other creations by this young woman and There is so much drive and ambition in her work I really hope she wins!!! The world really needs to see more of her work. 💗2
-
I got to see this creation up close and personal. It was amazing to say the least. The detail was spot on in my nerdy opinion. The movement of everything was well done for a first time large build like this. She could use fine tuning but her work is outstanding for going from Novice/Intermediate to almost Master level cosplay building. Here's hoping for a big ol Win. Would love to see her continue on with your schools help.1
-
This is absolutely a masterpiece! ❤️❤️ I sincerely hope she wins!! I can only imagine with the natural talent she already posses, how incredible her work would be!1
-
I know this young lady. The passion she has for all that she creates is inspiring. Her attention to detail and drive to make her creations the best they can be is amazing. I’ve watched her talent grow and hope she wins to continue on this path to cultivate her talent. Good luck!1
-
I was lucky enough to see this costume in person last summer at a convention. To say people were blown away by it is an understatement- this creation is beyond incredible. I completely underestimated how much time it took to make it too. I could never imagine putting 800+ hours into a costume. This person is obviously very, very passionate and dedicated to what they do. I can only wonder what they will be capable of if they continue doing this in their future.1
-
Amazing to see the work in progress and how detailed the results were. Great job.
1 -
This is my best friend!!! She's living her best life doing what she wants to do! She's following her dream!1
-
I was immediately blown away by how detailed and meticulously painted, carved, and sewn the pieces to this cosplay were. It definitely deserved the best in show it was awarded at Kitsune Kon. I had the privilege to work with Raija and photograph her in this cosplay and was even more impressed working with the cosplay up close. She is a wildly talented artist of all avenues who deserves this.1








Categories
- All Categories
- 97 CURRENT CONTEST
- 97 2025 Halloween Costume Contest
- 1.3K COMMUNITY
- 1K General
- 62 Tutorial Reviews
- 98 Suggestions and FAQ
- 82 Job Listings
- 40 Artists for Hire
- 1.8K CHARACTER CREATION
- 165 Costumes & Cosplay
- 148 Lab work
- 95 Props
- 152 Puppets
- 36 Stop Motion
- 18 VFX
- 39 Student Projects
- 478 Sculpture
- 159 Fabrication
- 160 Animatronics
- 177 Makeup Effects
- 130 Painting
- 29 Traditional/Digital Design
- 8.1K PAST CONTESTS
- 244 Creature Making Contest 2025
- 100 2024 Halloween Costume Contest
- 198 Character Making Contest 2024
- 343 Creature Making Contest 2024
- 131 2023 Halloween Costume Contest
- 168 Monster Making Contest 2023
- 239 Creature Making Contest 2023
- 117 2022 Halloween Costume Contest
- 309 Character Sculpting Contest 2022
- 133 Character Makeup Contest 2022
- 170 2021 Halloween Costume Contest
- 261 Creature Sculpting Contest 2021
- 209 Character Makeup Contest 2021
- 354 Creature Making Contest
- 200 2020 Halloween Costume Contest
- 203 Monster Makeup Contest
- 372 Creature Painting Contest
- 244 Horror Character Contest
- 182 2019 Halloween Costume Contest
- 260 Character Makeup Contest 2019
- 351 Character Sculpting Contest
- 279 2018 Halloween Costume Contest
- 292 Alien Art Contest 2018
- 251 Character Makeup Contest
- 389 Monster Making Contest
- 167 2017 Halloween Costume Contest
- 153 Heroes & Villains Contest
- 221 Cosplay Contest
- 215 Creature Sculpting Contest
- 107 Puppet Contest
- 161 Alien Art Contest
- 98 Halloween Costume Contest
- 149 Robot Art Contest
- 269 Dino Art Contest
- 592 Creature Contest
- 5 ALUMNI
- 275 ON DEMAND WEBCOURSES
- 1 Hand Puppet Detail and Finishing Techniques
- 24 Animation for Animatronics
- 9 How To Make a Mask - Wearable Dynamic Art
- 11 3-Axis Robotic Mechanisms
- 5 Neck Mechanisms
- 24 How To Make a Monster Suit with Bill Bryan & Ted Haines
- 19 Character Animatronics
- 5 How to Sculpt a Dinosaur
- 5 How To Build An Animatronic Head
- 5 Creature Costume Basics
- 4 Puppet Mechanism Basics
- 1 Tattoo Makeup - Cover, Create, & Apply
- 2 How To Make Horror Props
- 1 The Fine Art of Horror Painting
- 1 Fantasy Maquette Sculpting In CX5(S)
- 14 The Business of Making Monsters
- Production Design - The Process Of Creating A World For Film
- 4 Character Makeup - Multi-Piece Prosthetic Application
- 3 Prosthetic Makeup Basics - Gelatin Facial Appliances
- 5 Stop Motion Animation with the Chiodo Bros.
- 11 Blood, Gore and Makeup Effects
- 7 How to Punch Hair - Hairwork for Silicone Characters
- 3 Bodycasting on a Budget with Ted Haines
- 2 Portrait Illustration with Terry Wolfinger
- 5 Mastering Marionettes - Design, Construction & Performance with Scott Land
- 1 Creature Makeup - Multi-piece silicone prosthetic application
- 12 Muscle Suit Fabrication
- 11 Wig & Hair Basics
- 4 Silicone Prosthetic Transfer Appliances
- 3 Building Miniatures: Small-Scale Model Making - Part 5
- 9 Toy Design & Sculpture for Action Figures & Collectibles
- 1 Building Miniatures: Small-Scale Model Making - Part 4
- 2 Human Head Anatomy & Sculpture
- 1 How to Make a Foam Puppet - Part 3
- 1 Building Miniatures: Small-Scale Model Making - Part 3
- 5 How to Make a Foam Puppet - Part 2
- 3 How To Make a Foam Puppet - Part 1
- 1 Building Miniatures: Small-Scale Model Making - Part 2
- 14 Animatronic Control Systems - Arduino Programming Basics with David Covarrubias
- 3 Building Miniatures: Small-Scale Model Making - Part 1
- 3 Advanced Creature Teeth: Prosthetic Dental Appliances - Part 2
- 1 3D Pumpkin Carving - How to Carve a Pumpkin from the Outside In
- 5 How To Make A Latex Rubber Mask Part 3
- 3 Advanced Creature Teeth - Part 1
- 11 How To Make A Latex Rubber Mask Part 2
- 6 How To Make A Latex Rubber Mask Part 1
- 294 PAST LIVE WEBCOURSES
- 11 Monster Sculpting
- 8 Platinum Silicone Mask Painting
- 5 Feather Work: Puppets, Costumes, Hair & Makeup
- 9 How To Make Eyes For Puppets, Masks, & Makeups
- Working with Wigs - Wig & Hair Basics with Connie Grayson Criswell
- 14 Muscle Suit Fabrication with Ted Haines
- 7 Homework - Muscle Suit Fabrication with Ted Haines
- 13 Toy Design & Sculpture for Action Figures & Collectibles with Sandy Collora
- 10 Homework - Toy Design & Sculpture for Action Figures & Collectibles with Sandy Collora
- 13 Human Head Anatomy & Sculpture with Jordu Schell
- 11 Homework - Human Head Anatomy & Sculpture with Jordu Schell
- 18 Mastering Marionettes - Design, Construction & Performance with Scott Land
- 13 Homework - Mastering Marionettes - Design, Construction & Performance with Scott Land
- 16 Puppet Mechanism Basics - Eyes, Brows & Ears with BJ Guyer - Watch & Chat
- 11 Homework - Puppet Mechanism Basics - Eyes, Brows & Ears with BJ Guyer
- 12 Advanced Creature Teeth -- with John Cherevka
- 3 On Camera Hand Puppet Performance
- 9 Silicone Prosthetic Transfer Appliances - Age Makeup with Neill Gorton
- 3 Practical Magic: The Art of In-Camera Visual Effects with Joey Shanks
- 9 Buisness of Making Monsters with Shannon Shea
- 11 Stop Motion Animation with the Chiodo Bros
- 5 Foam Carving Puppets with BJ Guyer
- 3 3D Pumpkin Carving with Andy Bergholtz
- 4 Prosthetic Makeup Basics with Rob Burman
- 13 How to Make a Latex Mask with Tim Martin
- 2 Character Illustration with Terry Wolfinger
- 3 Halloween Costumes - Fabric Effects with Dawn Dininger and Amy Whetsel
- 9 Blood, Makeup & Gore FX with Gary J. Tunnicliffe
- 13 Hand Puppet Design and Fabrication with BJ Guyer
- 3 How to Sculpt a Dinosaur with Christopher Darga
- 2 Airbrush FX: Beginning to Advanced with Craig Fraser
- 1 Female Figure Sculpting in Cx5 wtih Adam Beane
- 3 Creature Design: Maquette Sculpting with Casey Love
- 3 How to Make a Sci Fi Helmet with Fon Davis
- 2 Hyper Realistic Silicone Painting with Tim Gore
- 2 Josh Herman Zbrush Creature Sculpting
- 13 Textures and Forms with Don Lanning Oct 26, 2013
- 9 Character Rendering in Photoshop with Dan LuVisi
- 2 Creature Maquette Painting with Jordu Schell
- 24 Textures and Forms with Don Lanning May 04, 2013
- 3 Tattoo Makeup A-to-Z: Cover, Create, and Apply with Christien Tinsley
- 11 Creature Design w/ Casey Love - Sculpting
- 7 Creature Design With Casey Love - Translucent Creature Painting
- 3 Creature Maquette Sculpting with Jordu Schell