Best Of
Plush Gone Psycho – Gloomy Bear

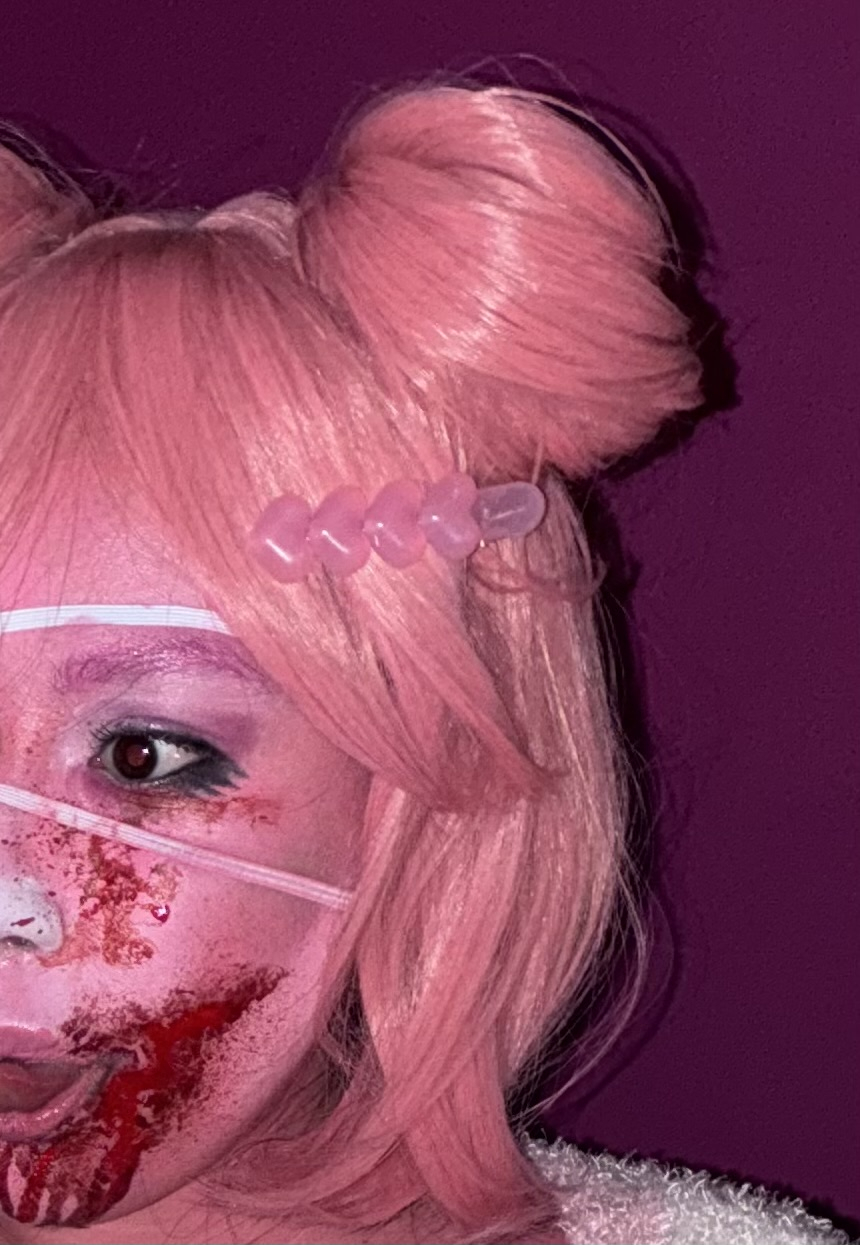
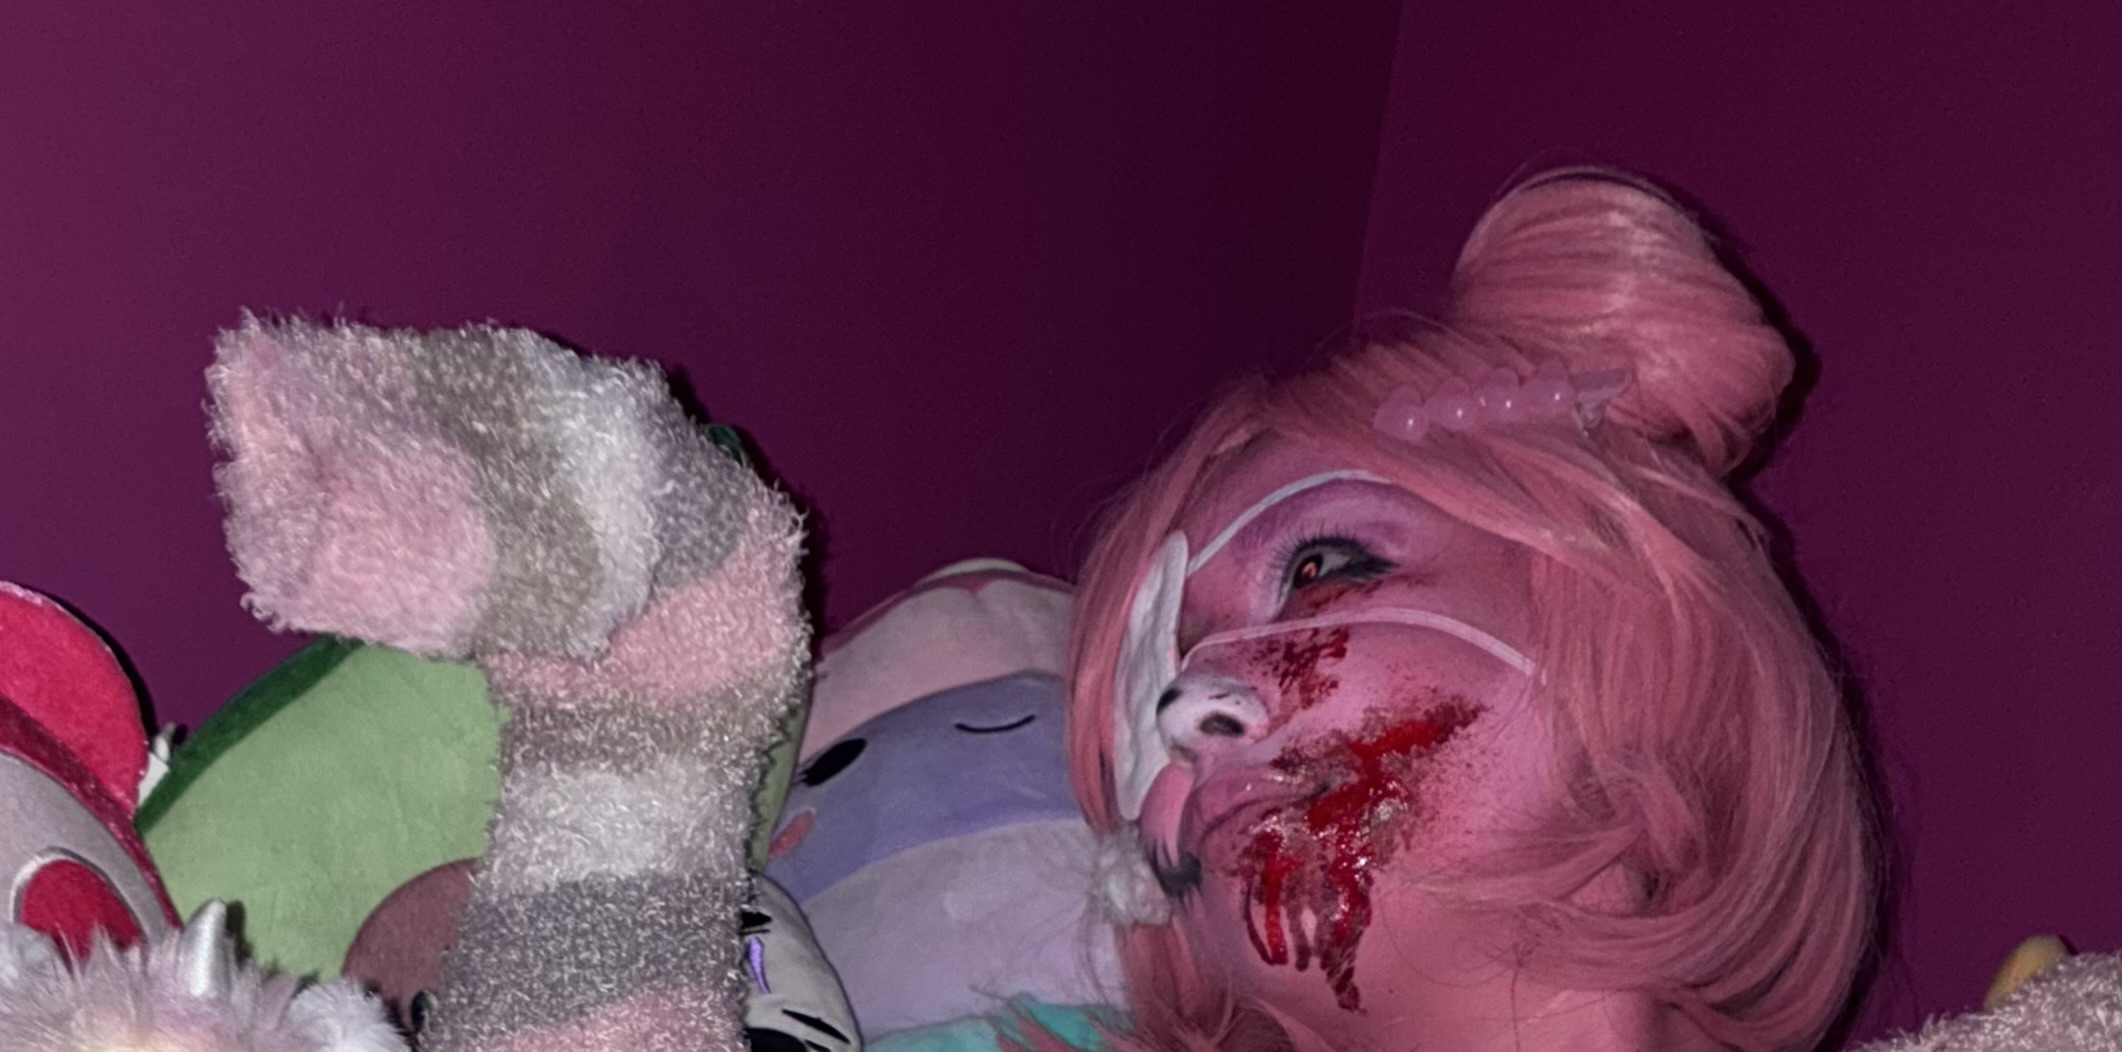
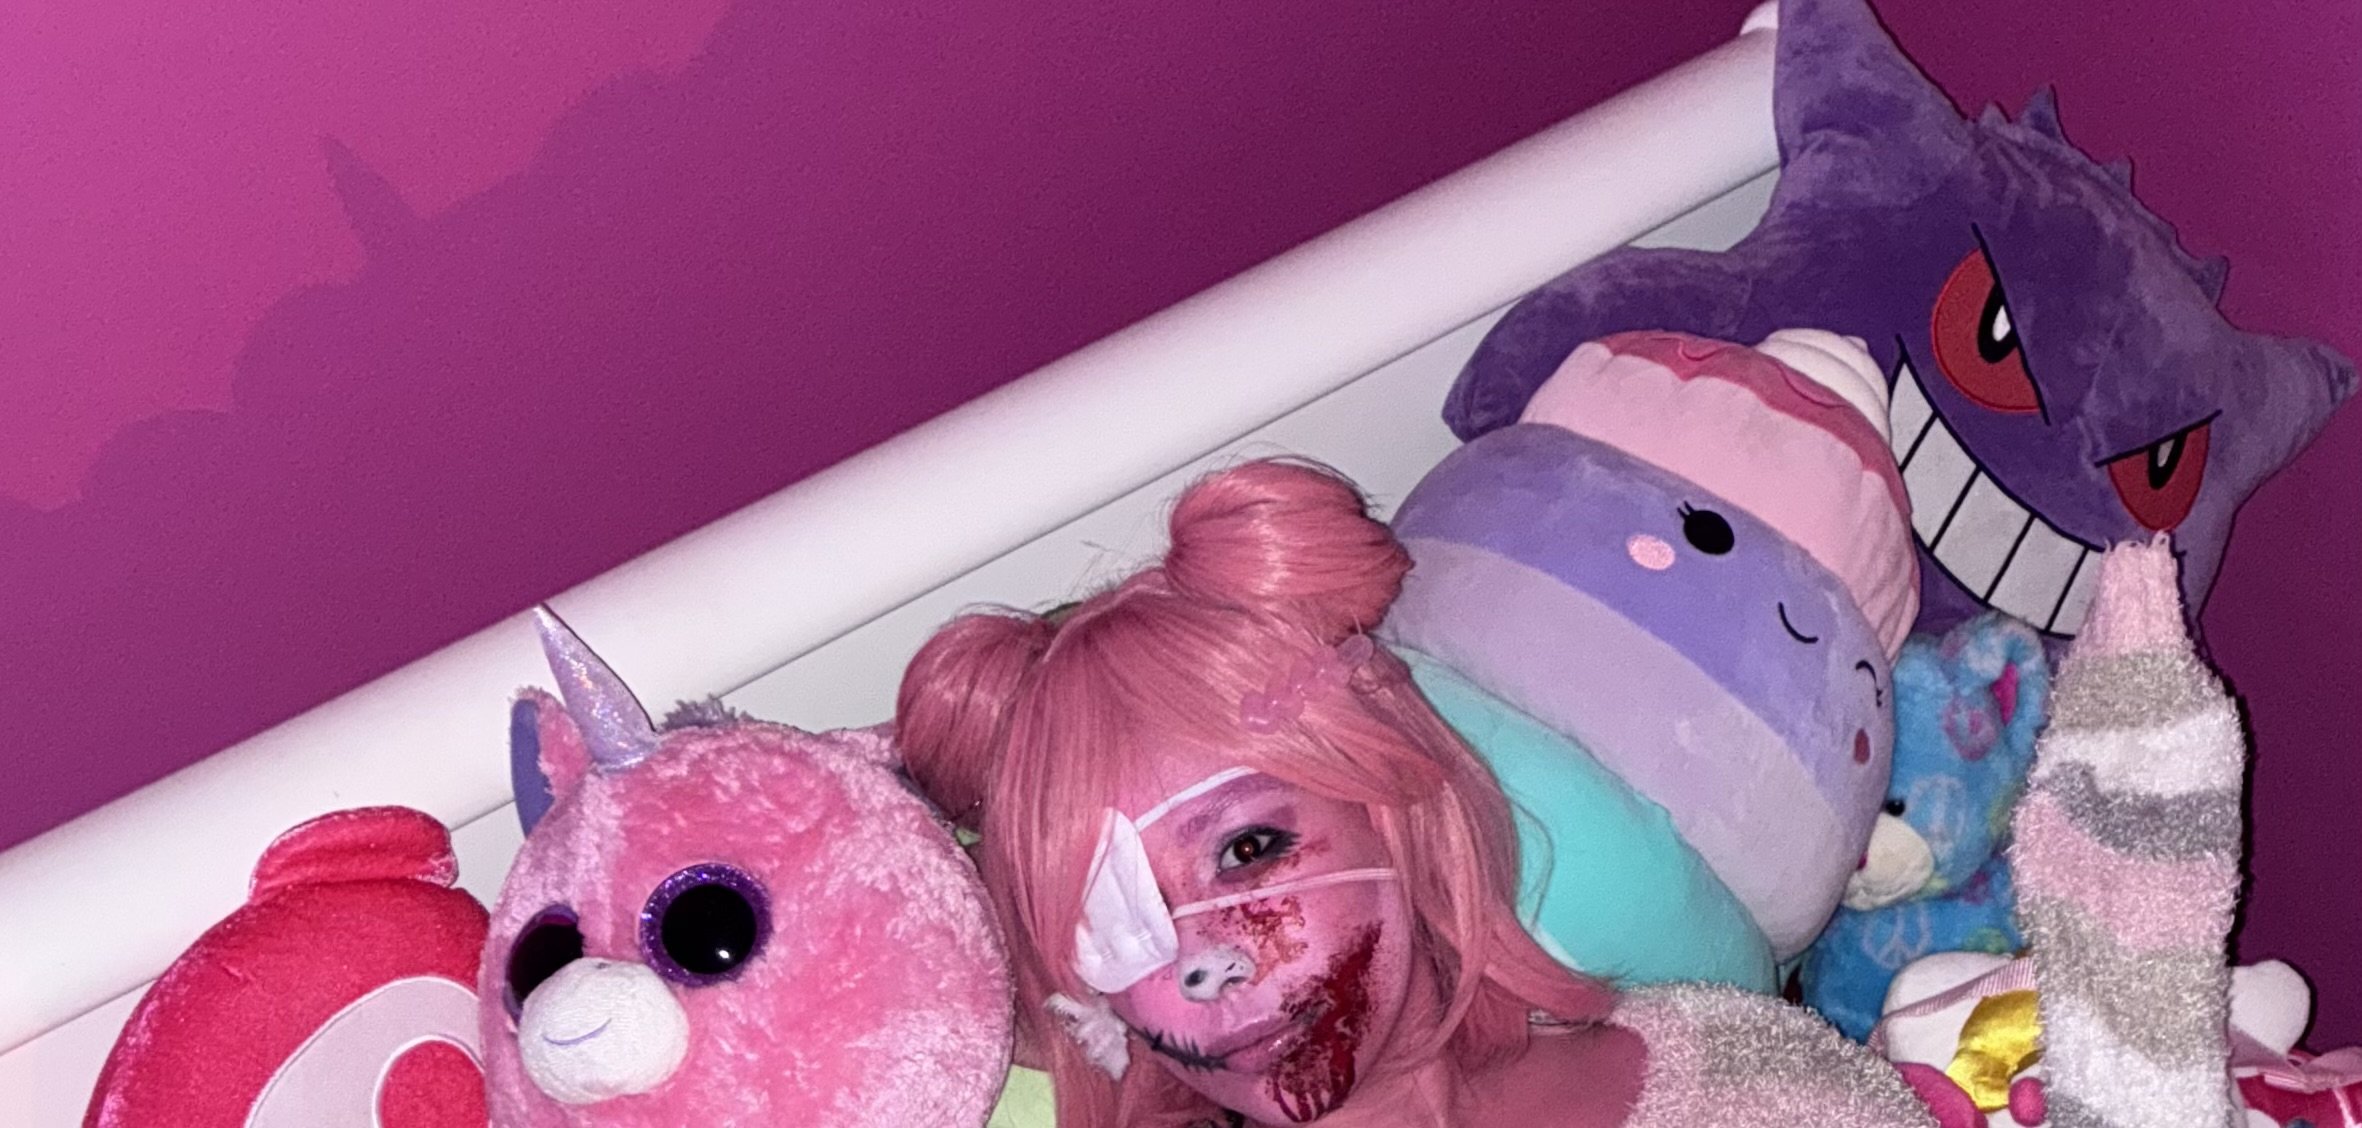
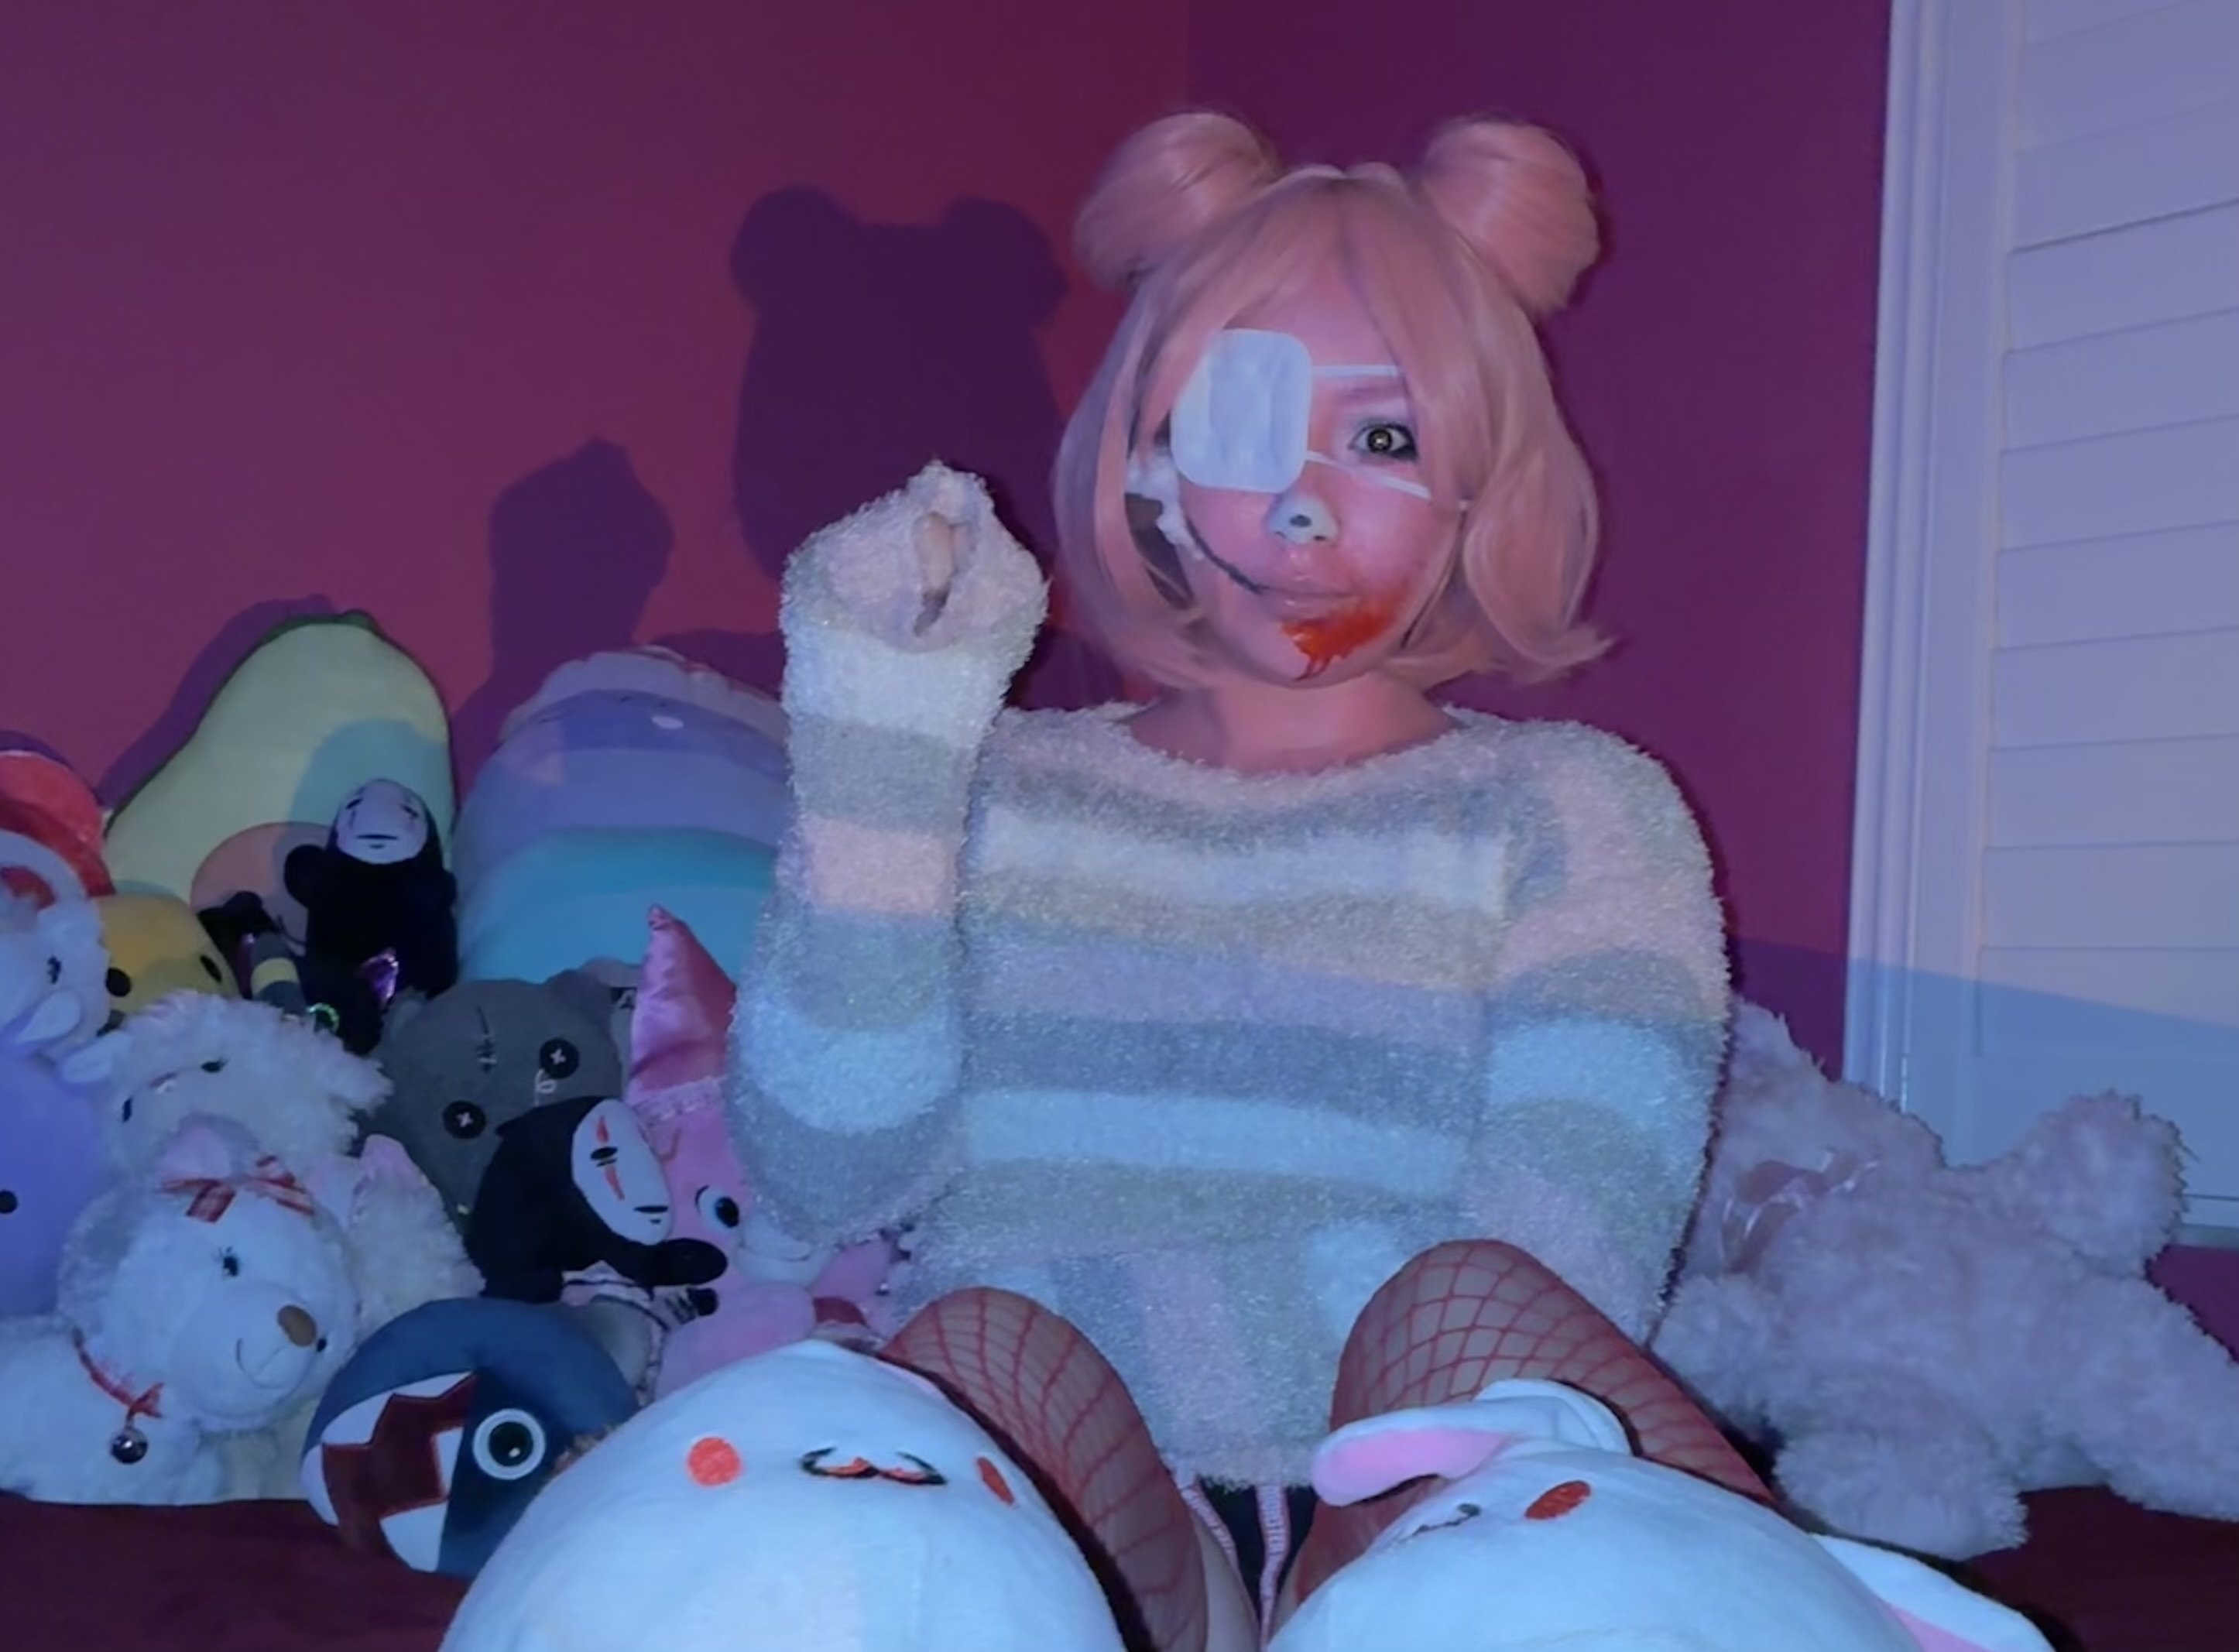
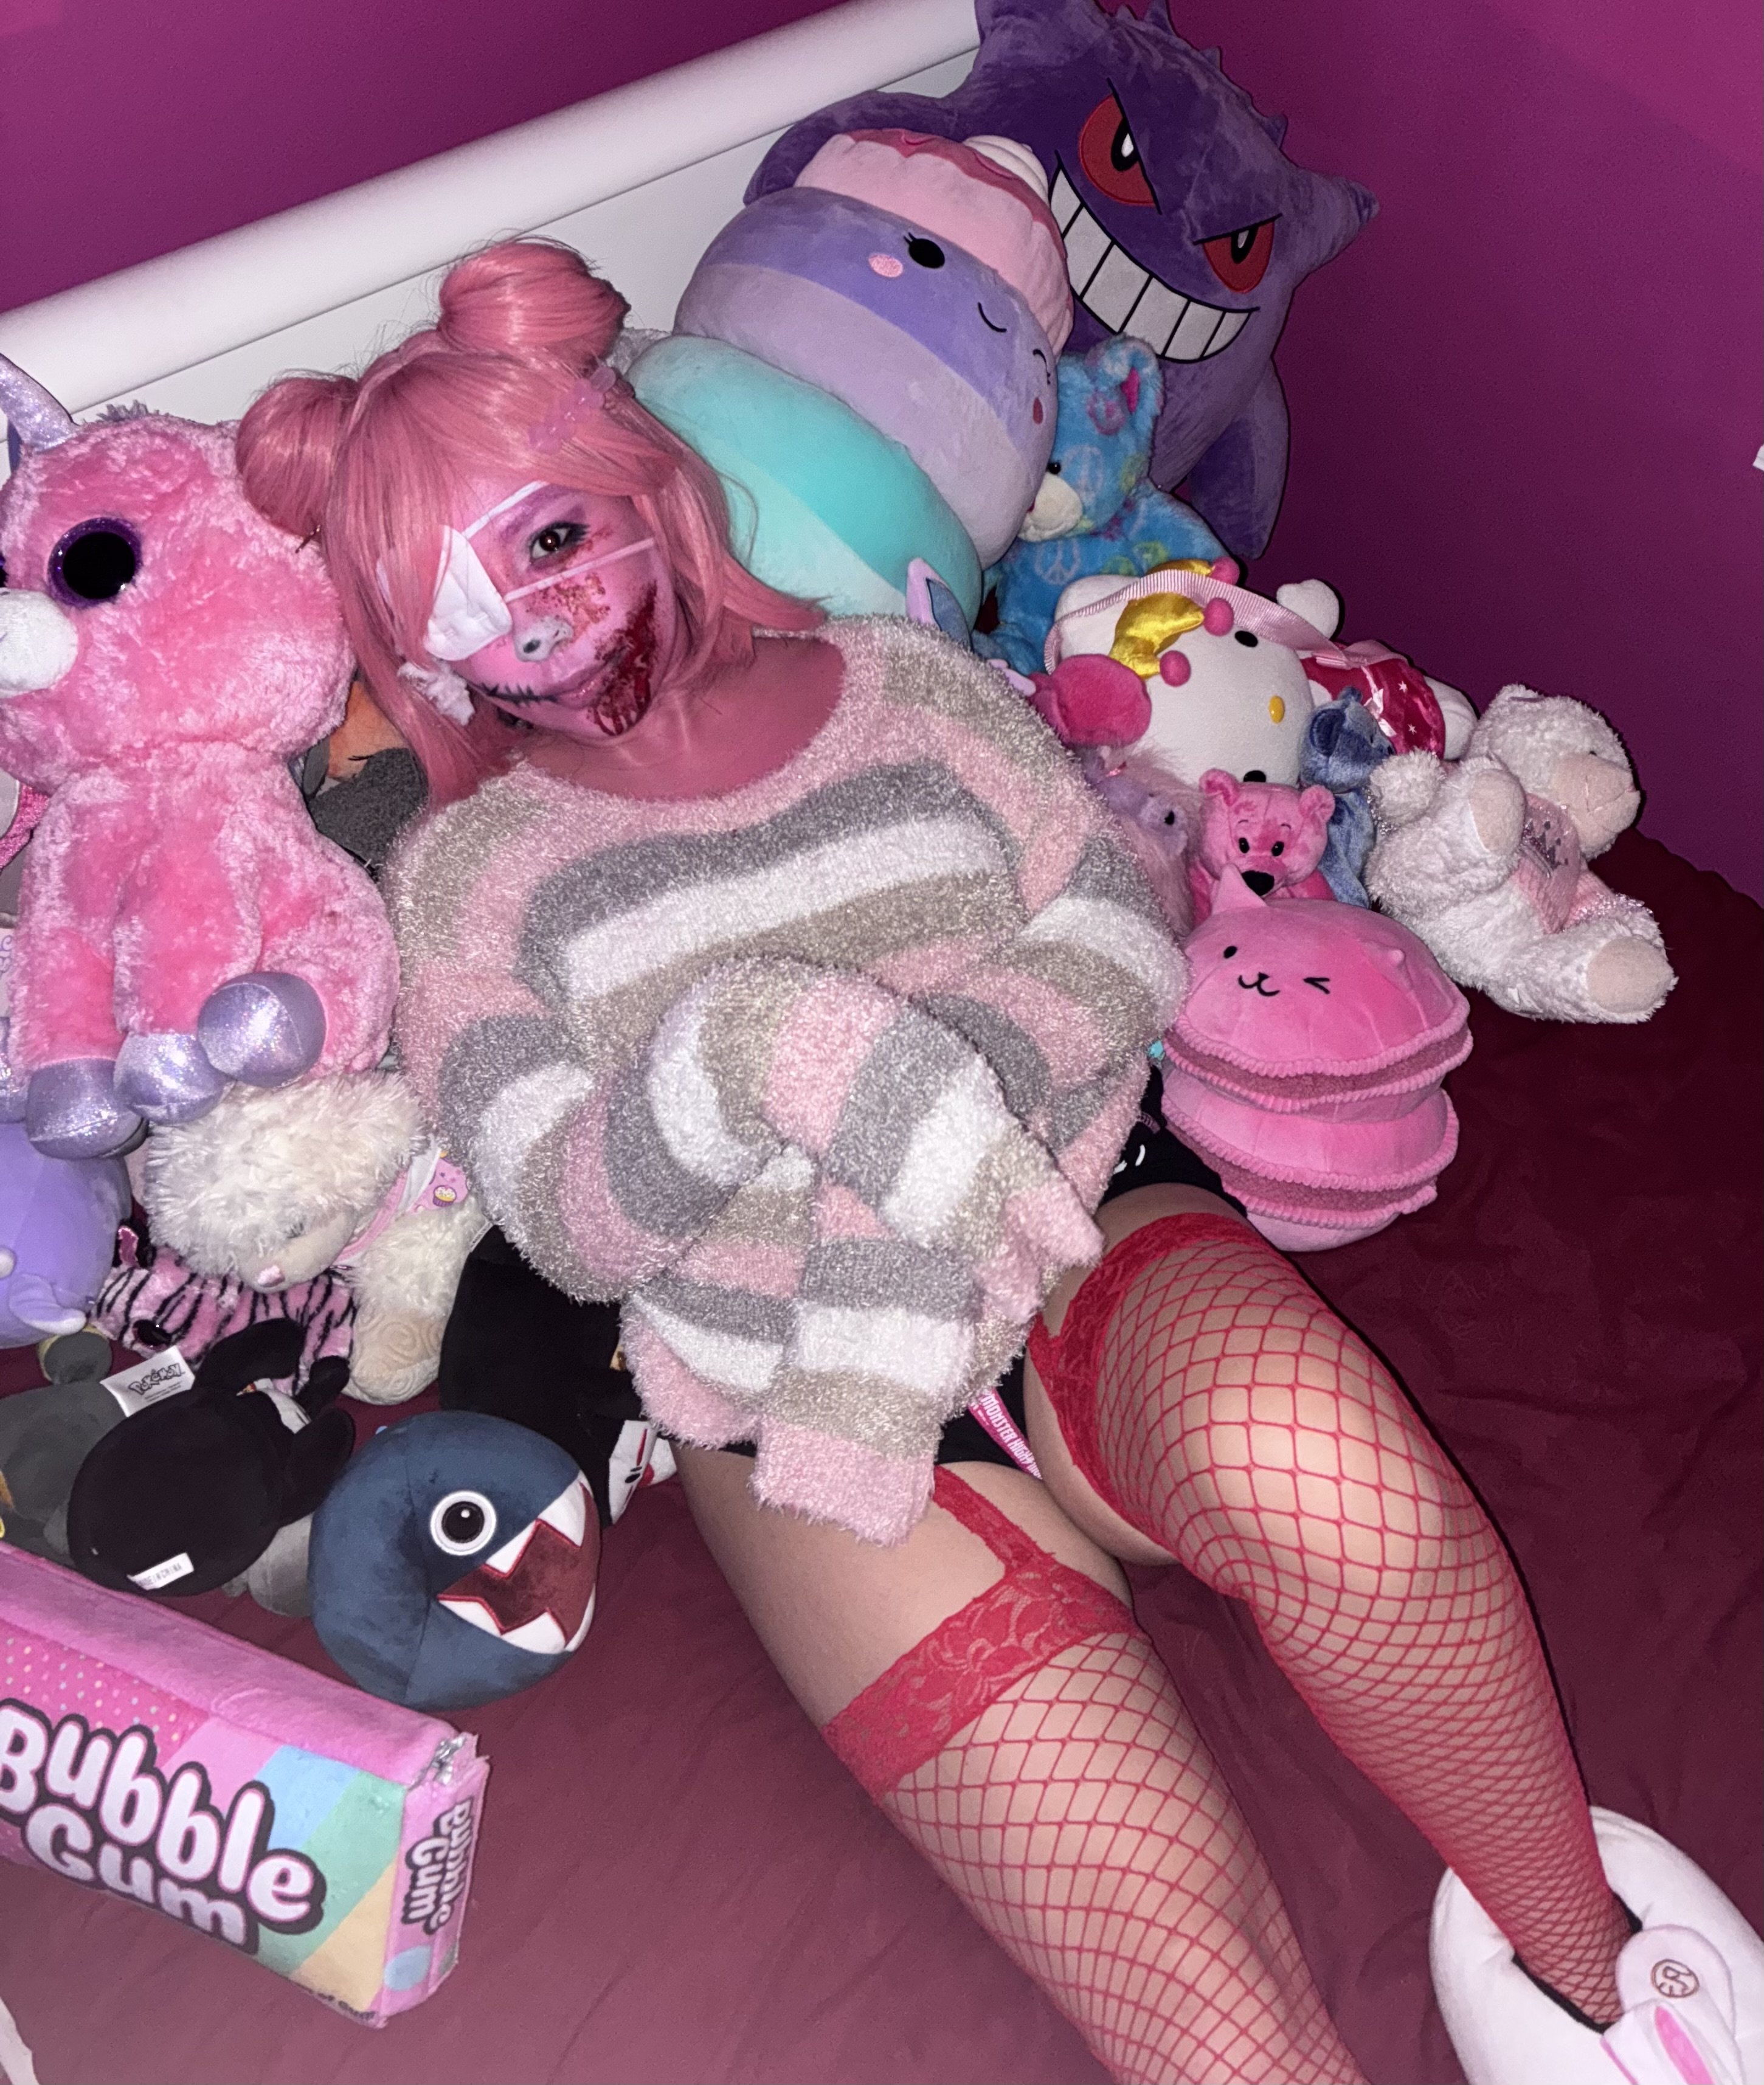
Hi everyone! This is my entry for the 2025 SWSCA Halloween Costume Contest 🩷
Concept: Plush Gone Psycho – Gloomy Bear 🧸🩸
A feral-cute plush toy who’s snapped — blending horror and sweetness into a handmade pastel nightmare. My goal was to create a character that feels cuddly from afar, but unsettling up close — a broken and battered toy with a story behind every stitch.
Build & Makeup: I hand-placed cotton using eyelash glue to form a realistic plush-fur texture, sealed it with barrier spray for structure, and layered pink tones from the Athena Water-Activated Palette and Mehron White Cloud for a soft yet dimensional base. I added a black plush-style nose with a white highlight on the bulb for toy realism.
On one side of my face, I created torn-plush SFX with sculpted “ripped fabric” detailing and fluffy cotton spilling out, paired with an eyepatch for asymmetry and character storytelling. On the opposite side, I used Mehron Professional Spray Blood for contrast and movement — giving the illusion that one side of the plush had endured more “damage.”
The wig — a WildCos Short Pink Cosplay Wig for Women (Two Ponytails) — was fully hand-styled into side space buns, secured with bobby pins, lightly straightened, shaped by hand, and finished with hairspray for a smooth, plush silhouette framing the face.
Products Used:
• Athena Water-Activated Palette
• Mehron White Cloud Makeup
• Mehron Professional Spray Blood
• ColourPop × Pokémon Shadow Palette (for pastel lids + mauve contour)
• Cotton & eyelash glue (faux-fur texture)
• Mehron Barrier Spray (sealant)
Focus: Creating a believable “stuffed toy come alive” illusion using practical, skin-safe materials and precise asymmetry — emphasizing handcrafted texture, color layering, and wig styling to tell a visual story.
Credits: Photos shot by my boyfriend Chase McFann 📸; all makeup, SFX, and hairstyling by me.
Theme: Plush toy turned feral — kawaii horror meets Y2K sleepwear, a soft-scary dream that blends childlike nostalgia with handmade menace 💕
Photos attached.
Thank you so much for viewing my work — I love the SFX and character-arts community and would be honored to continue learning with SWSCA 🎭

Re: What's On Your Workbench? (Fall 2025)


Re: What's On Your Workbench? (Fall 2025)

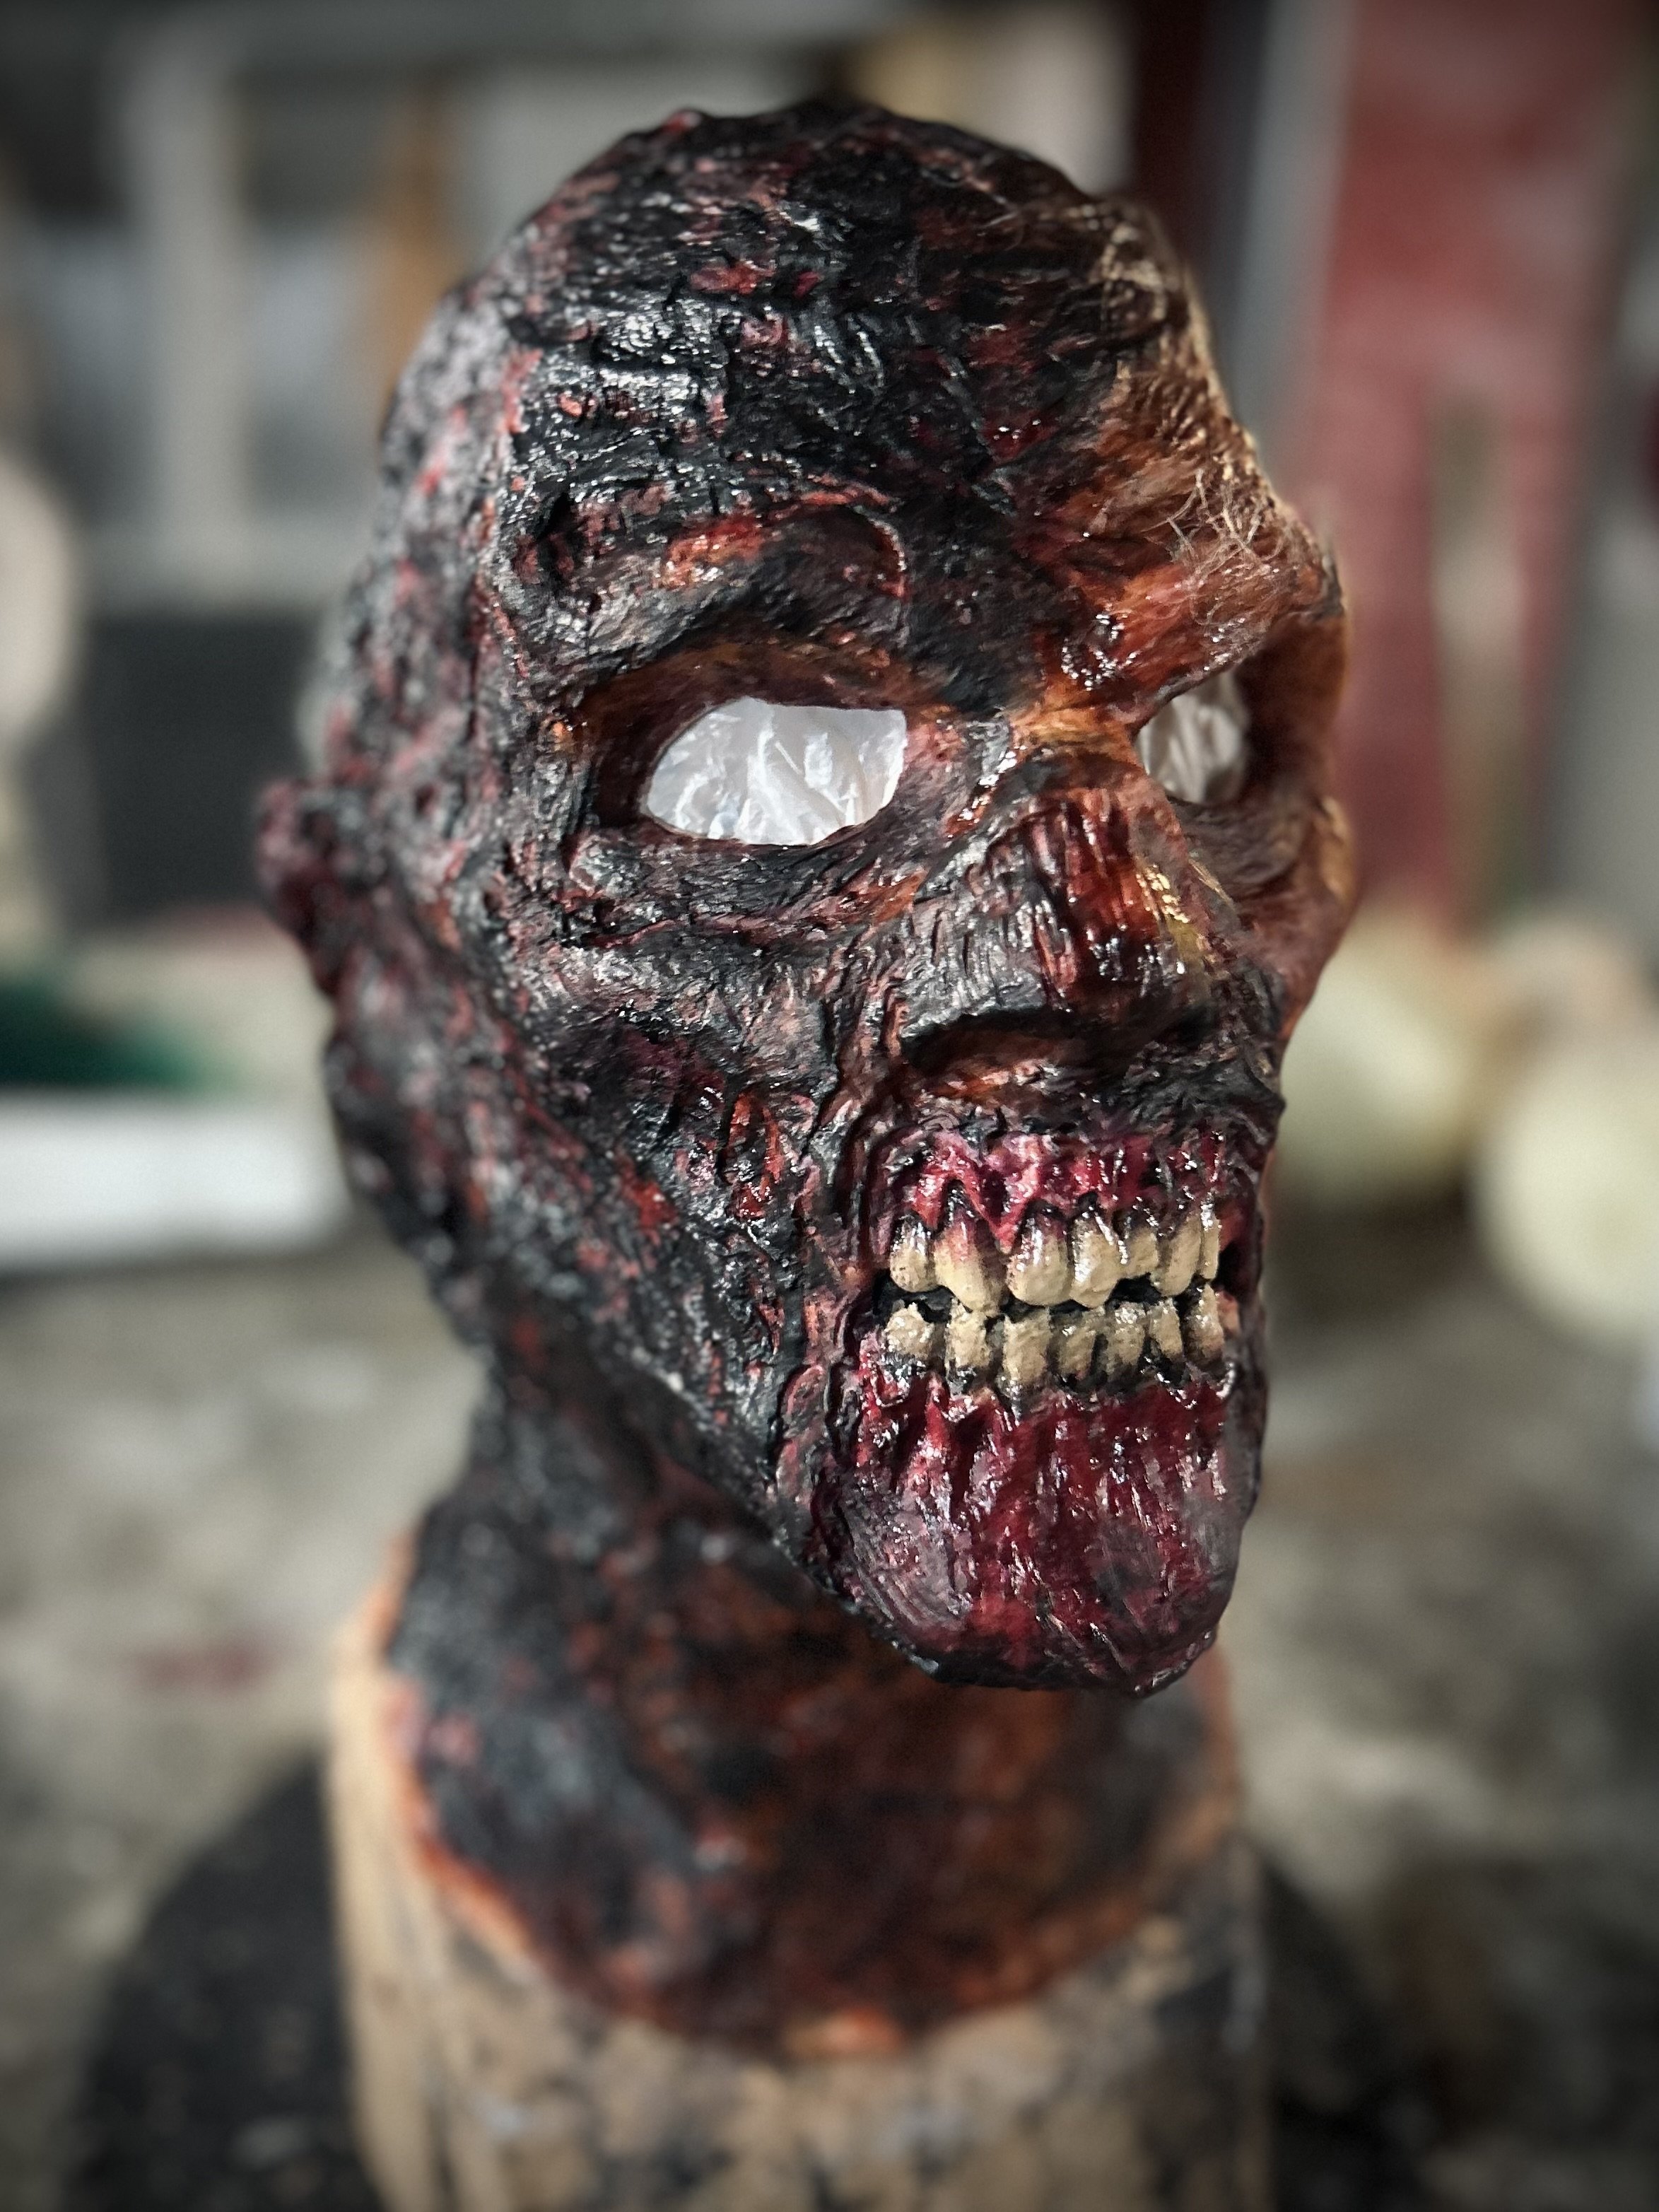
 one of my silicone masks, hope you like it!
Locust Cosplay gears of wars
https://www.youtube.com/shorts/X0cRIGtOHt0?&ab_channel=spydercosplay


Aliens: Resurgence (For The Hive) @ C2E2 by TrisRex
I just debuted my first exhibition this past weekend at C2E2 here in Chicago. It's an exhibit built to explore the Alien Hive inspired by action figures, comics, and video games. I've been working on this since 2021 and still working on other set pieces and characters. I'll be turning this into a short on YouTube as well. The Queen Alien was my first introduction to the Xenomorph so I saved her debut for this event as well!
See more here!


Shot by Steve Kaminsky @ Kaminsky Kandids Photography

Shot by Steve Kaminsky @ Kaminsky Kandids Photography

Shot by Steve Kaminsky @ Kaminsky Kandids Photography

Shot by Steve Kaminsky @ Kaminsky Kandids Photography

Shot by Steve Kaminsky @ Kaminsky Kandids Photography

Shot by Steve Kaminsky @ Kaminsky Kandids Photography

Shot by Steve Kaminsky @ Kaminsky Kandids Photography

 Shot by Steve Kaminsky @ Kaminsky Kandids Photography


Hope you enjoy, stay frosty!


💀Babydoll 💀


BioShock 2- Big Daddy- Subject Delta
Here is my Subject Delta Big Daddy from BioShock 2.
There's still some things needing to be complete including tightening the left arm a little bit, molding the drill to cast in foam, and creating some new belts for the thighs.
To give you guys some info-
-The full costume stands over 7' tall
-All paint, electronics, molding, casting, and finishing was done by me.
-The drill can spin and all the gears on the drill also spin (this was modeled by Lilykill)
-Almost every piece was molded and cast by me in Resin or fiberglass. The rest is either resin prints or is an FDM print that I didn't have time to mold but will soon (the drill will eventually be molded and cast in foam to conserve weight and so I can lift it properly.
-I have almost 100% full range of motion.
-I see through the camera on the top of the head connected to a monitor inside the helmet.
-All leather except some of the boot pieces is made of 100% genuine leather.


Re: What's On Your Workbench? (Summer 2025)


*** Creature Making Contest 2025 Winner Announcement ***
Big thanks to all of you fantastic creature makers who entered our 2025 Creature Making Contest! As always, your level of creativity was through the roof. With so many fun entries, it was nearly impossible to pick a single winner, but we are pleased to announce the Grand Prize goes to InkyPunkArt for their entry, The Banderbear. Congratulations!

Here are some words from InkyPunkArt about their creation:
Made entirely by myself from scratch, he has an aluminium wire skeleton, a faux fur soft body stuffed with wadding and hand sculpted and painted head, hands and feet.
Grand Prize Package sponsored by our great friends at FANGORIA.
Grand Prize Pack: Over $1,400 Value!
- From FANGORIA - Over $1,000 Value!
- FANGORIA Subscription - 2 years
- FANGORIA Bandana
- FANGORIA Coffee Mug
- FANGORIA Pullover Hoodie
- Top 100 Horror Movies Poster
- 5 Panel Hat with FANGORIA Leather Patch
- Black Beanie with FANGORIA Leather Patch
- FANGORIA Rust Pom Beanie
- FANGORIA Travel Tumbler
- FANGORIA Windbreaker
- Leatherface: The Texas Chainsaw Massacre III Poster
- Leatherface: The Texas Chainsaw Massacre III Poster – Fangoria Variant
- GUTS! Sweatshirt
- GUTS! Tee
- FANGORIA x Ghost x Ghost tee
- Colors of the Dark Tee
- FANGORIA x Murugiah – Sweatshirt
- FANGORIA x Murugiah – Tee
- FANGORIA Slipcase Black
- FANGORIA Slipcase Red
- FANGORIA Vol. 2 Issue #26 (subscriber/Nosferatu)
- FANGORIA Vol. 2 Issue #25 (subscriber/Freddy)
- FANGORIA Vol. 2 Issue #24 (subscriber/Longlegs)
- FANGORIA Vol. 2 Issue #23 (subscriber/Chucky)
- FANGORIA Vol. 2 Issue #22 (subscriber/It’s a Wonderful Knife)
- FANGORIA Vol. 2 Issue #21 (subscriber/VHS85)
- FANGORIA Classic Logo Tee
- 2024 Chainsaw Awards Film Crew Tee
- From Stan Winston School
- 1-Year Unlimited Subscription to Stan Winston School - $399.99 value!
- Artist Spotlight on the Stan Winston School Blog - PRICELESS
Grand Prize Winner:
The Banderbear by InkyPunkArt
https://forums.stanwinstonschool.com/discussion/11907/the-banderbear-poseable-ooak-puppet
Honorable Mentions (in no particular order)
https://forums.stanwinstonschool.com/discussion/12056/kudaru-baby-sea-creature-original-design
https://forums.stanwinstonschool.com/discussion/12097/bear-snail
https://forums.stanwinstonschool.com/discussion/11890/hrima-and-eisglodir
https://forums.stanwinstonschool.com/discussion/11993/lady-latrodectus
https://forums.stanwinstonschool.com/discussion/12069/the-druid
https://forums.stanwinstonschool.com/discussion/12096/the-grafton-monster
https://forums.stanwinstonschool.com/discussion/12090/gorilla-crab
https://forums.stanwinstonschool.com/discussion/12051/leviathan
https://forums.stanwinstonschool.com/discussion/12134/weird-hybrid-animal-the-morsh
- Team SWSCA

Re: What's On Your Workbench? (Summer 2025)