Homework - Stephanie Hedger

nspiration
I've decided to take inspiration from a book called Frontier Incursion, a Sci-Fi book with a species called Starcats. Which are basically large cats that have glowing marks along their bodies. 

Goal
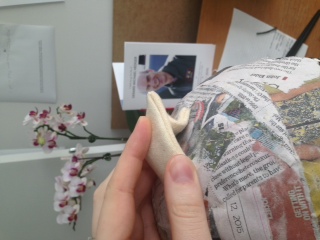
Instead of trying to recreate the entire cat (for now) I've decided to focus solely on their ears. So I've created them out of fabric and cardboard while the skull top is paper mache and will focus on the movement of the ears. 

I'm using the mechanism ideas from the plastic bag monsters course in creating the movement within the ears themselves allowing me to create different emotions based on position: relaxed, calm, angry and agitated.

(Sorry the photo's are sideways they're right on the computer I can't find a way to change them here)
Calm


Alert


Angry


I am planning on using 3 servos for each ear but as they have not arrived yet I have also ordered 2 pan and tilt servos that I may be able to use instead. Which may save space. 

They will be placed so one servo controls the 'calm/alert' state while, another controls the 'angry' state and the third should make the tip twitch as if the cat is agitated. (This would obviously be duplicated on each ear.)

I have an Arduino Uno that I am going to use for this version though for a later iteration I may require a smaller board. This will allow me the full range of inputs and outputs available on the board though I should not need them.

Electronic Components
-6 Servos or 2 Servos + 2 Pan & Tilt Servos

Mechanical Components
-Cat's Head
-Cat's ears x2
-Pivot Attachments
-Motivators (Likely cotton if strong enough)


Bonus Goal 1: Making the ears light up. 
I plan on using black light paint with UV LEDs to illuminate it 

Electronic Components
-UV LEDs

Mechanical Components
-UV Paint
-Fibre Optics (Possibly)


Bonus Goal 2: Sound reaction
I would also like to add a small microphone to the ears so the will automatically twitch based on sound. This will depend on component availability and coding difficulty in the time frame.  

Electronic Components
-Microphone or speaker 

Comments

  • edited May 2015
    //DAVID: I realise I don't use true Camel case but changing old habits/personal conventions would mess with work.

    /*
    Code for the operation of a cat's ear.
    References
    SRP: Servo Right Primary
    SLP: Servo Left Primary
    SRS: Servo Right Secondary
    SLS: Servo Left Secondary
    SRT: Servo Right Tip
    SLT: Servo Left Tip

    The primary servos control the position of the ear
    The secondary servos control the shape of the ear
    The Tip servos control the top of the ear

    */

    //LIBRARIES
    #include <Servo.h>


    //VARIABLES: HARDWARE IDs
    //Primary Servos control ear placement
    Servo SRP;//Servo Right Primary
    Servo SLP;//ServoLeftPrimary

    //Secondary Servos control ear shape
    Servo SRS;//ServoRightSecondary
    Servo SLS;//ServoLeftSecondary

    //Tip Servos control ear twitch
    Servo SRT;//ServoRightTip
    Servo SLT;//ServoLeftTip
    /*
                      ###Consider###
    Can/Should I combine these 2?
    Possibly but there'd be no independent ear twitch possible.
    Does this matter? Consider power requirements?
    */

    //VARIABLES: CODE
    int SRPPos = 0;
    int SLPPos = 0;
    int SRSPos = 0;
    int SLSPos = 0;
    int SRTPos = 0;
    int SLTPos = 0;

    void setup() {
      // put your setup code here, to run once:
      //Set ears to 'Relaxed'

      SRP.attach(9); //Right Primary Servo Is attached to pin 9
      SLP.attach(2); //Left Primary Servo Is attached to pin 2
      SRS.attach(10); //Right Secondary Servo Is attached to pin 10
      SLS.attach(4); //Left Secondary Servo Is attached to pin 4
      SRT.attach(11); //Right Tip Servo Is attached to pin 5
      SLT.attach(6); //Left Tip Servo Is attached to pin 6

      Serial.begin(9600);

       WarmupTest(); //Start Up Testing
    }

    void loop()
    {
      /*
      DAVID: As I currently don't have an input device to trigger each of these behaviours I'm simply looping
      therough them currently. As I get the available components I will be able to add an if statement to call
      each of the actions functions.

      I'm also planning on using some sort of pot. to directly control the placement of the ears.
      */

      Relaxed();
      delay(1000);
      Alert();
      delay(1000);
      Angry();
      delay(1000);
    }

    /*
    This is the default state of the ears. Ears should be positioned to the rear (Primary Servo position) but not
    flattened (Secondary Servo position) in any way.
    */
    void Relaxed()
    {
      int NoSteps = 75;//the number of steps taken to move through

      int SRPInitialPos = SRPPos; //Set the initial position of the right ear primary servo
      int SLPInitialPos = SLPPos; //Set the initial position of the left ear primary servo
      int SRSInitialPos = SRSPos; //Set the initial position of the right ear secondary servo
      int SLSInitialPos = SLSPos; //Set the initial position of the left ear secondary servo

      /*      ###    NOTE: Fine tune once servos are installed    ###*/
      //This section allows you to position the serves as required once they're mounted
      int SRPFinalPos = 0; //Set Destination Position of the right ear primary servo
      int SLPFinalPos = 0; //Set Destination Position of the left ear primary servo
      int SRSFinalPos = 180; //Set Destination Position of the right ear secondary servo
      int SLSFinalPos = 180; //Set Destination Position of the left ear secondary servo

      for (int x = 0; x < NoSteps; x++)
      {
        int y = NonLinearMapping(x, NoSteps); //Non Linear Mapping. See Function for details

        SRPPos = map(y, 0, 200, SRPInitialPos, SRPFinalPos);
        SLPPos = map(y, 0, 200, SLPInitialPos, SLPFinalPos);
        SRSPos = map(y, 0, 200, SRSInitialPos, SRSFinalPos);
        SLSPos = map(y, 0, 200, SLSInitialPos, SLSFinalPos);

        SRP.write(SRPPos);
        SLP.write(SLPPos);
        SRS.write(SRSPos);
        SLS.write(SLSPos);
        delay(40);
      }
    }


    /*
    This is the Alert state. The ear should be forward (Primary Servo Position) and not deformed (Secondary Servo
    Position) in any way.
    */
    void Alert()
    {
      int NoSteps = 100;//the number of steps taken to move through

      int SRPInitialPos = SRPPos; //Set the initial position of the right ear primary servo
      int SLPInitialPos = SLPPos; //Set the initial position of the left ear primary servo
      int SRSInitialPos = SRSPos; //Set the initial position of the right ear secondary servo
      int SLSInitialPos = SLSPos; //Set the initial position of the left ear secondary servo

      /*      ###    NOTE: Fine tune here once servos are installed    ###    */
      //This section allows you to position the serves as required once they're mounted
      int SRPFinalPos = 150; //Set Destination Position of the right ear primary servo
      int SLPFinalPos = 150; //Set Destination Position of the left ear primary servo
      int SRSFinalPos = 180; //Set Destination Position of the right ear secondary servo
      int SLSFinalPos = 180; //Set Destination Position of the left ear secondary servo

      for (int x = 0; x < NoSteps; x++)
      {
        int y = NonLinearMapping(x, NoSteps); //Non Linear Mapping. See Function for details

        SRPPos = map(y, 0, 200, SRPInitialPos, SRPFinalPos);
        SLPPos = map(y, 0, 200, SLPInitialPos, SLPFinalPos);
        SRSPos = map(y, 0, 200, SRSInitialPos, SRSFinalPos);
        SLSPos = map(y, 0, 200, SLSInitialPos, SLSFinalPos);

        SRP.write(SRPPos);
        SLP.write(SLPPos);
        SRS.write(SRSPos);
        SLS.write(SLSPos);
        delay(1);
      }
    }


    /*
    This is the Angry state. The ear should be back (Primary Servo Position) and deformed (Secondary Servo
    Position).
    */
    void Angry()
    {
      int NoSteps = 200;//the number of steps taken to move through

      int SRPInitialPos = SRPPos; //Set the initial position of the right ear primary servo
      int SLPInitialPos = SLPPos; //Set the initial position of the left ear primary servo
      int SRSInitialPos = SRSPos; //Set the initial position of the right ear secondary servo
      int SLSInitialPos = SLSPos; //Set the initial position of the left ear secondary servo

      /*      ###    NOTE: Fine tune here once servos are installed    ###    */
      //This section allows you to position the serves as required once they're mounted
      int SRPFinalPos = 0; //Set Destination Position of the right ear primary servo
      int SLPFinalPos = 0; //Set Destination Position of the left ear primary servo
      int SRSFinalPos = 90; //Set Destination Position of the right ear secondary servo
      int SLSFinalPos = 90; //Set Destination Position of the left ear secondary servo

      for (int x = 0; x < NoSteps; x++)
      {
        int y = NonLinearMapping(x, NoSteps); //Non Linear Mapping. See Function for details

        SRPPos = map(y, 0, 200, SRPInitialPos, SRPFinalPos);
        SLPPos = map(y, 0, 200, SLPInitialPos, SLPFinalPos);
        SRSPos = map(y, 0, 200, SRSInitialPos, SRSFinalPos);
        SLSPos = map(y, 0, 200, SLSInitialPos, SLSFinalPos);

        SRP.write(SRPPos);
        SLP.write(SLPPos);
        SRS.write(SRSPos);
        SLS.write(SLSPos);
        delay(6);//A pot could be used to vary this
      }
    }

    /*
    ------------------------------------------------------------------------Non Linear Mapping---------------------------------------------------------------------------------
    Non Linear Mapping (Animation Principles)
    Due to the nature of the movement I wanted to slow the movement down at the beginning and the end of the
    motion for a more natural look. To do this I have applied a cos function to the step number. I then map
    this number to determine the position of the servo. By having more steps with a smaller wait the movement
    is smoother.

    If you wanted to add anticipation to the movement simply create a function to calculate the shape and call
    that. (Could be placed in a library)
    */

    int NonLinearMapping(int x, int NoSteps)
    {
      int y = 100-cos(x * 3.14 / NoSteps) * 100;
      return y;
    }

    /*-------------------------------------------------------------------------WARM UP TEST CODE---------------------------------------------------------------------------------*/

    /*
    This code is designed to test the full range of capabilities on start up to ensure everything's working as
    planned.Leave to run as a startup check each time or, if necessary, comment out the call in the setup once
    all the connections have been checked.
    */

    void WarmupTest()
    {
      //RIGHT EAR TEST: Position
      for (SRPPos = 0; SRPPos < 180; SRPPos++)
      {
        SRP.write(SRPPos); // tell servo to go to position in variable 'SRPPos' (Servo Right Primary Position)
        delay(15);// waits 15ms for the servo to reach the position
      }
      for (SRPPos = 180; SRPPos >= 1; SRPPos--)
      {
        SRP.write(SRPPos); // tell servo to go to position in variable 'SRPPos' (Servo Right Primary Position)
        delay(15);// waits 15ms for the servo to reach the position
      }

      //RIGHT EAR TEST: Shape
      SRPPos = 0;//Set the Primary Servo into a suitable position to test the Secondary Servo
      SRP.write(SRPPos);//Move the primary Servo

      for (SRSPos = 0; SRSPos < 180; SRSPos++)
      {
        SRS.write(SRSPos); // tell servo to go to position in variable 'ServoRightPrimaryPos'
        delay(15);// waits 15ms for the servo to reach the position
      }
      for (SRSPos = 180; SRSPos >= 1; SRSPos--)
      {
        SRS.write(SRSPos); // tell servo to go to position in variable 'ServoRightSecondaryPos'
        delay(15);// waits 15ms for the servo to reach the position
      }

      //RIGHT EAR TEST: Tip
      SRPPos = 0;//Set the Primary Servo into a suitable position to test the Secondary Servo
      SRP.write(SRPPos);//Move the Primary Servo
      SRSPos = 0;//Set the Secondary Servo into a suitable position to test the Secondary Servo
      SRS.write(SRSPos);//Move the Secondary Servo

      for (SRTPos = 0; SRTPos < 180; SRTPos++)
      {
        SRT.write(SRTPos); // tell servo to go to position in variable 'ServoRightPrimaryPos'
        delay(15);// waits 15ms for the servo to reach the position
      }
      for (SRTPos = 180; SRTPos >= 1; SRTPos--)
      {
        SRT.write(SRTPos); // tell servo to go to position in variable 'ServoRightSecondaryPos'
        delay(15);// waits 15ms for the servo to reach the position
      }


      /*
      //Left Ear Test
                    ###        Leave Out till Power issues resolved. Duplicate of above       ###
      */
    }
    Post edited by Stephanie Hedger on
  • Stephanie, please don't forget to post the video for week 2 homework.
  • So currently the ear can move through 3 separate actions with the above code: Relaxed, Alert, and Angry. This is done with 2 servos (Primary and Secondary) on each ear. The third servo in the code is to control the tip of the ear. There is nothing to control until the 'skin' is attached.

    Unfortunately because it's made from cardboard all the testing has compromised its structural integrity. I think I've found a maker space that I can 3d print a plastic version that should work much better but for the minute here's a paper mache cat.

    Here is a video of it working currently. 
    https://www.youtube.com/watch?v=__GzaJOUHGQ&nbsp;


  • edited September 2019
    Oh, wow! I’m really excited to see the final piece! I’ve been thinking about re-watching Doctor who and choose one of the variants of TARDIS’ panels to recreate. I’m pretty sur that’s gonna take looooots of time, but I’m ready and excited. I’ll have to get assignment help to make it, because I’m a student and have something to do with my homework, but it’s all fine.
    Post edited by Chris Ellerby on
Sign In or Register to comment.